Table of Contents
Advertisement
Available languages
Available languages
Item # 1001
222
714
Model # WG20
USE AND CARE GUIDE
ENGINE DRIVE SELF-PRIMING PUMP
Questions, problems, missing parts? Before returning to the store,
call Everbilt Customer Service
8 a.m. - 6 p.m., EST, Monday-Friday
1-844-883-1872
HOMEDEPOT.COM
THANK YOU
We appreciate the trust and confidence you have placed in Everbilt through the purchase of this pump. We strive to continually create quality
products designed to enhance your home. Visit us online to see our full line of products available for your home improvement needs. Thank you for
choosing Everbilt!
Advertisement
Chapters
Table of Contents

Related Manuals for Everbilt WG20


Summary of Contents for Everbilt WG20
- Page 1 THANK YOU We appreciate the trust and confidence you have placed in Everbilt through the purchase of this pump. We strive to continually create quality products designed to enhance your home. Visit us online to see our full line of products available for your home improvement needs. Thank you for...
-
Page 2: Table Of Contents
Table of Contents Table of Contents ............2 Before Starting the Engine .......... 6 Safety Information ............2 Engine Operation ............8 Warranty ................. 2 Repair and Maintenance ..........9 Pre-Installation .............. 3 Troubleshooting ............ -
Page 3: Pre-Installation
Pre-Installation APPLICATION The pump is a clean water pump and cannot pump sewage and sea water. Please avoid silt, oil stain or other pollution liquid which will cause corrosion of the parts. PERFORMANCE GPH of water @ Total Feet Of Lift Max. -
Page 4: Installation
Installation Place the unit as close to the water source as possible to minimize suction lift, obtain the best pumping performance, and aid in priming. A typical portable installation is shown in Figure 1. Total head Discharge (26m 85ft) head Suction head Figure 1 - Typical installation For a permanent installation, mount the unit on a foundation that will support the weight of pump and engine and also provide... -
Page 5: Operation
Installation (continued) Connect discharge hose (not included) to the pump discharge port. It is best to use a short, large-diameter hose, because this will reduce fluid friction and improve pump performance. A long or small-diameter hose will increase fluid friction and reduce pump output. -
Page 6: Before Starting The Engine
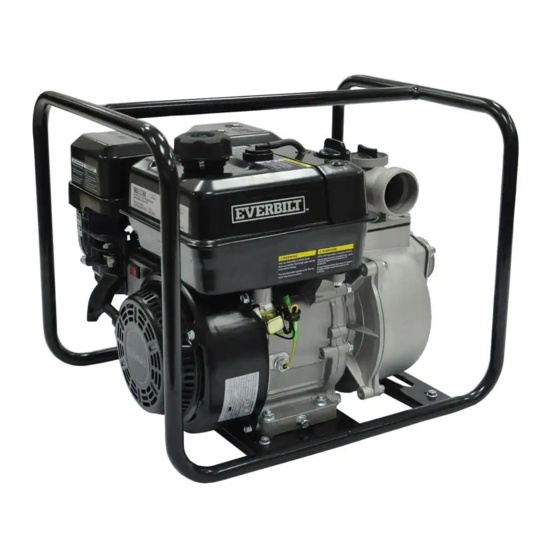
Operation (continued) Recoil starter grip 4. Choke lever 7. Oil drain plug 10. Suction port Ignition switch 5. Fuel cap 8. Discharge port 11. Pump drain cap Fuel valve lever 6. Priming water filler plug 9. Oil fill and dipstick Before Starting the Engine Gas tank Air filter... - Page 7 Before Starting the Engine (continued) ADDING GASOLINE Remove the fuel cap and fill the fuel tank with clean fresh gasoline. This should be unleaded fuel that has an octane rating of 86 or higher. Do not fill the tank to overflowing. Clean up any spilled gasoline before starting the engine. Highest level OPENING THE FUEL VALVE...
-
Page 8: Engine Operation
Engine Operation FILL WATER Before starting the engine, remove the filler plug from the pump Filler plug chamber, and completely fill the pump chamber with water. Reinstall the filler plug and tighten it securely. TURNING THE ENGINE ON □ The ignition switch (1) controls the ignition. Move it to the ON position to start the engine. -
Page 9: Repair And Maintenance
Repair and Maintenance Adjust and maintain the gasoline engine strictly in accordance with the maintenance methods and instructions listed in this manual. DAILY MAINTENANCE The regular inspection and adjustment must be carried out to ensure the gasoline engine maintains its excellent performance. The regular maintenance also ensures a prolonged service life. - Page 10 Repair and Maintenance (continued) REPLACEMENT OF LUBRICATING OIL Run the pump with water for five (5) minutes and then shut it down before replacing the engine’s lubricating oil. This ensures the quick and complete release of the lubricating oil. □ Check if the oil tank cover is tightened.
- Page 11 Repair and Maintenance (continued) MAINTENANCE OF SPARK PLUG (MODEL F6RTC) To ensure the normal operation of the engine, ensure the spark plug is always clean and properly adjusted as these steps show: Remove the spark plug by twisting counterclockwise. Gently remove any carbon deposits from the plug. Ensure the clearance is between 0.6~0.8mm.
-
Page 12: Troubleshooting
Troubleshooting CAUTION: Do not disassemble this pump without the manufacturer’s permission. The warranty does not cover unauthorized disassembly. If the remedial actions in this table do not eliminate the faults or the faults encountered are unmentioned in this table, please contact Customer Service. -
Page 13: Service Parts
Service Parts Part Part Number Name Part Part Number Name Strainer 100022246 100022187 Washer Clamp 100022225 100021938 Plug Pipe joint 100030202 100021965 O-ring 100022201-0001 Joint HOMEDEPOT.COM Please contact 1-844-883-1872 for further assistance. - Page 14 Questions, problems, missing parts? Before returning to the store, call Everbilt Customer Service 8 a.m. - 6 p.m., EST, Monday-Friday 1-844-883-1872 HOMEDEPOT.COM Retain this manual for future use.
- Page 15 GRACIAS Apreciamos la confianza que ha depositado en Everbilt por la compra de esta bomba. Nos esforzamos por crear continuamente productos de calidad diseñados para mejorar su hogar. Visítenos en internet para ver nuestra línea completa de productos disponibles para sus necesidades de mejorar su...
- Page 16 Tabla de contenido Tabla de contenido ............2 Antes de arrancar el motor .......... 6 Información de seguridad ..........2 Operación del motor............. 8 Garantía ................2 Reparación y mantenimiento ........9 Pre-instalación .............. 3 Resolución de fallas ........... 12 Instalación ..............
-
Page 17: Pre-Instalación
Pre-instalación APLICACIÓN La bomba es una bomba de agua limpia y no puede bombear aguas residuales ni agua de mar. Evite la arena, manchas de aceite u otro líquido contaminante que causará corrosión de las piezas. DESEMPEÑO GPH de agua a pies totales de elevación Elevación 0 pies 20 pies... -
Page 18: Instalación
Instalación Coloque la unidad lo más cerca posible de la fuente de agua para minimizar el levantamiento de succión, obtener el mejor desempeño de bombeo y ayudar en el cebado. En la Figura 1 se muestra una instalación portátil típica. Cabeza total Cabeza de (26 m 85 pies) -
Page 19: Funcionamiento
Instalación (continuación) Conecte la manguera de descarga (no incluida) en el puerto de descarga de la bomba. Es mejor usar una manguera corta de diámetro grande, porque esto reducirá la fricción del fluido y mejorará el desempeño de la bomba. Una manguera larga y de diámetro pequeño aumentará... -
Page 20: Antes De Arrancar El Motor
Operación (continuación) Manija de arranque 4. Palanca del ahogador 7. Tapón de drenaje de aceite 10. Puerto de succión retráctil Interruptor de ignición 5. Tapón de combustible 8. Puerto de descarga 11. Tapón de drenaje de la bomba Palanca de la válvula 6. - Page 21 Antes de arrancar el motor (continuación) CÓMO AGREGAR GASOLINA Retire la tapa de combustible y llene el tanque de combustible con gasolina fresca y limpia. Esta debe ser combustible libre de plomo que tenga un octanaje de 86 o mayor. No rebose el tanque. Limpie toda gasolina derramada antes de arrancar el motor. Nivel más alto CÓMO ABRIR LA VÁLVULA DE COMBUSTIBLE...
-
Page 22: Operación Del Motor
Operación del motor LLENADO DE AGUA Antes de arrancar el motor, retire el tapón de llenado de la cámara Tapón de llenado de la bomba y llene completamente la cámara de la bomba con agua. Instale de nuevo el tapón y apriételo con seguridad. CÓMO ENCENDER EL MOTOR □... -
Page 23: Reparación Y Mantenimiento
Reparación y mantenimiento Ajuste y mantenga el motor a gasolina estríctamente de acuerdo a los métodos e instrucciones de mantenimiento enumerados en este manual. MANTENIMIENTO DIARIO La inspección y ajuste regular se debe llevar a cabo para garantizar que el motor a gasolina conserve su desempeño excelente. El mantenimiento regular también garantiza una vida de servicio prolongada. - Page 24 Reparación y mantenimiento (continuación) REEMPLAZO DEL ACEITE LUBRICANTE Ponga a funcionar la bomba con agua durante cinco (5) minutos y luego apáguela antes de reemplazar el aceite lubricante del motor. Esto garantiza la liberación rápida y completa del aceite lubricante. □...
- Page 25 Reparación y mantenimiento (continuación) MANTENIMIENTO DE LAS BUJÍAS (MODELO F6RTC) Para garantizar el funcionamiento normal del motor, asegúrese de que las bujías estén siempre limpias y ajustadas adecuadamente como lo muestran estos pasos: Retire la bujía girándola hacia la izquierda Retire con suavidad cualquier depósito de carbón de la bujía.
-
Page 26: Resolución De Fallas
Resolución de fallas PRECAUCIÓN: No desmonte esta bomba sin el permiso del fabricante. La garantía no cubre desmontaje no autorizado. Si las acciones correctivas en esta tabla no eliminan las fallas o las fallas encontradas no se mencionan en esta tabla, comuníquese con Servicio al cliente. -
Page 27: Piezas De Servicio
Piezas de servicio Pieza Número de pieza Nombre Cantidad Pieza Número de pieza Nombre Cantidad Filtro 100022246 100022187 Arandela Abrazadera 100022225 100021938 Clavija Junta de tubería 100030202 100021965 Anillo O 100022201-0001 Junta HOMEDEPOT.COM Póngase en contacto con el 1-844-883-1872 para asistencia adicional. - Page 28 ¿Tiene preguntas, problemas, o faltan piezas? Antes de regresar a la tienda, llame a Servicio al Cliente de Everbilt de lunes a viernes de 8 a.m. a 6 p.m., hora local del Este 1-844-883-1872 HOMEDEPOT.COM Conserve este manual para uso futuro.
Need help?
Do you have a question about the WG20 and is the answer not in the manual?
Questions and answers