Download Print this page
Everbilt DP370C Use And Care Manual

Everbilt DP370C Use And Care Manual

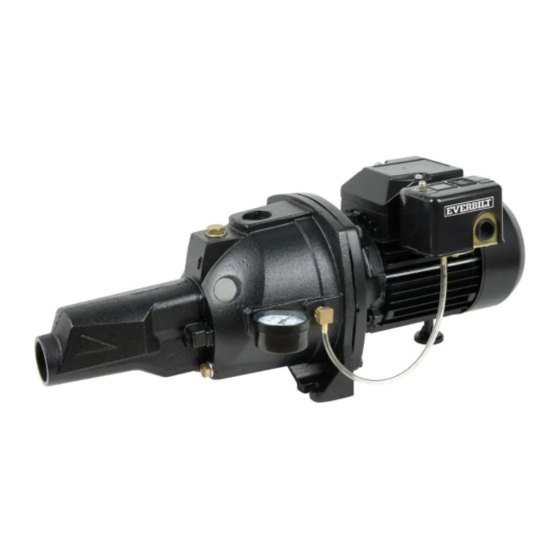
Convertible jet pump

Advertisement

SKU# 1001480251 1001480255
Model# DP370C DP550C
USE AND CARE GUIDE
CONVERTIBLE JET PUMP
Questions, problems, missing parts? Before returning to the store call
Everbilt Customer Service
8 a.m. - 6 p.m., EST, Monday-Friday
1-844-241-5521
WWW.HOMEDEPOT.COM
Rev. 05/25/17
THANK YOU
We appreciate the trust and confidence you have placed in Everbilt through the purchase of this convertible jet pump. We strive to continually create
quality products designed to enhance your home. Visit us online to see our full line of products available for your home improvement needs.
Thank you for choosing Everbilt!

Advertisement

loading

Summary of Contents for Everbilt DP370C

  • Page 1 THANK YOU We appreciate the trust and confidence you have placed in Everbilt through the purchase of this convertible jet pump. We strive to continually create quality products designed to enhance your home. Visit us online to see our full line of products available for your home improvement needs.
  • Page 2: Table Of Contents

    Table of Contents Table of Contents ............2 Shallow Well Installation ..........5 Performance ..............2 Pressure Switch Assembly Instructions ....10 Safety Information ............2 Deep Well Pump Replacement ........11 Warranty ................. 3 Troubleshooting ............17 Pre-Installation .............. 4 Performance GPH of Water @ Total Discharge Pressure of 40 psi Max.
  • Page 3: Warranty

    Warranty The manufacturer warrants the products to be free from defects in materials and workmanship for a period of one year from date of purchase. This warranty applies only to the original consumer purchaser and only to products used in normal use and service. If within one year this product is found upon examination by the manufacturer to be defective in materials or workmanship, the manufacturer’s only obligation, and your exclusive remedy, is the repair or replacement of the product at the manufacturer’s discretion, provided that the product has not been damaged through misuse, abuse, accident, modifications, alterations, neglect or mishandling.
  • Page 4: Pre-Installation

    Pre-Installation APPLICATION This unit is a convertible jet pump designed for pumping water where the water level is less than 70 ft. deep. If the water level to the pump is deeper than 70 ft., a deep well submersible pump should be selected. A pressure switch pre-set at 30 psi "on"/ 50 psi "off" has been installed on the pump.
  • Page 5: Shallow Well Installation

    Pre-Installation (continued) DETERMINE THE DEPTH OF YOUR WELL Tie a small but heavy weight such as a fishing weight to the end of a piece of cotton string. Lower the weight into the well until it reaches the bottom of the well. Make a mark on the string at ground level. Pull the weight out of the well and measure from the bottom of the weight to the ground level mark.
  • Page 6 Shallow Well Installation (continued) REPLACING AN EXISTING PUMP WARNING: Risk of electric shock. Can shock, burn or kill. Disconnect power to pump before working on pump or motor. 1. Drain and remove the old pump. Check the old pipe for scale, lime, rust, etc., and replace it if necessary. 2.
  • Page 7 Shallow Well Installation (continued) New Shallow Well Installation (Depth to Water 25 feet or less) CAUTION: To avoid skin burns, unplug the pump and allow time for it to cool after periods of extended use. Connecting (E) Schedule 80 PVC or Flex Slide the pipe assembly into your pipe to the (A) foot valve.
  • Page 8 Shallow Well Installation (continued) Connect the (E) PVC or flexible pipe to Connecting the PVC Pipe from the pump the pump inlet to the PVC Pipe coming from the well. Position the pump as close to the well as possible. Measure the distance from the PVC pipe extended from the check ...
  • Page 9 Shallow Well Installation (continued) Connecting a (M) 10 in. tank tee to the pressure tank (tank tee size may Checking the pressure in the tank vary based on tank size) Wrap all threads on tank tee with thread tape. Air pressure in the tank must be 2 psi lower than the "cut-in" of ...
  • Page 10: Pressure Switch Assembly Instructions

    Shallow Well Installation (continued) Voltage setting WARNING: All electrical work should be performed by a licensed electrician. This pump is pre-wired at 230 volts.  If the power source is 115 volts, remove the electrical housing  cover. Flip the switch to 115 volts. ...
  • Page 11: Deep Well Pump Replacement

    Deep Well Pump Replacement MATERIALS REQUIRED (NOT INCLUDED) Additional items needed Internet # Additional items needed Internet # (M) 10 in. Tank Tee (or recommened size based (A) 1-1/4 in. Foot Valve 205618048 205618015 on tank size) (B) 1-1/4 in. Priming Tee 100120387 (N) 1/4 in.
  • Page 12 Deep Well Installation (continued) Attaching the nozzle and venturi to the Connecting the (A) foot valve to the ejector ejector Wrap the threads of the venturi tube (2) (J32P-18/#11) with Wrap both ends of a (U) 1-1/4 in. x 4 in. nipple (sold ...
  • Page 13 Deep Well Installation (continued) Attaching a (R) 1 in. PVC elbow and Slide a (H) 4 in. Well Seal over the (E) (B) 1-1/4 in. priming tee to the PVC or PVC or Flexible Pipe flexible pipe Remove the pipe clamp and slide the (H) 4 in. well seal (sold Attach a (R) 1 in PVC elbow and a (B) 1-1/4 in.
  • Page 14 Deep Well Installation (continued) Removing the elbow insert from the Connecting the pressure gauge to pump body the elbow insert hole Pull out the pressure tube from the 90° elbow insert. Wrap the threads of the 1/4 in. pressure gauge (included) with ...
  • Page 15 Deep Well Installation (continued) Connecting the brass elbow to the Connecting the PVC adapter to the pressure regulator pressure regulator Thread the 1/4 in. disassembled elbow insert into the 1/4 in. hole Wrap thread tape around the threads of a 3/4 in. MNPT x 1 in. slip ...
  • Page 16 Deep Well Installation (continued) Connecting the pump with the Voltage setting water system CAUTION: Never install a shut-off valve between the WARNING: All electrical work should be performed by a licensed electrician. pump and the tank, as this can cause excessive friction loss and can damage the pressure switch and/or pump.
  • Page 17: Troubleshooting

    Troubleshooting Do Not Remove the drain plug (located on the front of the pump close Do not disassemble the motor housing. This motor has NO   to the inlet hole) and air plug (located on the top of the pump repairable internal parts, and disassembly may cause close to the outlet hole) to vent the system.
  • Page 18 Questions, problems, missing parts? Before returning to the store call Everbilt Customer Service 8 a.m. - 6 p.m., EST, Monday-Friday 1-844-241-5521 WWW.HOMEDEPOT.COM...

This manual is also suitable for:

Dp550c10014802511001480255