Advertisement
Quick Links
IP Audio Window Intercom Kit
1. INTERFACE DESCRIPTION
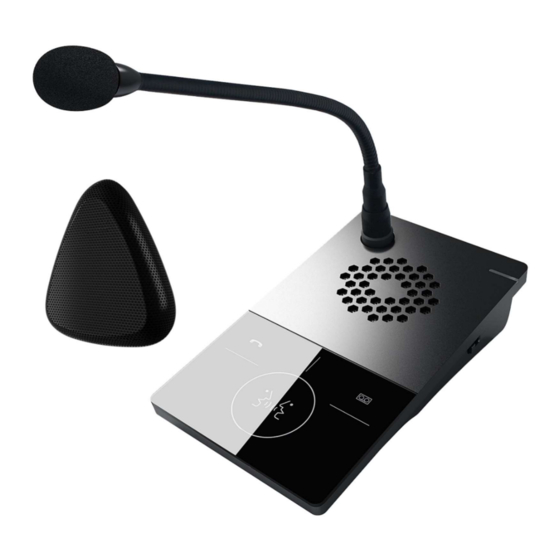
A. Internal Window Intercom Module
【Front】
① Network status indication: red light for
offline and green light for online.
② Gooseneck microphone socket: plug the
gooseneck microphone and fix the screw.
③ Loudspeaker: amplify the audio from the
external window intercom.
④ Voice Broadcast button:
When the intercom button ⑥ is ON (blue
light ON):
Short press to broadcast "Hello,
•
welcome" message.
•
Long press (1 second) to broadcast
"Thank you, welcome next time".
The broadcast button flashes green during
broadcasting.
⑤ Remote Intercom button: when the
terminal is connected to the server, press
the button to make a call to the supervisor
intercom terminal specified by the server.
⑥ Intercom button: press the button to
communicate with the external window
intercom, finish the conversation by
pressing the button again. The intercom
button light blue during conversation.
【Side】
① Scene mode adjustment
switch:
Three scene modes are available:
•
Noisy (to the front)
Standard (in the middle)
•
Quiet (to the back)
•
Standard is the default mode.
Notes: please refer to the User Manual for more detailed information.
TOA Canada Corporation
INSTALLATION MANUAL
【Interface line】
① Power interface: connect with
② Network interface: connect
12V/1.5A power.
③ Analog audio output
the cable to the switch.
interface: Connect to a DVR or IP
④ External window intercom
camera.
interface connection.
N-XC65-W
Advertisement

Related Manuals for Toa N-XC65-W


Summary of Contents for Toa N-XC65-W
- Page 1 ⑥ Intercom button: press the button to communicate with the external window intercom, finish the conversation by pressing the button again. The intercom Notes: please refer to the User Manual for more detailed information. button light blue during conversation. TOA Canada Corporation...
- Page 2 B. External Window Intercom Module ① Loudspeaker/MIC: Loudspeaker: amplify the audio from the Internal Window Intercom module. Microphone: pick up the audio at the External Window Intercom module. ② Connector to the Internal Window Intercom module. 2. CONNECTION DIAGRAM 3. APPEARANCE TOA Canada Corporation...
- Page 3 EV cotton can be used to paste the protective wire sleeve vertically on the glass to avoid loosening the interface due to the wire pulling). Connect the internal window intercom with the external window intercom according to the connection diagram. TOA Canada Corporation...
Need help?
Do you have a question about the N-XC65-W and is the answer not in the manual?
Questions and answers