Toa N-8000MI Installation Manual
Multi interface unit
Hide thumbs
Also See for N-8000MI:
- Installation manual (16 pages) ,
- Specifications (2 pages) ,
- Operating instructions manual (269 pages)
Table of Contents
Advertisement
Quick Links
MULTI INTERFACE UNIT
TABLE OF CONTENTS
1. SAFETY PRECAUTIONS ........................... 2
2. GENERAL DESCRIPTION ......................... 3
3. FEATURES ................................................. 3
4. SPECIFICATIONS ...................................... 3
Front ............................................................ 5
Rear ............................................................. 5
Thank you for purchasing TOA's Multi Interface Unit.
Please carefully follow the instructions in this manual to ensure long, trouble-free use of your equipment.
INSTALLATION MANUAL
7.1. Equipment Rack Mounting ................... 6
7.2. Desk-Top Installation ............................ 7
7.3. Wall Mounting ....................................... 7
8.1. Connection Diagram ............................. 8
8.2. Type of Cable ..................................... 11
8.3. Connector Connection ........................ 11
9. ACCESSORIES ........................................ 12
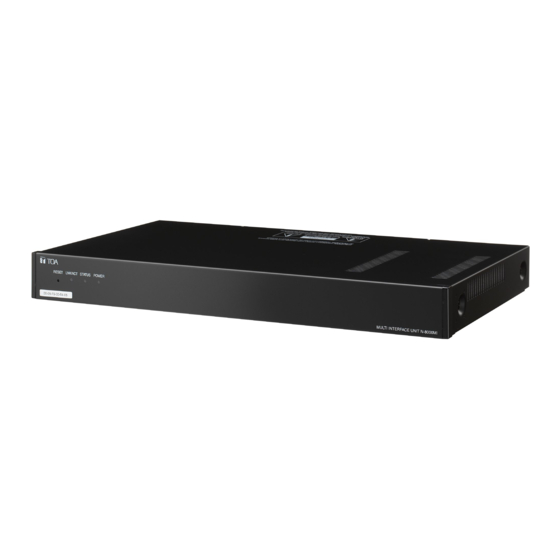
N-8000MI
Advertisement
Table of Contents

Subscribe to Our Youtube Channel
Related Manuals for Toa N-8000MI


Summary of Contents for Toa N-8000MI
-
Page 1: Table Of Contents
5. SYSTEM CONFIGURATION EXAMPLE ... 4 6. NOMENCLATURE AND FUNCTIONS Front ... 5 Rear ... 5 Thank you for purchasing TOA's Multi Interface Unit. Please carefully follow the instructions in this manual to ensure long, trouble-free use of your equipment. INSTALLATION MANUAL N-8000MI 7. -
Page 2: Safety Precautions
AC outlet and contact your nearest TOA dealer. Make no further attempt to operate the unit in this condition as this may cause fire or electric shock. -
Page 3: General Description
2. GENERAL DESCRIPTION The N-8000MI is a multi interface unit designed for use with TOA's packet intercom system (IP network- compatible intercom system) that employs the packet audio technology*. Connecting the multi interface to a local area network permits the ideal system for in-house or wide-area information transmission applications, such as paging, periodical broadcasts, and background music broadcasts, to be built between the multi interface and IP intercom exchange or other multi interface unit. -
Page 4: System Configuration Example
• Interface to control an indicator or external equipment such as a CCTV's switcher using relay contacts. The N-8000MI also features Network interface for connection with an IP intercom exchange or other multi interface unit. -
Page 5: Nomenclature And Functions Front
6. NOMENCLATURE AND FUNCTIONS [Front] 1 2 3 4 5 00-05-F9-FF-00-00 1. Reset key [RESET] Pressing this key reactivates the exchange. 2. LNK/ACT indicator [LNK/ACT] (Green) Lights when connected to a network, and flashes while transmitting or receiving data. 3. Status indicator [STATUS] (Red) Continuously lights while data is written to an internal storage medium (FlashMemory). -
Page 6: Installation
7. INSTALLATION The N-8000MI can be installed in any of three ways: (1) equipment rack mounting, (2) wall mounting, and (3) desk-top installation. 7.1. Equipment Rack Mounting A) Elevated Operating Ambient - If installed in a closed or multi-unit rack assembly, the operating ambient temperature of the rack environment may be greater than room ambient. -
Page 7: Desk-Top Installation
Step 2. Mount the N-8000MI on the wall. Notes • Use appropriate screws for the construction of wall. • Wooden screws 3.5 x 20 are supplied with the N-8000MI. • The socket-outlet shall be installed near the equipment and shall be easily accessible. Protect against disconnection... -
Page 8: Wiring
Mains or a UPS (Uninterruptible power supply). About power supply cord handling The supplied power supply cord is designed for exclusive use with the N-8000MI. Use the supplied power supply cord only with the N-8000MI. * Select an appropriate UPS taking into consideration the total power consumption of all system components and the required backup time, and also the requirement that the UPS should employ the on-line power system. -
Page 9: Mini-Clamp Connector (2 Pins)
Connect the Line input cables in a way as shown below according to the type of connected unit's input or output. Connecting to a balanced input or output • N-8000MI Connecting to an unbalanced input or output • N-8000MI 4. Audio input terminal connection Audio input terminals have no polarity. - Page 10 To PBX OD trunk's M and E lines To PBX OD trunk's transmitting line (T1) To PBX OD trunk's receiving line (R1) To Intercom's transmitting line (T2) To Intercom's receiving line (R2) N-8000MI's PBX interface terminal N-8000MI's PBX interface terminal 2 channels...
-
Page 11: Type Of Cable
Note Squeeze on the mini-clamp cover until it is correctly locked. Step 3. Insert the wired plug into the N-8000MI's socket until it locks into place. ø 0.4 – 0.65 mm (AWG22 – 26), Solid wire ø... -
Page 12: Accessories
<Drive where CD is placed> \index.html For example, when placing the CD in the "d" drive, • Download our TOA Products Data, web site (http://www.toa-products.com/international/) to get the up-to-date version for N-8000 software, firmware, and Instruction manuals. • The software version number can be confirmed using the Help menu.
Need help?
Do you have a question about the N-8000MI and is the answer not in the manual?
Questions and answers