
Related Manuals for Toa N-XC65-W


Summary of Contents for Toa N-XC65-W
- Page 1 USER MANUAL IP Audio Window Intercom Kit N-XC65-W N-XC65-WP WP (weatherproof version) TOA Canada Corporation Page 1 of 27...
-
Page 2: Table Of Contents
Table of Contents Summary ..............................3 1.1. Safety Precautions ..........................3 1.1.1. Warning Labels ........................... 3 1.1.2. Setup and Installation ........................ 3 1.1.3. Device Use ..........................3 1.2. Introduction ............................4 1.3. Features ............................. 4 1.4. Hardware Introduction ........................4 1.4.1. -
Page 3: Summary
1. Summary 1.1. Safety Precautions • Please follow warnings and relevant safety procedures. • Please keep this manual for future reference. Warning Labels 1.1.1. This symbol indicates there are potential safety hazards, which may cause serious injury or death if operated incorrectly This symbol indicates important operation and maintenance instructions. -
Page 4: Introduction
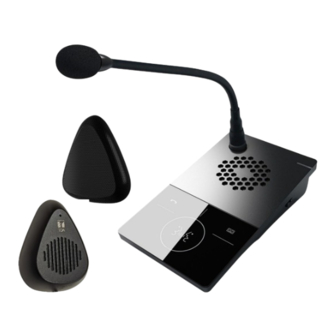
1.2. Introduction The IP audio window intercom allows full digital full-duplex communication. The unit consist of a master station and an external window intercom module. The unit receives a DC power input, an RJ45 Ethernet connection, and an unbalanced line level audio recording port. Master Station External window intercom module 1.3. - Page 5 ① ② Network status LED: red when offline, green when online ③ Speaker 3-PIN Mini XLR Gooseneck microphone screw-in socket ④ Main intercom button. When configured, pressing the voice broadcast button initiates a call to another N- ⑤ XC65 Unit Secondary intercom button.
-
Page 6: External Window Intercom Module
1.4.2. External Window Intercom Module ① Speaker/MIC: ② Master Station Connector Page 6 of 27... -
Page 7: Device Setup
2. Device Setup 2.1. Items The Window intercom system includes the following accessories. Please verify that your package contains the following items. Contact your reseller if any parts are missing. (1) Master Station 1 PCS (2) External window intercom module 1 PCS (3)... -
Page 8: Wiring
(7) Phoenix terminal 1 PCS (8) Cable Bushing 1 PCS (9) EV-cotton 1PCS (10) Installation manual 1 PCS 2.2. Wiring Connect the DC power adapter Connect the external window intercom module to the Master Station Connect the Ethernet LAN cable to the RJ45 connector Page 8 of 27... -
Page 9: Network Setup
2.3. Network Setup Via a web browser, navigate to the Web page of the IP digital window intercom. The default IP address is http://192.168.1.101. Make sure you set the IP address of your computer to the same static IP address range (e.g. -
Page 10: Device Settings
3. Device Settings 3.1. Web Interface Login Use a web browser and navigate to the IP address (factory default is http://192.168.1.101), then press Enter. Enter user name and password in the login window of the Web page (the default is: admin, password: Rdc070#*). -
Page 11: Network Settings
3.2. Network Settings Description: You can choose between static IP or obtain an IP Connection Type automatically from DHCP server MAC Address Cannot be modified, assigned to the device network adapter IP Address Device IP address, factory default is 192.168.1.101 Subnet Mask The subnet mask of the LAN network. -
Page 12: Audio Output Settings
3.3. Audio Output Settings Description: Audio Output Set the desired audio output configuration 3.4. Talk Settings Page 12 of 27... - Page 13 Description: Volume setting for incoming audio sent from remote N-XC65 intercom unit Net Input Volume Volume setting for outgoing audio sent to remote N-XC65 intercom Net Output unit Volume Inside Output Volume setting for Master Station Volume Outside Output Volume setting for External Window Intercom Module Volume Prompt Volume Volume setting for alarms and device prompts...
-
Page 14: Recorder Settings
3.5. Recorder Setting Description: Volume setting for unbalanced line level audio output Analog Output Volume Page 14 of 27... -
Page 15: Password Modification
3.6. Password Modification You can change the web page login-in account and password in the WEB management parameters, click “Save” when finished. 3.7. Port Modification You can change the port of the WEB access. When not using port 80, please add the corresponding port behind the address when accessing this WEB page. -
Page 16: Language Settings
3.8. Language Settings You can switch the Web page language between Chinese and English, save the modification and restart the intercom to activate the changes. 3.9. Restart Device Restart the device. Note: the all modified parameters on the web page will be effective after restarting the device. Page 16 of 27... -
Page 17: Factory Reset
3.10. Factory Setting Revert the device to factory settings. 3.11. Upgrade Firmware Click “Upgrade” to enter the firmware upgrade mode. This will load a separate web page where you can load the firmware file and initiate the upgrade. If this web page does not load, please clear the browser cache then reload the page. -
Page 18: Systems Log
Systems Log 3.12. The log file contains all system events. Click “Clear All The Log” to empty the log. Page 18 of 27... -
Page 19: Three-Way Call Operation
4. Three-way Call Operation 1. Press either the off-line left or right key call as indicated below to start the call to the specified target in the talk settings. Note that a call to another intercom unit is not possible if the talk button is engaged. LEFT KEY RIGHT KEY TALK BUTTON... - Page 20 2. Depending on the setting on the target station, the device can accept the call manually or automatically. Once the call is accepted, the talk button can be engaged to allow a 3-way conversation. When finished, depending on your hang up settings, the call will be hung up and the talk button will default to its disengaged mode.
-
Page 21: Troubleshooting
Web Page is behaving abnormally? Please clear the web browser cache or use another web browser. Traceability Information for Canada Manufacturer: Authorized representative: TOA Corporation TOA Canada Corporation 7-2-1, Minatojima-Nakamachi, Chuo-ku, Kobe, 3670 Odyssey Drive, Unit #1, Hyogo, Japan Mississauga, L5M 0Y9, Canada www.toacanada.com...
Need help?
Do you have a question about the N-XC65-W and is the answer not in the manual?
Questions and answers