
Related Manuals for ProLights Sunrise 2IP


Summary of Contents for ProLights Sunrise 2IP
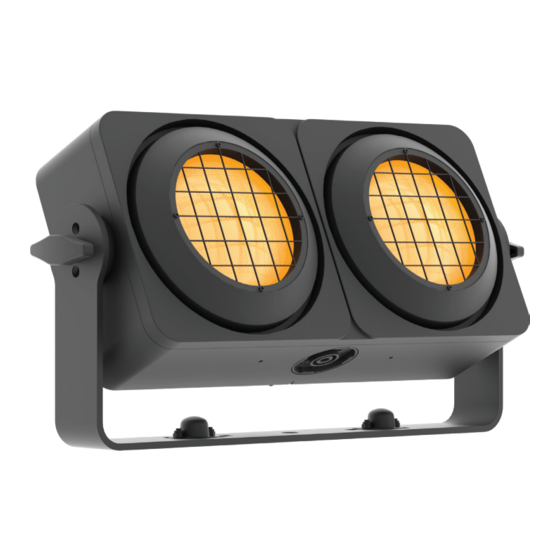
- Page 1 Sunrise 2IP IP rated modular LED blinder with 2x75W LED WW and Tungsten emulation USER MANUAL English version REV.03-11/20...
- Page 2 PROLIGHTS product are trademarks OWNED or licensed by Music & Lights S.r.l., its affiliates, and subsidiaries. PROLIGHTS is a registered trademark by Music & Lights S.r.l. All right reserved. Music & Lights – Via Appia km 136,200; Itri 04020, Italy.
-
Page 3: Table Of Contents
HANGING BRACKET (CODE SR2IPHB02V - OPTIONAL) ..........20 HANGING BRACKET (CODE SR2IPHB04H - OPTIONAL) ..........21 14 - MAINTENANCE MAINTENANCE AND CLEANING THE PRODUCT............22 REPLACING THE FUSE ....................22 VISUAL CHECK OF PRODUCT HOUSING ..............22 TROUBLESHOOTING ..................... 23 PROLIGHTS - Sunrise 2IP... -
Page 4: Safety Information
• Do not reapply power until repairs have been completed. • Refer any service operation not described in this manual to PROLIGHTS Service team or an authorized PROLIGHTS service center. Installation •... - Page 5 • Warning! Disconnect the fixture from AC mains power and allow to cool for at least 10 minutes before handling. • Only technicians who are authorized by PROLIGHTS or Authorised service partners are permitted to open the fixture. • Users may carry out external cleaning, following the warnings and instructions pro- vided, but any service operation not described in this manual must be referred to a qualified service technician.
- Page 6 The products to which this manual refers comply with: • 2014/35/EU - Safety of electrical equipment supplied at low voltage (LVD). • 2014/30/EU - Electromagnetic Compatibility (EMC). • 2011/65/EU - Restriction of the use of certain hazardous substances (RoHS). PROLIGHTS - Sunrise 2IP...
-
Page 7: Packaging
• RSR1235A/B: steel security cable for hanging bodies, inox steel shackle, L=120 cm, silver/black; • UPBOX1U: firmware uploader kit, USB IN, 3pin XLR DMX OUT. 2 - TECHNICAL DRAWING Weight: 7.6 kg - 16.75lbs Dimensions are in mm / in - Fig.1 PROLIGHTS - Sunrise 2IP... -
Page 8: Installation
Warning! When clamping the fixture to a truss or other structure at any angle, use clamps of half-cou- pler type. Do not use any type of clamp that does not completely encircle the structure when fastened. Ø13 mm [Ø0.5 in] 180 mm [7.1 in] Fig.2 PROLIGHTS - Sunrise 2IP... -
Page 9: Connection To The Mains Supply
• Connect the power connector into the Mains input socket (100-240 VAC-50/60 Hz). • The product is then ready for its operations and can be controlled through the available input sig- nals on board. • To disconnect power from the product, disconnect the Mains from the socket. PROLIGHTS - Sunrise 2IP... -
Page 10: Product Overview
7. DMX OUT (5-p XLR): 1 = GND, 2 = sign-, 3 = sign+, 4 N/C, 5 N/C; 8. GORE VALVE; 9. POWER IN: for connection to the Mains 100-240V~/50-60Hz; 10. POWER OUT: power output for connection of multiple units in series. Fig.3 PROLIGHTS - Sunrise 2IP... -
Page 11: Dmx Connection
... . DMX IN DMX OUT DMX IN DMX OUT DMX IN DMX OUT DMX IN DMX OUT DMX512 Controller Fig.5 - Example 6 DMX channels configuration PROLIGHTS - Sunrise 2IP... -
Page 12: Construction Of The Dmx Termination
2. Reach the addressing menu, then select the DMX ADDRESS settings. 3. Select the address from 1 to 512 using the navigation arrows/buttons and confirm by pressing ENTER. 4. Press Menu to exit and return to the Home screen. PROLIGHTS - Sunrise 2IP... -
Page 13: Control Panel
• UP: Browse upwards through the menu list and increases the numeric value displayed; • DOWN: Browse downwards through the menu list and decreases the numeric value displayed; • ENTER: Used to confirm the current menu or confirm the current function value or option within a menu. PROLIGHTS - Sunrise 2IP... -
Page 14: Menu Structure
HOLD To choose the behaviour of BLACKOUT fixture in case of dmx signal STAND ALONE lost. INVERT To invert the pixel layout of MAPPING the fixture. FACTORY RELOAD To reset the unit to factory default settings. PROLIGHTS - Sunrise 2IP... - Page 15 EFFECT 4 1 ÷ 100 EFFECT 5 1 ÷ 100 000 ÷ 255 STATIC TUNGTEN 1 To choose the desidered 000 ÷ 255 TUNGTEN 2 level of each color in static 000 ÷ 255 STROBE mode. PROLIGHTS - Sunrise 2IP...
-
Page 16: Rdm Functions
Modulation Frequency 0x0347 Modulation Frequency Description 0x0348 Output Response Time 0x0345 Output Response Time Description 0x0346 Parameter Description 0x0051 Product Detail ID List 0x0070 Sensor Definition 0x0200 Sensor Value 0x0201 Software Version Label 0x00C0 Supported Parameters 0x0050 PROLIGHTS - Sunrise 2IP... -
Page 17: Error Messages
OFF by the product protection system. [MAINTENANCE TIME] Need to be done standard maintenance and also reset of elipsed time. [DMX ACTIVE] If transfer configuration is used with dmx signal connected. PROLIGHTS - Sunrise 2IP... -
Page 18: Dmx Charts
DIMMER 2 FINE 000 ÷ 255 EFFECT No function 000 ÷ 045 Effect 1 046 ÷ 087 Effect 2 088 ÷ 129 Effect 3 130 ÷ 171 Effect 4 172 ÷ 213 Effect 5 214 ÷ 255 PROLIGHTS - Sunrise 2IP... - Page 19 Stand alone effect 3 072 ÷ 073 Stand alone effect 4 074 ÷ 075 Stand alone effect 5 076 ÷ 077 Stand alone static 078 ÷ 079 Reserved 080 ÷ 253 Factory default of control functions 254 ÷ 255 PROLIGHTS - Sunrise 2IP...
-
Page 20: Accessories Installation
90 [3.5] 90 [3.5] 104 [4.1] 388 [15.3] 173 [6.8] Mount the hanging bracket and tighten the screws and the two knobs on the sides for the hanging the single unit placed in horizontal position. Fig.8 PROLIGHTS - Sunrise 2IP... -
Page 21: Hanging Bracket (Code Sr2Iphb01V - Optional)
70 [2.8] 70 [2.8] 33 [1.3] 205 [8.1] 257 [10.1] Mount the hanging bracket and tighten the screws and the two knobs on the sides for the hanging a single unit placed in vertical position. Fig.9 PROLIGHTS - Sunrise 2IP... -
Page 22: Hanging Bracket (Code Sr2Iphb02V - Optional)
1. Using the rear brackets SR2IPOS to connect the units. 2. Mount the hanging bracket and tighten the screws and the two knobs on the sides for the hanging of two units placed in vertical position. Fig.10 PROLIGHTS - Sunrise 2IP... -
Page 23: Hanging Bracket (Code Sr2Iphb04H - Optional)
1. Using the rear bracket SR2IPOS to connect the units. 2. Mount the hanging bracket and tighten the screws and the two knobs on the sides for the hanging of two units placed in horizontal position. Fig.11 PROLIGHTS - Sunrise 2IP... -
Page 24: Maintenance
WARNING: the use of alcohol or any other detergent could damage the lenses. • All other service operations on the product must be carried out by PROLIGHTS, its approved service agents or trained and qualified personnel. -
Page 25: Troubleshooting
• Check if the Fuse is intact and eventually replace it if fault necessary. • Contact the PROLIGHTS Service or authorized service partner. Do not remove parts and/or covers, or carry out any repairs or service that are not described in... - Page 26 Note...
- Page 28 PROLIGHTS is a trademark of prolights.it Via A.Olivetti snc MUSIC & LIGHTS S.r.l. support@prolights.it 04026 - Minturno (LT) ITALY musiclights.it Tel: +39 0771 72190...
Need help?
Do you have a question about the Sunrise 2IP and is the answer not in the manual?
Questions and answers