Advertisement
Quick Links
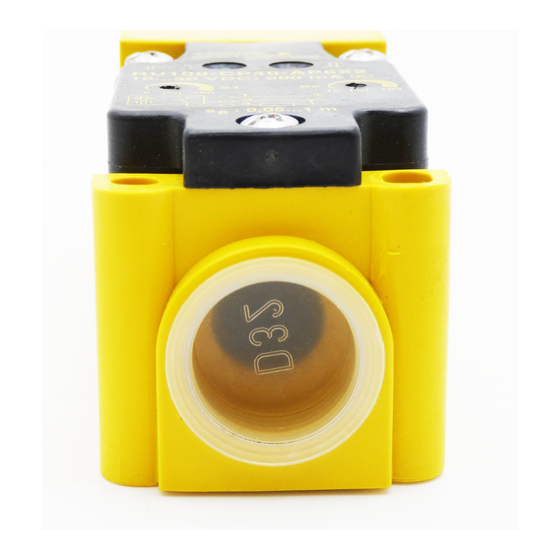
Ultraschall-Sensoren
RU100-CP40...
Umsetzen der aktiven Fläche ( C )
(Lieferzustand aktive Fläche vorne)
Schrauben ( B ) lösen und Elekronikteil
( A ) zusammen mit Sensorkopf ( D )
vom Anschlusssockel ( F ) abziehen.
Ist Anfahrrichtung "oben" gewünscht,
Schrauben ( E ) lösen, Sensorkopf ( D )
abheben und um 180° drehen,
Schrauben ( E ) wieder anziehen.
Ist Anfahrrichtung "unten", "rechts" oder
"links" gewünscht, Anfahrrichtung "oben"
einstellen. Anschließend das Elektronik-
teil ( A ) vom Sensorkopf ( D ) abziehen,
den Sensorkopf in 45°-Schritten in die
gewünschte Anfahrrichtung drehen und
wieder aufs Elektronikteil ( A ) stecken.
Abschließend Elektronikteil ( A ) mit
Sensorkopf ( D ) auf den Anschluss-
sockel ( F ) stecken und Schrauben ( B )
anziehen.
B
A
ø 5,3
30
M20 x 1,5
(weitere Hinweise auf Rückseite)
Ultrasonic sensors
RU100-CP40...
Changing of Sensing Face Position ( C )
(unit comes with sensing face in front)
Loosen screw ( B ) and remove
amplifier ( A ) with together sensor head
( D ) from the terminal socket ( F ).
For "top" target approach loosen
screws ( E ), rotate sensor head ( D ) by
180° and re-tighten screws ( E ).
For "bottom", "right" or "left" target
approach proceed as above ("top"
target approach). Remove sensor head
( D ) from the amplifier ( A ), rotate
sensor in 45° steps for the desired
target approach. Re-connect sensor
head ( D ) and amplifier ( A ).
Insert amplifier ( A ) with sensor head
( D ) into the terminal socket ( F ) and
re-tighten screws ( B ).
C
D
E
60
F
34
(further information overleaf)
Détecteurs ultrasoniques
RU100-CP40...
Changement d´orientation de la face
active ( C ) (Appareil livré face active
frontale)
Desserrer les vis ( B ) et enlever la
partie électronique ( A ) avec la tête
de détection ( D ) du socle de
raccordement ( F ) .
Lorsqu'on désire obtenir le sens
d'attaque "dessus", desserrer les
vis ( E ), enlever la tête du détecteur ( D )
et la tourner de 180° et resserrer les
vis ( E ).
Lorsqu'on désire obtenir le sens
d'attaque "dessous", "droite" ou
"gauche", regler le sens d'attaque
"dessus", séparer ensuite la tête de
détecteur ( D ) de la partie électronique
( A ), tourner par pas de 45° dans le
sens d'attaque souhaité et emboîter à
nouveau sur la partie électronique ( A ).
Terminer en emboîtant la partie
électronique ( A ) avec la tête de
détection ( D ) sur le socle de
raccordement ( F ) et serrer les vis ( B ).
C
D
E
A
(informations supplémentaires au verso)
Advertisement

Related Manuals for turck RU100-CP40 Series


Summary of Contents for turck RU100-CP40 Series
- Page 1 Ultraschall-Sensoren Ultrasonic sensors Détecteurs ultrasoniques RU100-CP40… RU100-CP40… RU100-CP40… Umsetzen der aktiven Fläche ( C ) Changing of Sensing Face Position ( C ) Changement d´orientation de la face (Lieferzustand aktive Fläche vorne) (unit comes with sensing face in front) active ( C ) (Appareil livré face active frontale) Schrauben ( B ) lösen und Elekronikteil Loosen screw ( B ) and remove...
- Page 2 B. Irrtümer und Änderungen vorbehalten / Subject to change without notice / Sous réserve de modifications • © Hans Turck GmbH & Co. KG 2003 Hans Turck GmbH & Co. KG • D–45466 Mülheim/Ruhr • Tel. 0208/4952-0 • Fax 0208/4952-264 • E-Mail: turckmh@mail.turck-globe.de • www.turck.com...
Need help?
Do you have a question about the RU100-CP40 Series and is the answer not in the manual?
Questions and answers