Giorik 700 Series Installation And Operation Manual
Hide thumbs
Also See for 700 Series:
- Installation, operation & maintenance manual (45 pages) ,
- Installation manual (29 pages) ,
- Manual (25 pages)
Table of Contents
Advertisement
Available languages
Available languages
• GB - INSTALLATION AND OPERATION MANUAL
• DE- INSTALLATIONS- UND BEDIENUNGSHANDBUCH
Electric deep fat Fryers
Elektrische Fritteusen
210FE / 210FE-C / 15FE / 15FEC / 20FE / 20FEC
/ F215L / F215CL / 215FE / 215FEC / 220FE /
220FEC / 922FE / 922FE-C / 915FE / 915FEC
/ 920FE / 920FEC / 921FE / 921FEC / 940FE /
940FEC / 942FE / 942FEC
Rev. 02-2015
Advertisement
Chapters
Table of Contents

Subscribe to Our Youtube Channel
Related Manuals for Giorik 700 Series


Summary of Contents for Giorik 700 Series
- Page 1 • GB - INSTALLATION AND OPERATION MANUAL • DE- INSTALLATIONS- UND BEDIENUNGSHANDBUCH Electric deep fat Fryers Elektrische Fritteusen 210FE / 210FE-C / 15FE / 15FEC / 20FE / 20FEC / F215L / F215CL / 215FE / 215FEC / 220FE / 220FEC / 922FE / 922FE-C / 915FE / 915FEC / 920FE / 920FEC / 921FE / 921FEC / 940FE / 940FEC / 942FE / 942FEC Rev.
-
Page 2: Table Of Contents
TABLE OF CONTENTS nstallatIon General and safety warnings Positioning Electrical connection Equipotential echnIcal features peratIng InstructIons Warnings and Operation Switching on 3.2.1 Deep Fryer switch on with MELTING (where provided) 3.2.2 Voltage Outage 3.2.3 Warnings and Alarms Safety thermostat Switching off Emptying the tank aIntenance Cleaning and care of the appliance... -
Page 3: Nstallation
1. INSTALLATION 1.1 General and safety warnings Before connecting the ap- Carefully read this manu- pliance ensure the pow- al before installation and er cable supplied is not commissioning of the ap- damaged, in which case pliance, as the text pro- the cable must be re- vides important... - Page 4 nel and following the man- Before commissioning the ufacturer's instructions. appliance ensure all pack- aging parts have been re- The appliance has been moved, then make sure to designed cook food dispose of them in compli- closed environments ance with current regula- and must be solely em- tions.
- Page 5 centre authorised by the manufacturer mand original spare parts. Any modification to ap- pliance installation that should be required shall be approved and performed authorised technical personnel. The appliance is only in- tended professional use and by qualified per- sonnel. Power off the appliance before performing...
-
Page 6: Positioning
1.2 Placement The appliance has been designed to be installed in closed premises; it cannot be used outdoors and must not be exposed to weathering. The designated installation location must have a rigid, flat and level surface that must be able to safely withstand the weight of the appliance loaded to maximum capacity. - Page 7 The electrical system - as required and specified in regulation in force - must be equipped with efficient earthing. Electrical safety of the appliance may only be assured if the electrical installation is compliant. Before performing electri- cal installation, voltage and FEXXXX XXXXXX/XX/XX frequency readings of the...
-
Page 8: Equipotential
1.4 Equipotential bonding The appliance must be included in an equipotential system, which has been checked for efficiency in accordance with current regulations. The connection terminal is on the frame and marked with the symbol in fig. 5, to be connected to a cable of minimum section 10 mm². -
Page 9: Technical Features
2. TECHNICAL FEATURES... -
Page 10: Operating Instructions
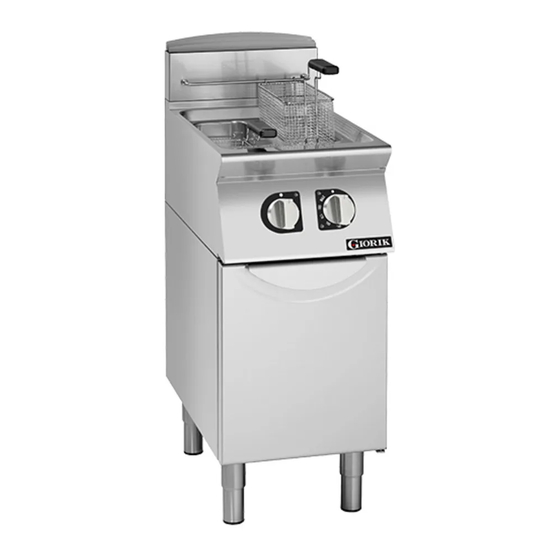
3. OPERATING INSTRUCTIONS 3.1 Warnings and Operation This appliance is used to fry food in boiling oil or food- grade grease by means of suitable baskets (fig. 6). Fig. 6 Any other use should be avoided as hazardous misuse. Supervise the appliance during operation. Before first commissioning the appliance, it is required to remove all packaging material and proceed with accurate cleaning of the vat and baskets from the protective industrial grease, acting as follows:... -
Page 11: Deep Fryer Switch On With Melting (Where Provided)
In case of using solid grease, pay the utmost attention while it is melting: FIRE HAZARD! Where provided, use the MELTING cycle (pre-heating); or manually thermostat the melting stage until the grease has completely lique- fied. To switch on, engage the main switch. Green After filling the vat/vats, in appliances Warning... - Page 12 A: START/STOP button B: live resistors LED temperature increase button D: digital temperature dis- play (precision +/- 1°C) temperature decrease button temperature reached buzzer acknowl- edgement F: MELTING in operation Fig. 10 G: “MELT” button: MELTING enable/disable Engage pole switch. Turn switch knob to position 1 and the display switches on D (fig.
-
Page 13: Voltage Outage
3.2.2 Voltage Outage The control device MELTING (where provided) is fitted with internal memory which, in the event of very short power outage, stores the data set until the power is restored. In the event the outage should extend over the storage time, the display will read “PF”... -
Page 14: Safety Thermostat
! Regardless of the fryer's operation device, used food ttentIon grade oil and grease must be used with caution, in fact their smoke point is lower and their foam tends to overflow. Also pay attention when dipping in oil food that is too moist or in excessive amounts as they contribute to the formation of foam that may overflow. -
Page 15: Emptying The Tank
3.5 Emptying the vat To empty the vat, wait for the oil to be cold. Open the fryer door, place the oil collecting vat with relevant filter (if not present) and open the cock (fig. 12). LEVER DRAINAGE COCK DRAINAGE HOSE OIL COLLECTING VAT WITH FILTER HEATING ELEMENT MOVEMENT LEVER... -
Page 16: In The Event Of Malfunction
necessary rubbing it in the same direction as the satin finish. Steel parts must be washed with hot water and neutral detergent. Do not use abrasive or corrosive detergents that might damage steel. In the event of prolonged disuse of the appliance, disconnect it from the power mains and accurately clean surfaces. - Page 17 symbol fig. 14 specifies that, end of its service life, the appliance must be disposed according European Parlia- ment directive 2012/19/EU 04/06/2012. Fig. 14 Information on disposal in European Union countries The EU Directive on WEEE equipment has been implemented differ- ently by each country, therefore should you wish to dispose of this appliance, we suggest you contact your local authorities or Dealer to inquire about the correct method of disposal.
- Page 19 INHALTSVERZEICHNIS nstallatIon Allgemeine Anmerkungen und Sicherheitshinweise Positionierung Elektroanschluss Potentialausgleich echnIsche erkMale eDIenungsanleItung Warnungen und Funktionen Einschaltung 3.2.1 Einschaltung der Fritteuse mit MELTING (falls vorgesehen) 3.2.2 Unterbrechung der Stromversorgung 3.2.3 Meldungen und Alarme Sicherheitsthermostat Abschaltung Entleeren der Wanne artung Reinigung und Pflege des Geräts Im Falle einer Funktionsstörung Entsorgung des Geräts s.
-
Page 20: Nstallation
1. INSTALLATION 1.1 Allgemeine Anmerkungen und Sicherheitshinweise Das vorliegende Handbuch aufweist. In keinem Fall darf muss vor der Installation ein beschädigtes Gerät in- und der Inbetriebnahme des stalliert und in Betrieb ge- Geräts aufmerksam gelesen nommen werden. Im Zwei- werden, da der Text wichtige felsfall muss umgehend der Informationen in Bezug auf Technische... - Page 21 und die Trennung gewähr- oder Schäden am Gerät ist leistet. Die Kontakte dieser es außerdem von grundle- Vorrichtung müssen über gender Bedeutung, dass das eine Unterbrecherstrecke Personal regelmäßig präzi- verfügen, welche die voll- se Anweisungen in Bezug ständige Trennung unter auf die Sicherheit erhält.
- Page 22 den, so muss diese gegen Jede erforderliche Verände- Temperaturen bis 80 °C be- rung in Bezug auf die Ins- ständig sein und falls sie ent- tallation des Geräts muss flammbar sein sollte, muss genehmigt werden und darf eine Wärmeschutzdämmung ausschließlich autori- vorgesehen werden.
-
Page 23: Positionierung
1.2. Positionierung Das Gerät wurde für die Installation in geschlossenen Räumen entwi- ckelt. Es darf nicht im Freien verwendet und keinen Witterungsbedingun- gen ausgesetzt werden. Der für die Installation vorgesehene Standort muss über eine starre, ebene und horizontale Fläche verfügen, die dem Gewicht des Geräts bei maximal zulässiger Beladung sicher stand- halten kann. - Page 24 Die Elektroanlage muss, wie in den geltenden Normen vorgeschrieben und spezifiziert, mit einer funktionstüchtigen Erdung versehen sein. Die elektrische Sicherheit der Anlage kann einzig bei Vorhandensein einer normgerechten Elektroanlage gewährleistet werden. Vor der Herstellung des elek- trischen Anschlusses, müs- FEXXXX XXXXXX/XX/XX sen die Spannungs- und Fre- quenzwerte des Elektronetzes...
-
Page 25: Potentialausgleich
Die Versorgungsspannung des in Betrieb befindlichen Geräts darf von dem Wert der Nominalspannung nicht mehr als ±10% abweichen. 1.4 Potentialausgleich Das Gerät muss in ein Ausgleichsleiter-System integriert werden, dessen Effizienz gemäß der in den gängigen Vorschriften enthaltenen Anforderungen überprüft werden muss. -
Page 26: Technische Merkmale
2. TECHNISCHE MERKMALE... -
Page 27: Edienungsanleitung
3. BEDIENUNGSANLEITUNG 3.1 Warnungen und Funktionen Mit diesem Gerät können Speisen mit Hilfe von entspre- chenden Körben in siedend heißem Speiseöl oder -fett frittiert werden (Abb. 6). Abb. 6 Jegliche andere Verwendung muss verhindert werden, da sie als unsachgemäß und gefährlich gilt. Während des Betriebs muss das Gerät beaufsichtigt werden. -
Page 28: Einschaltung Der Fritteuse Mit Melting (Falls Vorgesehen)
Bei der Verwendung von festem Fett während des Schmelzvorgangs besondere Vorsicht walten lassen: BRANDGEFAHR! Falls vorhanden, den Zyklus MELTING (Vorwärmung) verwenden, also manuell über Thermostat die Schmelzphase regulieren, bis sich das Fett vollständig verflüssigt hat. Zum Einschalten, den Hauptschalter aktivieren. Grüne Kon- Nachdem die Wanne(n) gefüllt wurde(n) er- trollleuchte... - Page 29 A: Taste START/STOPP B: rote Kontrollleuchte Heiz- widerstände unter Spannung C: Taste zur Erhöhung der Temperatur D: digitale Temperaturanzei- ge (Präzision +/- 1 °C) E: Taste zur Senkung der Tem- peratur und zum Ausschluss des akustischen Alarms bei Erreichen der Temperatur F: Kontrollleuchte MELTING Fig.
-
Page 30: Unterbrechung Der Stromversorgung
3.2.2 Unterbrechung der Stromversorgung Die Kontrollvorrichtung MELTING (falls vorgesehen) verfügt über einen internen Speicher, der bei sehr kurzen Unterbrechungen der Stromver- sorgung die eingestellten Daten bis zur Wiederherstellung der Stromver- sorgung beibehält. Sollte die Unterbrechung der Stromversorgung länger als die Speicher- zeit dauern, wird bei erneuter Inbetriebnahme am Display die Meldung "PF"... -
Page 31: Sicherheitsthermostat
! Unabhängig von der Funktionsart der Fritteuse ist es notwen- chtung dig, bei der Wiederverwendung von Speiseölen und -fetten besonde- re Vorsicht walten zu lassen, da ihr Rußpunkt viel niedriger ist und ihr Schaum zum Überlaufen tendiert. Außerdem muss darauf geachtet werden, dass keine allzu feuchten Le- bensmittel oder sehr große Mengen an Lebensmitteln in das Öl getaucht werden, da dies die Bildung von Schaum fördert und dieser überlaufen könnte. -
Page 32: Entleeren Der Wanne
3.5 Entleeren der Wanne Zum Entleeren der Wannen abwarten, bis das Öl abgekühlt ist. Die Klappe der Fritteuse öffnen, die Ölsammelwanne mit dem entspre- chenden Filter positionieren (falls nicht bereits vorhanden) und den Hahn öffnen (Abb. 12). HEBEL ABLASSHAHN ÖLABLASSROHR ÖLSAMMELWANNE MIT FILTER HEBEL ZUR DREHUNG DER HEIZWIDERSTÄNDE... -
Page 33: Im Falle Einer Funktionsstörung
Die Komponenten aus Stahl müssen mit warmem Wasser und einem neutralen Reinigungsmittel gereinigt werden. Keine scheuernden oder ätzenden Reinigungsmittel verwenden, die den Stahl angreifen könnten. Wenn das Gerät über einen längeren Zeitraum nicht verwendet wird, muss es vom Stromnetz getrennt und seine Oberflächen sorgfältig ge- reinigt werden. - Page 34 Das in Abb. 14 dargestellte Symbol zeigt an, dass das Ge- rät am Ende seiner Lebensdauer in Übereinstimmung mit den Angaben der Richtlinie des europäischen Parlaments 2012/19/EU vom 04.06.2012 entsorgt werden muss. Abb. 14 Informationen zur Entsorgung innerhalb der Europäischen Union Die europäische Richtlinie über Elektro- und Elektronikaltgeräte WEEE wurde von den einzelnen Ländern auf unterschiedliche Weise umgesetzt.
-
Page 35: E Lektrische S Chaltpläne ( Von S. 35 Bis S. 50 Für Alle M Odelle )
5. WIRING DIAGRAMS - SCHALTPLÄNE 210fe - 922fe Diagram - Plan Zse2029... - Page 36 210fe-c / 922fe-c Diagram - Plan Zse2034...
- Page 37 15fe - 915fe Diagram - Plan Zse2027...
- Page 38 15fec - 915fec Diagram - Plan Zse2032...
- Page 39 20fe - 920fe Diagram - Plan Zse2028...
- Page 40 20fec - 920fec Diagram - Plan Zse2033...
- Page 41 f215l Diagram - Plan Zse2015...
- Page 42 f215cl Diagram - Plan Zse2003...
- Page 43 215fe Diagram - Plan Zse2030...
- Page 44 5.10 215fec Diagram - Plan Zse2035...
- Page 45 5.11 220fe - 940fe Diagram - Plan Zse2031...
- Page 46 5.12 220fec - 940fec Diagram - Plan Zse2036...
- Page 47 5.13 921fe Diagram - Plan Zse2041...
- Page 48 5.14 921fec Diagram - Plan Zse2043...
- Page 49 5.15 942fe Diagram - Plan Zse2042...
- Page 50 5.16 942fec Diagram - Plan Zse2044...
- Page 52 THE MANUFACTURING COMPANY DISCLAIMS ANY LIABILITY FOR DAMAGE DUE TO INCORRECT IN- STALLATION, TAMPERING WITH THE APPLIANCE, MISUSE, NEGLIGENT MAINTENANCE, FAILURE TO COMPLY WITH REGULATIONS IN FORCE AND UNSKILLED USE. THE MANUFACTURER RESERVES THE RIGHT TO MAKE THE CHANGES TO THE PRODUCT IT DEEMS NECESSARY OR USEFUL AT ANY TIME.
Need help?
Do you have a question about the 700 Series and is the answer not in the manual?
Questions and answers