Table of Contents
Advertisement
Quick Links
Advertisement
Table of Contents

Related Manuals for X-Rite Pantone Virtual Light Booth


Summary of Contents for X-Rite Pantone Virtual Light Booth
- Page 1 Virtual Light Booth User Guide...
- Page 2 Industry Canada Compliance Statement CAN ICES-3 (A) / NMB-3 (A) Equipment Information Use of this equipment in a manner other than that specified by X-Rite, Incorporated may compromise design integrity and become unsafe. WARNING: This device is not for use in explosive environments.
- Page 3 • NOTICE: There are no user serviceable parts in this product. All warranty and non warranty repairs should be referred to X-Rite, Incorporated. • RETAIN THIS MANUAL FOR FUTURE REFERENCE: Once you have read this manual, keep it handy for others to read or refer to when they need to operate the unit.
- Page 4 X-Rite, Incorporated. Patents: www.xrite.com/ip “© 2019, X-Rite, Incorporated. All rights reserved” X-Rite® is a registered trademark of X-Rite, Incorporated. All other logos, brand names, and product names mentioned are the properties of their respective holders. Warranty Information X-Rite warrants this Product against defects in material and workmanship for a period of twelve (12) months from the date of shipment from X-Rite’s facility, unless mandatory law provides for longer...
- Page 5 WARRANTIES OF MERCHANTABILITY, FITNESS FOR A PARTICULAR PURPOSE OR APPLICATION, AND NON-INFRINGEMENT. NO EMPLOYEE OR AGENT OF X-RITE, OTHER THAN AN OFFICER OF X-RITE, IS AUTHORIZED TO MAKE ANY WARRANTY IN ADDITION TO THE FOREGOING. IN NO EVENT WILL X-RITE BE LIABLE FOR ANY OF BUYER’S MANUFACTURING COSTS,...
-
Page 6: Table Of Contents
V i r t u a l L i g h t B o o t h Table of Contents Overview and Installation Packaging Information VLB Installation Guidelines Connecting the VLB Overview Powering the VLB Front Panel Controls Power Standby Button Up and Down Buttons USB Port Touch Pad Definition... - Page 7 V i r t u a l L i g h t B o o t h Daylight Filters Cleaning Replacing the Lamps Troubleshooting Technical Specifications...
-
Page 8: Overview And Installation
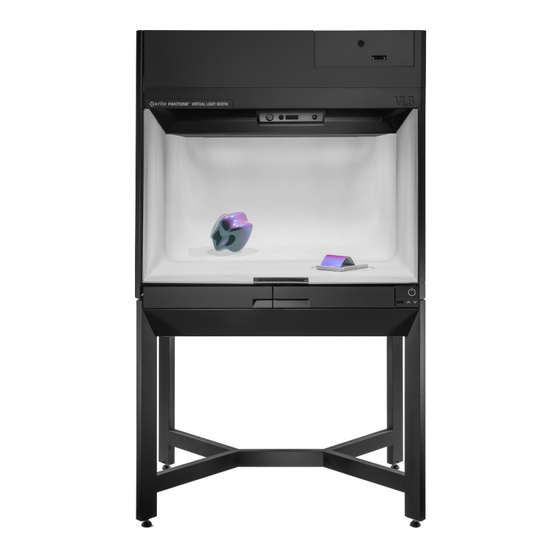
V i r t u a l L i g h t B o o t h OVERVIEW AND INSTALLATION The X-Rite Virtual Light Booth (VLB), a component of the X-Rite Total Appearance Capture (TAC™) Ecosystem, presents virtual materials with a very high degree of realism and accuracy. This enables users to evaluate digitized materials rendered on virtual objects in direct comparison to physical material samples. -
Page 9: Vlb Installation Guidelines
V i r t u a l L i g h t B o o t h VLB Installation Guidelines Please take the following precautions to ensure the best environment for the use of the device. • Install on a flat, level surface capable of bearing the load of the device. •... -
Page 10: Connecting The Vlb
V i r t u a l L i g h t B o o t h Connecting the VLB Plug one end of the Ethernet Crossover cable into the Ethernet port on your computer. Plug the other end of the cable into the VLB. Connect the AC cord to the VLB and then an easily accessible outlet. -
Page 11: Overview
V i r t u a l L i g h t B o o t h OVERVIEW Powering the VLB Toggle the power switch located on the back of the VLB to turn it on. Back of VLB A power standby button is located on the front panel of the device (see below). -
Page 12: Touch Pad Definition
V i r t u a l L i g h t B o o t h Touch Pad Definition Use the touch pad to control the device. It provides functionality to: • Turn the device on and off • Control the rotating stage •... -
Page 13: Operation
V i r t u a l L i g h t B o o t h OPERATION PANTORA Connect the device Enter the IP address and click the Connect button. Once connected, the device info is displayed and materials and scenes are uploaded to the VLB. Prepare a scene Select New from the Scene Editor menu to create a new scene. - Page 14 V i r t u a l L i g h t B o o t h The PANTORA scene editor loads and displays the objects. The objects can be moved or rotated with the sliders or the control buttons. They work the same as in the PANTORA viewer.
-
Page 15: Uploading Scenes
In order to see the content of a scene drag it into the scene viewer. It shows the selected scene and the available material slots. X-Rite provides 3 preconfigured scenes with 3 different car paint and fabrics sample holders and a corresponding swatch, which has one material slot assigned. You can load them from the menu in the scenes section. -
Page 16: Control Bar
V i r t u a l L i g h t B o o t h Select and load a scene to view the materials it contains. Tap on the colored material slot, then tap on the material you would like to assign to the corresponding object. NOTE: If there are already items existing on the VLB which are not available in your scenes or materials section in PANTORA, they are displayed in PANTORA with a question mark. -
Page 17: Scene List
V i r t u a l L i g h t B o o t h Service Calibration This symbol appears once the service calibration of the VLB has expired. VLB Error This symbol appears when an error occurs in the VLB system. If the error is automatically resolved by the software, this symbol will also disappear again. -
Page 18: Presenter
V i r t u a l L i g h t B o o t h Presenter Presenter contains the following functions: • Material: Displays icons of the loaded materials. Press to show materials in list view. • Scene (center screen): Currently loaded scene with objects. The color indicates the material slots. -
Page 19: System Information
V i r t u a l L i g h t B o o t h o Rotation direction: The rotation direction button select the rotation mode of the virtual and the physical turntable. Physical and virtual turntable rotate in the opposite direction. This is the recommended default setting which is optimized for the correct illumination rendering. -
Page 20: Settings
V i r t u a l L i g h t B o o t h • System Info: Provides the user with all needed information about the VLB, for example firmware, calibration status, IP address and others. • Legal: Acknowledgment of used 3 Party Software. -
Page 21: Light Calibration
V i r t u a l L i g h t B o o t h o Whenever using with multiple users, it doesn't make sense to switch on the tracking. Since the viewpoint-based display correction will only be sensible for the currently tracked person and lead to strange behavior for all others. - Page 22 V i r t u a l L i g h t B o o t h 2. Tap the Calibration button on the Settings screen to start the procedure. 3. Open the front left drawer on the VLB and connect one end of the USB cable into the i1Pro. 4.
- Page 23 V i r t u a l L i g h t B o o t h 7. Open the protective slider on the calibration holder to access the white calibration tile. 8. Position the i1Pro in the calibration holder with the aperture over the white calibration tile. White calibration tile Protective slider 9.
- Page 24 V i r t u a l L i g h t B o o t h 14. Align the i1Pro and the i1-stand in the center of the rotation stage (see below). 15. Locate the calibration curtain, fold and secure the two corners together using the hook and loop fasteners in the curtain.
- Page 25 V i r t u a l L i g h t B o o t h 16. Hang the calibration curtain on the VLB so that the entire front is covered.
- Page 26 V i r t u a l L i g h t B o o t h 17. Tap the Take measurements button on the screen. The VLB will perform a LED SPOT Measurement, D65 – Voltage Adjustment, and D65 Measurement. NOTE: This process will take several minutes to complete.
-
Page 27: Color Accuracy Test
V i r t u a l L i g h t B o o t h COLOR ACCURACY TEST To check if the color accuracy of the VLB display deviates from the original factory calibration you can perform a color accuracy test at any time. The procedure is similar to the light calibration. 1. - Page 28 V i r t u a l L i g h t B o o t h 9. You can download the color accuracy data using the VLB Diagnostics application for archiving or sending to X-Rite VLB support.
-
Page 29: Supported External Devices
V i r t u a l L i g h t B o o t h Supported External Devices • 3D Mouse: Starting with firmware version 1.1, the VLB supports the usage of a 3D connexion SpaceMouse to control the objects in the virtual VLB scene. -
Page 30: The Approval Workflow In Vlb And Pantora
V i r t u a l L i g h t B o o t h THE APPROVAL WORKFLOW IN VLB AND PANTORA You can implement a fully customized workflow for approval using the VLB. It supports the generation of user defined controls and allows the application of some logics using JavaScript. - Page 31 V i r t u a l L i g h t B o o t h If the workflow is activated and the ApprovalMetaDataDefinition.xml is loaded in Pantora you will see a screen similar to the one below. A new unapproved material is shown as rejected and the defined properties have default values displayed.
- Page 32 V i r t u a l L i g h t B o o t h At a minimum you must enter the evaluator’s name. Tap the blank field to open the virtual keyboard and enter the evaluator’s name. The same procedure applies to the comments field. After adjusting the properties a red Reject or green Approve button appears in the upper right corner.
-
Page 33: Using Javascript In The Approval Workflow
V i r t u a l L i g h t B o o t h 3. Using JavaScript in the Approval Workflow Using JavaScript you can customize the approval workflow in a very flexible way. It can be mapped to individual workflows (e.g. -
Page 34: Viewing And Handling Of Approval Metadata
V i r t u a l L i g h t B o o t h 4. Viewing and Handling of Approval Metadata If a material finished the approval process it gets an approved or rejected mini-icon in the materials list. - Page 35 If Pantora is connected to the VLB all materials and metadata is synchronized immediately. This also allows you to see the metadata and mini-icons in Pantora. If you select the X-Rite metadata definition the Approval (VLB) section contains status, comments, and date. The data is write protected in Pantora.
- Page 36 V i r t u a l L i g h t B o o t h If the approved material is loaded on the VLB but not available on the computer currently running the connected Pantora instance, it cannot be updated and a warning message is displayed:...
-
Page 37: Appendix
For sales questions or to order cables and accessories, visit our web site (www.xrite.com) or contact your nearest X-Rite dealer or service center. • Problems and questions can also be faxed or emailed to your local X-Rite office listed on our website. General Maintenance Follow the procedures below for system cleaning, lamp replacements, and fuse replacement. -
Page 38: Diffuser Cleaning
V i r t u a l L i g h t B o o t h Diffuser Cleaning Clean the exterior of the diffuser glass with a lint-free cloth. CAUTION: Make sure there are no objects in the way of the diffuser before opening. Hold the diffuser (1) and release the diffuser latch (2) located at the front of the unit. - Page 39 V i r t u a l L i g h t B o o t h Daylight Filters Cleaning Hold the diffuser and release the diffuser latch located at the front of the unit. Slowly lower the front of the diffuser until it stops. Allow time for the daylight filters to cool before handling them.
- Page 40 V i r t u a l L i g h t B o o t h Replacing the Lamps Replace burned out lamps immediately in order to maintain the overall performance standards of the device. We recommend replacing lamps in complete sets. Lamp Type Replace After Simulated Daylight (DL)
- Page 41 D65 diffuse illumination “SPLQC class” 6500K LED point light (for effect pigment evaluation) Integrated Virtual Light Booth: High Brightness Display 47”, 5000 cd/m2 X-Rite “Full Immersion Technology” (patent pending) Fully integrated display, dynamic real-time • visualization, fully controlled and synchronized material...
- Page 42 V i r t u a l L i g h t B o o t h Technical Specifications X-Rite Color Pipeline fully controlled, including • 10 Bit-per-component color control, dynamic “observer position dependent” display profiling and real-time consideration of ambient light Sensors &...
- Page 44 Switzerland Phone (+41) 44 842 24 00 Fax (+41) 44 842 22 22 Asia Pacific Headquarters X-Rite Asia Pacific Limited Suite 2801, 28th Floor, AXA Tower Landmark East, 100 How Ming Street Kwun Tong, Kowloon, Hong Kong Phone (852) 2568 6283 Fax (852) 2885 8610 Please visit www.xrite.com for a local office near you.
Need help?
Do you have a question about the Pantone Virtual Light Booth and is the answer not in the manual?
Questions and answers