Otto Bock Nurmi Neo Instructions For Use Manual
Hide thumbs
Also See for Nurmi Neo:
- Instructions for use manual (52 pages) ,
- Service manual (27 pages)

Related Manuals for Otto Bock Nurmi Neo


Summary of Contents for Otto Bock Nurmi Neo
- Page 1 Nurmi Neo Instructions for use ....................
- Page 2 Nurmi Neo...
-
Page 3: Table Of Contents
........................ 8.2.4 Gluteal support and combined gluteal and pelvic support ................ 8.2.5 Anti-tipper ............................8.2.6 Swivel lock ............................8.2.7 Friction brake ............................. 8.2.8 Seat ..............................8.2.9 Sling Seat ............................Disassembly and transport ........................Care ..............................8.4.1 Cleaning ............................Nurmi Neo... - Page 4 Maintenance and repair ........................... Maintenance ............................9.1.1 Maintenance intervals .......................... Repair ............................... Disposal ................................10.1 Disposal information ..........................10.2 Information on re-use ........................... Legal information .............................. 11.1 Liability .............................. 11.2 Warranty ............................11.3 Service life ............................Technical data ..............................Nurmi Neo...
-
Page 5: Foreword
(e.g. when approaching furniture or for interaction with the surroundings). The reverse-roll locks on the rear wheels prevent the walking aid from rolling back. The product can be used on solid ground both indoors and outdoors. Nurmi Neo... -
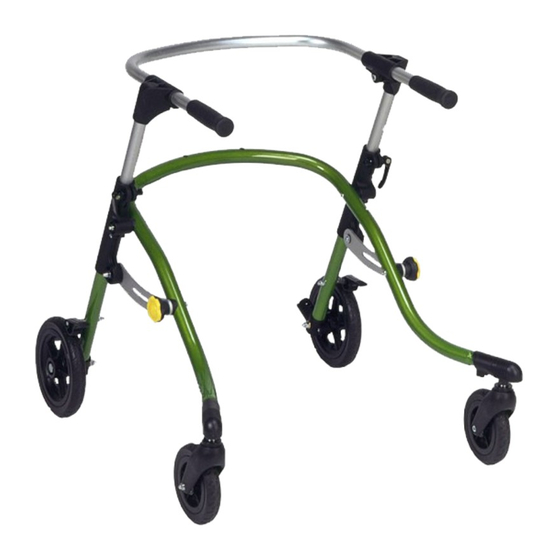
Page 6: Product Overview
It is operated by an attendant. The product may only be used with the options that are listed on the product order form. Ottobock assumes no liability for combinations with medical devices and/or accessories from other manufacturers outside the modular system. Nurmi Neo... -
Page 7: Indications
► In case of problems with the settings, please contact the qualified personnel who adjusted your product. WARNING Improper handling of packaging materials Risk of suffocation due to neglect of the duty to supervise ► Packaging materials must be kept out of the reach of children. Nurmi Neo... - Page 8 Hypothermia or burns due to contact with components, failure of components ► Do not expose the product to any extreme temperatures (e.g. direct sunlight, sauna, extreme cold). ► Do not leave the product in the immediate vicinity of heaters. Nurmi Neo...
-
Page 9: Further Information
The serial number required for enquiries and orders can be found on the nameplate. For explanations of the nameplate, see the section "Nameplate" (see Page 10). 4.6 Nameplate and warning labels 4.6.1 Signage on the product The warning signs and nameplates are attached to the product at the following mounting points: Nurmi Neo... -
Page 10: Nameplate
YYYY = year of manufacture; MM = month of manufacture; DD = day of manufacture UDI-PI to GS1 standard; UDI = Unique Device Identifier, PI = Product Identifier UDI-DI to GS1 standard; UDI = Unique Device Identifier, DI = Device Identifier Nurmi Neo... -
Page 11: Warning Labels
D Operate the rehabilitation device under supervision only. Never leave children unattended. E Rehabilitation device is intended for indoor use. 5 Delivery 5.1 Scope of delivery • Nurmi Neo base frame • Grip bar • Options according to the order •... -
Page 12: Preparing The Product For Use
2) Hold the base frame behind the front wheels and unfold it (see fig. 6). CAUTION! Always unfold the folding mechanism fully. Otherwise, there is a risk of tipping due to the base frame folding up unintentionally. 3) After unfolding, tighten the star knobs on both sides (see fig. 7). Nurmi Neo... - Page 13 (see fig. 10). CAUTION! Note that the grip bar – even after the tripod springs engage at the maximum extension height – always has to be locked by engaging the cam lever. Nurmi Neo...
- Page 14 1) Adjust the grip bar depth evenly on both sides and firmly tighten the clamping screws on both sides (see fig. 13). 2) To check, place the Nurmi Neo with the swivel lock housings against a smooth door (see fig. 14). Nurmi Neo...
-
Page 15: Delivery
The height and depth of the grip bar are continuously adjustable. Further information on adjustment is found in the section "Assembly" (see Page 12 ff.). Pay special attention to the safety instructions for adjusting the hand grips. Further information on the optional grip bars: see Page 17. Nurmi Neo... -
Page 16: Using The Reverse-Roll Lock
► All options/accessory components must be installed by the qualified personnel unless they were pre-installed by the manufacturer. A few notes on installation are provided here for the benefit of the qualified personnel. ► Always mount options/accessory components so that the stability of the product is maintained. Nurmi Neo... -
Page 17: Grab Rail
Additional adjustment possibility Especially low handle heights and a short distance between the grips can be set with this grip bar (see fig. 21). The adjustment is carried out as described in the previous section. Nurmi Neo... -
Page 18: Grip Bar, Extra High, With Channel Forearm Rests
CAUTION! The distance between the channel forearm rests should be adjusted so as to avoid pres sure points and cramped postures. The channel forearm rests may only be adjusted within the range shown (see fig. 24). 3) Firmly retighten the clamping screws on the grip bar. Nurmi Neo... -
Page 19: Storage Bag
3) Use the quick-release lock to take the storage basket off the grip bar. Removing/attaching the storage basket 1) Press the quick-release lock and take the storage basket off the holder. 2) Set the storage basket onto the holder and push it down. Nurmi Neo... -
Page 20: Driving Brake And Wheel Lock
Adjusting the gluteal support The gluteal supports can be adjusted in three dimensions: 1) Depth adjustment: Loosen the screw connection and push the support ahead/back (see fig. 29, item 1; see fig. 30, item 1). Re-tighten the screw connection. Nurmi Neo... -
Page 21: Anti-Tipper
1) If necessary: Press in the tripod spring on the anti-tipper bar (see fig. 31). 2) Swing the anti-tipper bars up out of the way (see fig. 32, rear). 8.2.6 Swivel lock INFORMATION Retrofitting a swivel lock may only be carried out by qualified personnel. Nurmi Neo... -
Page 22: Friction Brake
► Connecting elements could break if the seat bank is subjected to a load greater than the allowable load, and result in your child falling. ► Do not exceed the maximum allowable load of the main product (see Page 28). The seat (see fig. 36) allows the user to rest while using the children's walker. Nurmi Neo... -
Page 23: Sling Seat
The Sling Seat is attached to the Nurmi Neo with four length-adjustable straps (see fig. 37, item 1/2). The groin strap is very easy to release from the straps with the help of the plastic buckles. For this purpose, the rear straps have 3F safety buckles that are opened with two hands (see fig. 37, item 1). - Page 24 Installing the Sling Seat (Nurmi Neo with standard grip bars) INFORMATION ► Initially perform the following steps on only one strap, so you have an assembled installation sample in front of you at all times. ► Note that the installation possibility described in this section can also be used alternatively when optional grip bars are installed.
-
Page 25: Disassembly And Transport
Pinching, crushing due to lack of caution in danger areas ► While folding the product, do not hold on to other parts than the ones described, especially the folding mech anism. ► Avoid pinching yourself on the frame components. Nurmi Neo... -
Page 26: Care
► Clean the product at regular intervals. ► Do not clean the product with a jet of water or a pressure washer. The penetration of water can cause corro sion and subsequent malfunctions. ► Check the driving behaviour of the product after cleaning it. Nurmi Neo... -
Page 27: Cleaning
Check the screw connections between the wheels and frame Check screw connections on front/rear wheel Visual examination of wear and tear parts, for example wheels and bearings Check the legibility of all labels and markings on the product Nurmi Neo... - Page 28 380–570 510–720 570–850 [mm] Grip bar with universal handles – distance between 270–410 320–460 370–510 handles [mm] Mini grip bar – push handle height [mm] 310–480 Mini grip bar – distance between handles [mm] 200–410 540–660 660–790 720–940 Nurmi Neo...
- Page 29 Please note that the maximum load of the overall product must not be exceeded, also after loading the storage basket. Ambient conditions Temperatures and relative humidity Temperature during use [°C (°F)] -10 to +40 (14 to 104) Transport and storage temperature [°C (°F)] -10 to +40 (14 to 104) Relative humidity [%] 10 to 85; non-condensing Nurmi Neo...
- Page 30 Nurmi Neo...
- Page 31 · www.ottobock.de 143441 Moscow Region/Krasnogorskiy Rayon info@ottobock.com.co · www.ottobock.com.co Russian Federation Otto Bock Healthcare Products GmbH Otto Bock de Mexico S.A. de C.V. T +7 495 564 8360 · F +7 495 564 8363 Brehmstraße 16 · 1110 Wien · Austria Prolongación Calle 18 No. 178-A info@ottobock.ru · www.ottobock.ru F +43 1 5267985...
- Page 32 Ihr Fachhändler | Your specialist dealer Otto Bock Mobility Solutions GmbH Lindenstraße 13 · 07426 Königsee/Germany www.ottobock.com...
Need help?
Do you have a question about the Nurmi Neo and is the answer not in the manual?
Questions and answers