
Subscribe to Our Youtube Channel
Related Manuals for SWIT M-1093H


Summary of Contents for SWIT M-1093H
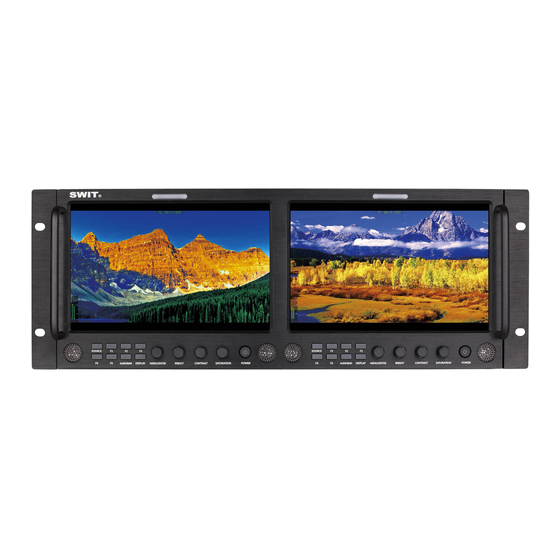
- Page 1 SWIT Electronics Co., Ltd. Model: M-1093H 9” Full HD Rack Mount LCD Monitor User Manual Ver:A Please read this User Manual throughout before using.
-
Page 2: Preface
2. All brands and trademarks of SWIT Electronics Co., Ltd. are protected and other relative trademarks in this user manual are the property of their respective owners. 3. Due to constant effort of product development, SWIT reserves the right to make changes and improvements to the product described in this manual without prior notice. -
Page 3: Maintenance
Maintenance Warning 1. In order to reduce the risk of fire and electrical shock, do not lay this product in rain or damp places. 2. Please keep away from the strong magnetic field; it may cause the noise of the video and audio signals. -
Page 4: Table Of Contents
4. Power cable Introduction M-1093H adopts IPS LCD panel, with resolution 1920×1200 and wide viewing angle H170°∕V170°. It supports 2 x 3GSDI (Level A/B), 1 x HDMI, 1 x CVBS and 1 x analog audio input. It also supports 2 x 3GSDI, 1 x HDMI, 1 x CVBS and 1 x analog audio loop through output. -
Page 5: Installation Dimensions
Installation Dimension The main body (in mm):... -
Page 6: Operation Instructions
Operation Instructions ·Front Panel ⑴ Speaker: For SDI/HDMI embedded audio and analog audio monitoring. (Will not work if earphone is plugged in) ⑵ Button SOURCE: Press “SOURCE” to select SDI1, SDI2, HDMI, and CVBS signal input. F1~F5: User definable function keys. Please see details in “4. Function key” under “Main Menu”. For example: Set F1 to “Histogram”. -
Page 7: Osd
·OSD ⑴ Time code(SDI) Under SDI input, it can display Time code. If no Time code information is detected, it will be displayed as “TC: UNLOCKED”. User can set function keys F1~F5 or GPI pins as “Time code” to turn on or off this function. ⑵... - Page 8 Introduction of audio and video functions 2-ch embedded audio meters Under 3G/HD/SD SDI, HDMI and CVBS, it displays 2 channels embedded audio meters. The audio meter is green, and will turn yellow when audio exceeds -20dB, and turn red when audio exceeds -9dB.
-
Page 9: Back Panel
·Back Panel ⑴ GPI: TSL UMD&GPI control socket ⑵ SDI-LOOP1: SDI loop through output from SDI-IN1 (BNC connector) ⑶ SDI-LOOP2: SDI loop through output from SDI-IN2 (BNC connector) ⑷ CVBS-OUT: CVBS output (BNC connector) ⑸ HDMI socket HDMI-IN: HDMI input (HDMI-A connector) HDMI-OUT: HDMI loop through output from HDMI-IN (HDMI-A connector) ⑹... -
Page 10: Main Menu
Main Menu M-1093H has OSD to adjust the parameters and settings, for example: Picture, Color Temp., Function Key, etc. Press “MENU/ENTER” button, the main menu will popup from the left top of the screen. The selected main menu highlights in yellow. - Page 11 Submenu introduction(the default values are marked with underline ) 1. Exit & Status Displays the current status, the details are as down below: *1 Display the current video signal and format *2 Display the current function keys setup 2. Picture To adjust picture parameters 3.
- Page 12 Audio Alarm, Focus Assist , Aspect Ratio, Scan Mode, Zoom Mode, Mute, Freeze Frame, Flip Mode, CVBS,HDMI, SDI1,SDI2, Color Temp. For example: Set F3 to “R/G/B/Mono” under “Function key” submenu. User can press F3 on the front panel to adjust the parameters of “R/G/B/Mono”, and the “R/G/B/Mono” will change and follow the sequence: Blue Only →Red Only →Green Only →Mono →Off.
- Page 13 UMD setup: ⑴ Connect the external control equipment with M-1093H; ⑵ Set “Display Type” to “UMD” under UMD submenu; ⑶ Make sure the “address”, “Baud Rate”, “Parity” the same; ⑷ Adjust the external control equipment and send UMD command, the UMD information will be display as the right photo.
- Page 14 8. Audio *1 When “Bar Frame” is set to “Off”, only the audio meter will be displayed. When “Bar Frame” is set to “On”, frame and real-time audio value will be displayed. *2 When “Audio Alarm” is set to “On”, if no embedded audio is detected, the audio bar will display “UNLOCKED”.
- Page 15 When set to “Off”, source scan will not be supported. *2 Logo When powered on, the screen will display SWIT logo. *3, *4 Update Driver/ Kernel ⑴ Power the monitor, insert the USB equipment with update software into the USB socket.
-
Page 16: Specification
Specification LCD Performance Size 9inch×2 Display area 191.5×119.7 mm×2 Resolution 1920×RGB×1200 Color 8 bit Aspect ratio 16:9∕4:3 Brightness 450 cd∕㎡ Contrast 1000:1 Viewing Angle Horizontal: 170°Vertical: 170° Input/output BNC×4 3G/HD/SD-SDI input BNC×2 CVBS input HDMI×2 HDMI input Inpu GPI×2 UMD, GPI×1 USB×2 3.5mm×2 analog audio input... -
Page 17: Trouble-Shooting
Trouble-shooting Symptom Possible Causes Solution Please check if the power is connected, and then The power is not turned on press ”POWER” button to turn on the monitor Unstable power voltage Reconnect to power supply BNC or HDMI cable loose No display Check and correctly connect the contact or not correctly...
Need help?
Do you have a question about the M-1093H and is the answer not in the manual?
Questions and answers