
Related Manuals for SWIT FM-16B


Summary of Contents for SWIT FM-16B
- Page 1 SWIT ELECTRONICS CO., LTD. Model: FM-16B 15.6" LCD Monitor User Manual Please read this user manual throughout before using Ver: A...
-
Page 2: Preface
All internal technologies of this product are protected, including device, software and trademark. Reproduction in whole or in part without written permission is prohibited. All brands and trademarks of SWIT Electronics Co., Ltd. are protected and other relative trademarks in this user manual are the property of their respective owners. -
Page 3: Table Of Contents
Maintenance Warning 1. In order to reduce the risk of fire and electrical shock, do not lay this product in rain or damp places. 2. Please keep away from the strong magnetic field; it may cause the noise of the video and audio signals. The power 1. -
Page 4: Packing List
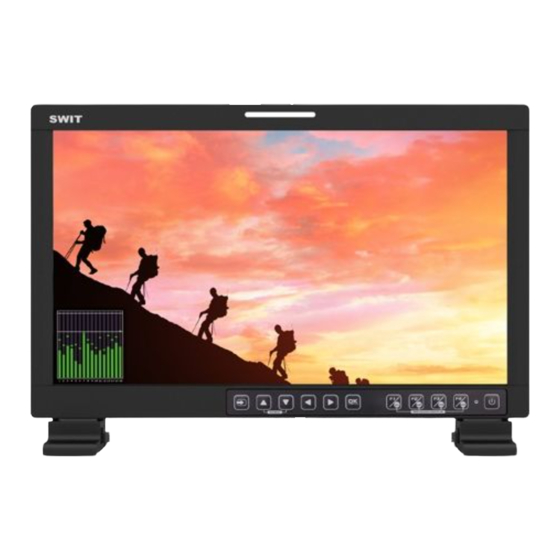
The inner lining of the carrying case is unfolded, and can be used as the sun hood. Introduction FM-16B adopts TFT-LCD panel, with resolution of 1920x1080 and 178° x 178° wide viewing angle. It supports 2 x 3G/HD/SD-SDI, 1x HDMI, 1x VIDEO , and 1 x SDI, 1x HDMI loop through, plus earphone and speaker out. -
Page 5: Installation Dimensions
Installation Dimension The main body (in mm) 3.30 242.31 267.00 100.44 100.0 141.5 383.01 66.90 48.70 128.00 383.01 274.10... - Page 6 Istallation The monitor can be mounted to a standard rack or mounted at the foot. 1. Foot mounting instructions: There are screw holes at the rear panel of the monitor, which are labeled in the following figures. Assemble the parts of the stands, then insert the stands into the case, and fasten it with the screws provided.
-
Page 7: Operation Instruction
Operation Instructions ·Front Panel (9) (10) (11) ⑴ Input selection: Used to switch an input signal ⑵ Adjust upward When working with main menu, toggle this button to select the next item or increase the number When not displaying the Main menu , display the Fast menu ⑶... -
Page 8: Rear Panel
⑹ Save/Return/Main menu Display the Main menu: press OK/MENU button, it will display the main menu at the center of the screen. Save/Back: confirm the selection and back to the higher level menu. Turn Page: when the current selection in the sub-menu list is Next Page, press this button to turn to the next page circularly. -
Page 9: Osd
·OSD Status Information Aspect Marker Area Marker Center Marker KEY INHIBIT Wave Form Timecode Audio Meter ⑴ Status Information Status Information is displayed in the top left corner of the screen, and includes the input channel and signal format. You can define it in USER CONFIG menu. - Page 10 Introduction of audio and video functions 8-ch embedded audio meters ◆ Under SDI and HDMI, it displays 8 channels embedded audio meters. The audio meter is green, and will turn yellow when audio exceeds -20dB, and turn red when audio exceeds -9dB. Time code (...
-
Page 11: Main Menu
Main Menu FM-16B has OSD to adjust the parameters and settings, for example: Status Information, Input Selection, Color Management etc. 1、 Press the OK/MENU button at the bottom of the front panel, the main menu is displayed at the center of the screen, the selected item is in white highlight is at the back of the item name. Press LEFT button to quit the displayed Main menu. - Page 12 Submenu introduction 1.Status Menu The STATUS menu items are used to describe the current status information of the monitor, the menu items are shown in following figure: Input: Show the input interface and its format Signal Format: Show the format of the input signal Color Range: Show current color range YCbCr Color Matrix: Show YCbCr color temperature Gamma: Show Gamma...
- Page 13 3. Color Management Menu The COLOR MANAGEMENT menu items are used to adjust the color temperature parameters and the color balance, the menu items are as shown in following figure: Gamma: Adjust Gamma Color Temp: Set the color temperature Red Gain: Adjust the Red Gain Green Gain: Adjust the Green Gain Blue Gain: Adjust the Blue Gain Copy From: Copy this parameter value to USER...
- Page 14 4、 User Config Menu The USER CONFIG menu items are used to adjust the parameters defined by customers, the menu items are as shown in following figure: Function Key and User Preset Menu 1、 User Preset: The user preset provides a series of menu settings customized as a User Preset, up to 4 presets could be defined in this device.
- Page 15 Marker Menu The MARKER menu items are displayed on Page3 in USER CONFIG menu, and they are used to adjust the marker parameters. Marker: Set whether to show all of the markers. It is the main switch for area marker, center marker and safety marker.
- Page 16 Display Location The Display Location menu items are displayed on Page4 in USER CONFIG menu. Set the location of waveform, vector scope and histogram by USER CONFIG → Waveform Location/ Vector scope Location/ Histogram Location separately, the available locations on the screen are as shown in following figure:...
- Page 17 Waveform Waveform Display Mode: Set various waveform through USER CONFIG→ Waveform Type item, and display the following three kinds of waveform as LUMA, RGB, PARADE. Waveform Size: Set USER CONFIG → Waveform SIZE item to adjust the size of the waveform, there are three kinds of sizes for waveform: Small size waveform: Set Waveform SIZE item as Small, and this kind of waveform could be ◇...
- Page 18 Sharpness Peak: Enable/Disable peak function. Over sharpen the image. Peak Level: Set the sharpness level of the image. The higher the value, the sharpener the image. False Color ‒Exposure Assist False Color: FALSE COLOR is also known as EXPOSURE ASSIST, this function generates an artificial luminance map of the input signal that can be useful to identify over exposed areas (exposure).
- Page 19 IMD CONFIG Menu The IMD CONFIG menu items are used to adjust the parameters defined for IMD display, the menu items are as shown in following figure: IMD Display: Set whether to display IMD Characters on screen. IMD Protocol: Select an IMD protocol IMD Char: Set the IMD characters, only available in Local IMD protocol IMD Color: Set the IMD character color Monitor ID: Set the ID number for each monitor...
-
Page 20: Specification
Specification LCD Performance Dimension 15.6 inches Dimension(W x H x D mm) 383.0×242.3 ×68.4mm Pixel Pitch(W x H mm) 0.179×0.179 Aspect Ratio 16:9 Display Area(W x H mm) 344.16×193.59mm Viewing Angle(H x V) 178°/178° Color Depth 1.073G colors Resolution 1920×1080 Contrast(Typ.) 700:1 Luminance(cd/m2) -
Page 21: Trouble-Shooting
Trouble-shooting Symptom Possible Causes Solution Please check if the power is connected, and then The power is not turned on press ” POWER” button to turn on the monitor Unstable power voltage Reconnect to power supply BNC or HDMI cable loose Check and correctly connect the BNC or HDMI cable contact or not correctly No display...
Need help?
Do you have a question about the FM-16B and is the answer not in the manual?
Questions and answers