
Related Manuals for SWIT BM-215NDI


Summary of Contents for SWIT BM-215NDI
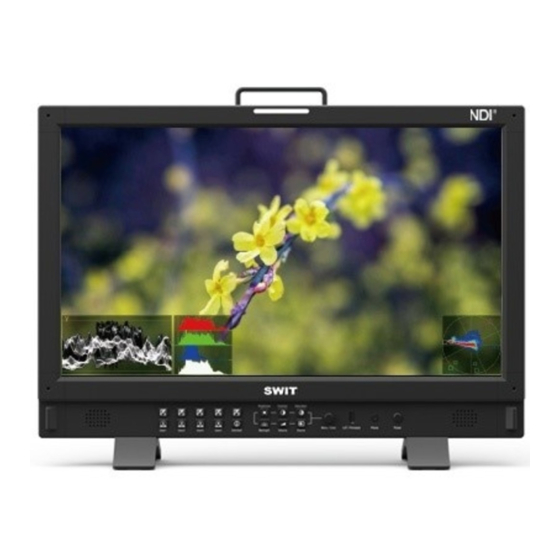
- Page 1 SWIT ELECTRONICS CO., LTD. BM-NDI 4K Studio LCD Monitor Model: BM-215NDI、 245NDI User Manual Thank you for choosing SWIT products, please read this user manual seriously before using. Ver: A...
-
Page 2: Statement
All the brand and trademark in this product are protected by law,all other company’ s brand and trademark in this product are protected by their owner’ s law. In order to better service majority users,SWIT products will keep improving and developing,SWIT keep the right to revise and improve this user manual without previous notice. -
Page 3: Attention
Attention Warning 1. Do not put the monitor in rainy or wet environment to avoid the dangerous of fire or electric shock; 2. Do not put the monitor close to any device with high-intensity magnetic. Warning of power connection 1. Please using original power adaptor to avoid damage; 2. -
Page 4: Table Of Contents
Table of contents Statement Attention Table of contents Packing list Product feature Instruction Front panel view Back side view Status Operation The menu content Dimension Specification Troubleshoot Packing list Quantities Standard accessories Monitor Battery plate ( V-mount or Gold-mount) Monitor stand Power cable Overview The resolution of BM-NDI series LCD monitor is up to 1920*1080, H178°/ V178°... -
Page 5: Instruction
Instruction ·Front panel view (11) (8) (9) (10) (5)(6) (1) Tally light: Can be set to red, green and yellow; (2) Speaker: Can play embedded audio of HDMI、 SDI and NDI. (Speaker will not work when earphone is connecting) ; (3)... - Page 6 Brightness: Brightness control,Range:-100~100, Default value:0 Contrast: Contrast control,Range:-100~100, Default value: 0 Brightness Contrast Saturation Saturation: Saturation control,Range:-100~100, Default value:0 Backlight: Backlight control,Range:0~100, Default Backlight Volume Source value:16 Volume: Volume control,Range:0~100, Default value:36 Source: Input signal source selection Press “Brightness” 、 ” Contrast” 、 ” Saturation、 Backlight” 、 ” Volume” on the front panel to choose corresponding functions,turn “MENU”...
-
Page 7: Back Side View
(4) NDI IN: 12G /3G-SDI (5) HDMI 2.0 IN: The DHCP protected content is not displayed (6) Reset: Formatting button Instruction (Do not do this without SWIT permission) : 1. Switch off monitor; 2. Touch and keep pressing the small button with suitable tool (Do not release it when switch on monitor)... -
Page 8: Osd
·OSD TC 00:15:13:07 CAMERA in phase ⑴ Time code ( SDI) Display the information of time code which is embedded in SDI signal (LTC, VITC1&2) , moni- tor will show “TC:UNLOCKED” if no time code information is detected.User can set shortcut key (... -
Page 9: Status
be set in MENU. ⑻ Histogram User can switch on/off “Histogram” function by setting shortcut key(F1~F5) or GPI pin to “Histogram” function on the front panel. Status Main Menu Status Exit&Status > Format Input > Channel Picture > Color Temp Color Management >... -
Page 10: Operation
Operation Steps 1、 Press “Menu/Enter” knob, the menu will show on top left corner of screen. 2、 Turn “Menu/Enter” left and right to choose different sub-menu,the chosen one will show yellow backlight,press “ Menu/Enter” knob to set the corresponding parameter. 3、... - Page 11 *1 Picture The value of “Contrast” , “Brightness” , “Saturation” , “ Sharpness” and “Backlight” can be quickly adjusted by the shortcut key on the front panel. Ⅲ、 Color management—Set the color of input video Menu option Instruction The range of value Color Gamut *1 Set the Color Gamut LCD Panel,...
- Page 12 Ⅳ、 Control Menu option Instruction Selection F1*1 Time Code, Color Temp,Waveform, Waveform type,Single line waveform, Marker,Blue only,Audio Bar,Zebra,Vector, Set the function of shortcut key Histogram,Odd/Even Frame,Lissajous pattern,Focus assist,False color ,H/V delay *1F1~F5 Now only support “Waveform,Vector,Audio Bar,Blue only,Marker” . Ⅴ、 Assist Menu option Instruction Selection...
- Page 13 *1 WFM Single line Switch on “WFM Single line” function,Monitor only show one line waveform of video.Turn “Menu/Enter” knob left and right to choose the number of waveform lines.。 ( The selected range of waveform lines depends on the current signal format.) WFM Single Line:OFF WFM Single Line:ON *2 Horizontal/Vertical...
- Page 14 Type 1 Type 2 Audio alarm information 1 2 3 4 5 6 7 8 910111213141516 R -13DB 02CH L -32DB 01CH *2. H/V Delay Left Channel:1 Green Right Channel:2 Red H/V Delay is not displayed on HDMI channel. Ⅶ、 Auto Calibration Menu option Instruction Selection...
- Page 15 Auto Calibration Please make sure the monitor is in dark room,and the sensor probe is put in the center marker and close to the screen. Auto Calibration Please make sure the monitor is in Select MENU to start! dark room,and the sensor probe is put in the center marker and close to the screen.
- Page 16 Ⅷ、 System Menu option Instruction Selection OFF,Lock All,Lock Rotary Knobs, Key Lock *1 Set key lock function Lock Key Buttons Recall Profile *2 Select current Mode Factory, USER1~USER4 Save Profile Save current setting to one of USER setting USER1~USER4 Green Mode Black Bcklight,Grey Backlight Set the display mode of Green Mode Idle Duration...
- Page 17 *2 Recall Profile/Save Profile Monitor supply 4 User setting,User can save current setting according to demand and habit to (USER1~USER4).After that,user only need to select “USER1~USER4” to show corresponding menu setting. For example: Adjust “Color Temp” to 2200K, switch on assist function such as “Histogram” , set function key such as F1 to “Only Blue”...
-
Page 18: Dimension
UPDATE ※Caution 1、 Make sure only one firmware is copied to the root of USB Do you want to update now? driver one time. Select MENU to start ! 2、 Do not cut off the power when doing update. MENU:OK INFO:Quit Ⅸ、... -
Page 19: Specification
580.9 BM-245-NDI Specification LCD Performance Model BM-215-NDI BM-245-NDI Size 21.5 23.8 Display area 495.6×292.2mm 543.0×316.72mm Resolution 1920*1080 1920*1080 Display color 16.7M 16.7M Display ratio 16:9 16:9 Brightness Contrast 3000:1 3000:1 Viewing angle H/ V: 178°/ 178° H/ V: 178°/ 178° Input /Output BNC×2 3G/HD/SD-SDI×2... - Page 20 Supported format: Below signal format can be displayed on the monitor Input terminal Signal format shown in the Status Display as Format SDI1/2 HDMI HDMI 720*480I60 — 720×480/60I — √ — — 720×480/60P 720*480P60 — 720×480/60P √ √ — 720×576/50I 720×576/50I —...
- Page 21 Input terminal Signal format shown in the Status Display as Format SDI1/2 HDMI HDMI 2048×1080/59.94P 2048×1080/59.94P 2048*1080P60 √ √ — — 2048×1080/60P 2048×1080/60P 2048*1080P60 √ √ — — 3840×2160/23.98P 3840*2160P24 √ √ — — 3840*2160P23.98 3840×2160/24P 3840*2160P24 √ √ — —...
-
Page 22: Troubleshoot
Technological Development Zone, Nanjing 210038, P.R.China Tel: +86-25-85805753 Email: contact@swit.cc SWIT Electronics Europe GmbH Add: Hochstr. 17, 47228 Duisburg, Germany Tel: +49(0)20659799339 Email: info@swit-europe.com SWIT Electronics America, Inc Add: 3350 Scott Boulevard 61-02, Santa Clara, CA 95054, USA Tel: (408)260-8258, 1-866-986-SWIT(7948) Email: info@swit.us...
Need help?
Do you have a question about the BM-215NDI and is the answer not in the manual?
Questions and answers