Table of Contents
Advertisement
Quick Links
ServReach
KVMultiport KVMoIP
™
Extends your keyboard, mouse, and video monitor
signals over an IP network to provide full access to
as many as 16 target servers.
Can be managed with the KVManager or work
as a standalone KVM-over-IP switch.
Order toll-free in the U.S.: Call 877-877-BBOX (outside U.S. call 724-746-5500)
Customer
FREE technical support 24 hours a day, 7 days a week: Call 724-746-5500 or fax 724-746-0746
Support
Mailing address: Black Box Corporation, 1000 Park Drive, Lawrence, PA 15055-1018
Information
Web site: www.blackbox.com • E-mail: info@blackbox.com
BLACK BOX
KVIP1016A
®
Advertisement
Table of Contents
Troubleshooting

Subscribe to Our Youtube Channel
Related Manuals for Black Box ServReach KVMultiport KVMoIP


Summary of Contents for Black Box ServReach KVMultiport KVMoIP
- Page 1 Order toll-free in the U.S.: Call 877-877-BBOX (outside U.S. call 724-746-5500) Customer FREE technical support 24 hours a day, 7 days a week: Call 724-746-5500 or fax 724-746-0746 Support Mailing address: Black Box Corporation, 1000 Park Drive, Lawrence, PA 15055-1018 Information Web site: www.blackbox.com • E-mail: info@blackbox.com...
- Page 2 Trademarks Used in This Manual Trademarks Used in This Manual Black Box and the Double Diamond logo are registered trademarks, and ServReach and ServSwitch are trademarks, of BB Technologies, Inc. Mac is a registered trademark of Apple, Inc. Open VMS is a trademark of Digital Equipment Corporation.
- Page 3 FCC and IC RFI Statements/RoHS/WEEE Federal Communications Commission and Industry Canada Radio Frequency Interference Statements This equipment generates, uses, and can radiate radio-frequency energy, and if not installed and used properly, that is, in strict accordance with the manufacturer’s instructions, may cause inter ference to radio communication. It has been tested and found to comply with the limits for a Class A computing device in accordance with the specifications in Subpart B of Part 15 of FCC rules, which are designed to provide reasonable protection against such interference when the equipment is operated in a commercial environment.
- Page 4 NOM Statement Instrucciones de Seguridad (Normas Oficiales Mexicanas Electrical Safety Statement) 1. Todas las instrucciones de seguridad y operación deberán ser leídas antes de que el aparato eléctrico sea operado. 2. Las instrucciones de seguridad y operación deberán ser guardadas para referencia futura. 3.
-
Page 5: Table Of Contents
Compatibility ................................9 Terminology ................................10 Hardware Description .............................10 Pre-Installation Guidelines ..............................12 Avoiding General Rackmounting Problems ......................12 Rackmounting the ServReach KVMultiport KVMoIP ....................12 Connecting the System ..............................14 The Server Access Modules (SAMs) ........................14 4.1.1 Connecting a SAM PS/2 ........................15 4.1.2... - Page 6 20.10 The OSD Help Window—F1 ...........................52 20.11 Scanning Computers—F4 ............................52 20.12 Tuning—F5 ................................52 20.13 Moving the Label—F6 ............................53 20.14 DDC—F10 ................................53 Upgrading the ServReach KVMultiport KVMoIP Firmware ....................54 21.1 Obtaining the Update Software and Latest Firmware.....................54 21.2 System Requirements for the Update Software ......................54 21.3...
- Page 7 Table of Contents 21.7.1 ServReach KVMultiport KVMoIP Switch Version ...................56 21.7.2 SAM Version ............................57 21.8 Obtaining New Firmware ............................58 21.9 Restoring Factory Settings ............................58 Update Software—Troubleshooting...........................59 22.1 Communication Error Message ..........................59 22.2 Electricity Failure ..............................59 Video Resolution and Refresh Rates ...........................60 Appendix: SNMP Events Table ..............................61...
-
Page 8: Specifications
Chapter 1: Specifications 1. Specifications Compatibility — All 32-bit operating systems Distance (Maximum) — To servers: 33 ft. (10 m) CE Approval — Yes Operating Systems — Target server: DOS, Windows , Novell , Linux , Sun Solaris for PC; ®... -
Page 9: Overview
IP user can access and control 16 multi-platform (PS/2, Sun, USB) servers. The ServReach KVMultiport KVMoIP is based on ROC technology in which each computer/ server is directly connected to the switch via ROC dongles using only standard CAT5 cable at a distance of up to 100 feet (30.4 m) in a star configuration. It has 16 server ports. -
Page 10: Terminology
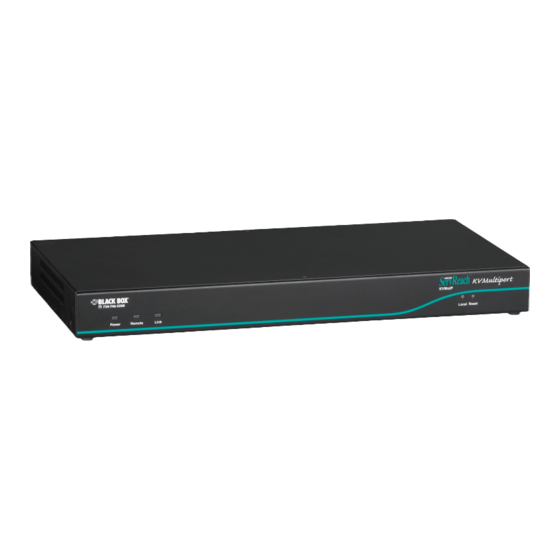
The PC running a remote ServReach KVMultiport KVMoIP session. Remote session The process of remotely accessing and controlling target servers connected to the ServReach KVMultiport KVMoIP from a user workstation. 2.6 Hardware Description Figures 2-1 and 2-2 illustrate the front and back panels of the ServReach KVMultiport KVMoIP. Table 2-2 describes their components. - Page 11 When you press this button, the ServReach KVMultiport KVMoIP disconnects the Client remote Local button session, and the local mouse and keyboard become operational. The Remote LED turns off. Press and hold this button for more than seven seconds to reset the ServReach KVMultiport KVMoIP Reset button unit.
-
Page 12: Pre-Installation Guidelines
• Place the ServReach KVMultiport KVMoIP on a flat, clean, and dry surface. • The ServReach KVMultiport KVMoIP is not intended for connection to exposed outdoor lines. • Make sure that the maximum distance between each computer and the ServReach KVMultiport KVMoIP does not exceed 33 feet (10 m). - Page 13 Place the brackets towards the front of the unit so that the unit can be mounted front facing, or place the brackets towards the rear of the unit so that the unit can be mounted rear facing. Figure 3-2 illustrates the bracket connected for rear facing. Screw the bracket to the ServReach KVMultiport KVMoIP using the screws provided. Rear of unit...
-
Page 14: Connecting The System
Chapter 4: Connecting the System 4. Connecting the System Figure 4-1 illustrates the ServReach KVMultiport KVMoIP system overview. To LAN port Server access modules (SAMs) User over IP Figure 4-1. ServReach KVMultiport system overview. 4.1 The Server Access Modules (SAMs) Each computer/server is directly connected to the ServReach KVMultiport via the appropriate Server Access Module using CAT5 cable in a star configuration. -
Page 15: Connecting A Sam Ps/2
Chapter 4: Connecting the System To computer’s video card To computer’s USB port Figure 4-3. SAM USB (Sun). 4.1.1 Connecting a SAM PS/2 The connections for SAM PS/2 are exactly the same. Figure 4-4 illustrates the SAM PS/2. You can connect the SAM PS/2 to a powered-on computer, but it must be in the following order: 1. -
Page 16: Connecting A Sam Sun
Chapter 4: Connecting the System 2. Connect the USB connector to the computer’s USB port. To Video Card To USB port SAM USB CAT5 cable to ServReach KVMultiport Server port Figure 4-5. SAM USB. 4.1.3 Connecting a SAM Sun Figure 4-6 illustrates the SAM Sun and its connections. To connect the SAM Sun: 1. -
Page 17: Connecting The Cat5 Cables
Chapter 4: Connecting the System 4.3 Connecting the CAT5 Cables 1. Connect one connector to the SAM’s RJ-45 port. 2. Connect the other connector to one of the ServReach KVMultiport Computer ports. 3. Follow the above two steps for each computer. 4.4 Connecting a KVM Console To operate the system locally, connect a KVM console to the ServReach KVMultiport: 1. -
Page 18: Initial Settings-Default Ip Address
Chapter 5: Initial Settings—Default IP Address 5. Initial Settings—Default IP Address The following sections provide instructions for setting the IP address for the ServReach KVMultiport unit. See Figure 5-1 for an overview of the boot-up process. By default, ServReach KVMultiport boots with an automatically assigned IP address from a Dynamic Host Configuration Protocol (DHCP) server on the network. - Page 19 Chapter 5: Initial Settings—Default IP Address Static IP Addresses for a Number of Units When you want to connect more than one ServReach KVMultiport to the same network and there is no DHCP server, or you want to use static IP addresses, connect the ServReach KVMultiport units one at a time and change the static IP address of each unit before connecting the next unit.
-
Page 20: Logging Into The Web Interface
Chapter 6: Logging into the Web Interface 6. Logging into the Web Interface Client computer operating system—Windows 2000 or higher, with Firefox 3 or Internet Explorer 6.0 or later version; Linux with Firefox 3. Complete the initial setup via the Web configuration interface: 1. - Page 21 Chapter 6: Logging into the Web Interface Figure 6-2. ServReach KVMultiport IP Web interface. SSL Certificate Notes When first connecting to the ServReach KVMultiport https configuration page, two browser security warnings appear. Click “Yes” to proceed. The first warning disappears upon the first ServReach KVMultiport IP client installation, when the root certificate is installed. Page 21...
-
Page 22: Network > Configuration
Chapter 7: Network > Configuration 7. Network > Configuration Consult your Network Administrator for the network settings. Device name—Type a name for the ServReach KVMultiport. Default device name consists of the letter “D” followed by the 6-digit device number (D.N.) found on the silver label on the underside of the ServReach KVMultiport IP dialog box. If the DHCP server is published in the DNS server, you may connect to the ServReach KVMultiport IP using the device name, as follows: https://DeviceName TCP Port—Choose any TCP Port from port #800 to 65535. -
Page 23: Network > Snmp Settings
Chapter 8: Network > SNMP Settings 8. Network > SNMP Settings From the menu, click “SNMP settings.” The following appears: Figure 8-1. SNMP Settings window. From this page you can activate or deactivate SNMP logging. Enable traps—Check to enable sending SNMP traps of ServReach KVMultiport IP events and operation. Community—Type the SNMP community. -
Page 24: Administration > User Settings
Chapter 9: Administration > User Settings 9. Administration > User Settings From the menu, click “User Settings” and Figure 9-1 appears. Figure 9-1. User Settings window. On this page, an Administrator creates and edits users. By default, the user name is: “admin” and the password is “access” (both lower case). -
Page 25: Editing A User
Chapter 9: Administration > User Settings NOTE: The following “special” characters: &, <, >, ” cannot be used for either the user name or password. Depending on the security level chosen, the user name and password parameters are different. See Chapter 12. 2. -
Page 26: Administration > Switch Configuration
Install switch definition file If Black Box Technical Support updates the Switch Definition file, the file will be available at the Black Box web site (www.blackbox.com) under the product name. 1. Download the file onto the Client computer and unzip it. -
Page 27: Administration > User Targets
Chapter 11: Administration > User Targets 11. Administration > User Targets By default, access is allowed to all servers for all user types. You may define the access rights of each user separately. To do so: 1. From the menu, click “User Targets.” The User Targets Configuration window will appear. 2. -
Page 28: Security > Settings
Chapter 12: Security Settings 12. Security > Settings Configure the security features, such as Account Blocking, Password Policy, and Idle Timeout, as explained below. From the Security section, click “Settings” and the Security Settings appear. See Figure 12-1. Figure 12-1. Security Settings window. The Security Settings fields include: Account Blocking—decide on the number of attempts to login with a wrong username or password after which there is a time lock or a total block. -
Page 29: Security > Ssl Certificate
Chapter 13: Security > SSL Certificate 13. Security > SSL Certificate You can install an SSL certificate. To do so: From the menu, select “SSL Certificate.” The install SSL Certificate page appears (see Figure 13-1). Figure 13-1. Install SSL Certificate page. Certificate File—Browse to locate the “cer”... -
Page 30: Maintenance > Firmware Upgrade
Upgrade the ServReach KVMultiport firmware to take advantage of new features. Download the firmware from the Black Box Web site product page. Save the firmware file on the Client computer. From the menu select “Firmware Upgrade.” The Firmware Upgrade window appears showing the current firmware version. -
Page 31: Restore Factory Settings
Chapter 15: Restore Factory Settings 15. Restore Factory Settings You can restore the ServReach KVMultiport unit KVM/IP portion to the factory settings. This restores the original ServReach KVMultiport IP parameters, resetting all the information added by the administrators, including: Network settings*, Servers, Switches, Users, Passwords etc. (The OSD preserves the server names and other settings. -
Page 32: Saving Changes And Logging Out
Chapter 16: Saving Changes and Logging Out 16. Saving Changes and Logging Out To save any configuration changes and restart the ServReach KVMultiport, click on the “Save and Restart” button. You must press after making changes to the following pages: •... -
Page 33: Starting A Remote Session
Figure 17-1. Login page. On first connection, install the Black Box certificate and ActiveX control. You must log in as an Administrator to your computer to install the ActiveX control. Once the ActiveX control is installed, all types of users can log in. -
Page 34: Sharing A Remote Session
Chapter 17: Starting a Remote Session On the remote console, you have the following: Server Confirmation label—This confirms the identity of the current server accessed and disappears by default after 30 seconds, (this period can be adjusted in the OSD). It appears again when switching to a different server. The currently accessed server iden- tity can be checked any time by looking at the server name on the Internet Explorer title bar. -
Page 35: Full-Screen Mode
Chapter 17: Starting a Remote Session You have the following options: Local Mouse Pointer—You can change the Client computer mouse pointer to appear as a dot or to not appear at all. Default is a regular shaped mouse cursor. Auto Hide—Check this option to hide the Toolbar from the next connection onwards. Full Screen—Check this option to make the remote session screen appear in full-screen mode from the next connection onwards. -
Page 36: Adjusting The Video Settings
Chapter 17: Starting a Remote Session Performance mode You can choose fixed or adaptive—these are explained below. Fixed mode Fixed mode allows you to select the high, medium, or low bandwidth option. For example, in a LAN environment, it is best to set the bandwidth setting on High. -
Page 37: Power Cycle
Chapter 17: Starting a Remote Session Figure 17-6. Manual Video Adjustments controls. Brightness/Contrast—Use the scales to adjust the brightness and contrast of the displayed image. Move the sliders to change the displayed image. Click in the area of the sliders for fine-tuning. For the following controls, choose the appropriate measurement: H. - Page 38 Chapter 17: Starting a Remote Session To add a keyboard sequence: Click “Add/Remove.” The Special Key Manager dialog box appears (see Figure 17-7). Figure 17-7. Special Key Manager dialog box. To add a predefined sequence: 1. Click “Add Predefined.” A list of sequences appears. 2.
-
Page 39: Synchronizing Mouse Pointers
Chapter 17: Starting a Remote Session Figure 17-8. Macro dialog box. 2. Give the key sequence a name in the Label field. 3. Click “Start Recording.” 4. Press the desired keys. The keys appear in the area provided. 5. Click “Stop Recording.” 6. -
Page 40: Calibrating Mice Pointers
Chapter 17: Starting a Remote Session To align the mouse pointers: From the Toolbar click Align. The mice will align. 17.10.2 Calibrating Mice Pointers A target server may have a different mouse pointer speed than the client computer. Calibrating automatically discovers the mouse speed of the target server and aligns the two pointers. -
Page 41: Switching To A Different Server/Device
Chapter 17: Starting a Remote Session 1. From the drop-down menu, select the target’s operating system. Instructions and sliders appear. 2. Follow the instructions and set any relevant sliders to the same values as set in the target’s Mouse Properties window. 3. -
Page 42: Troubleshooting-Safe Mode
Chapter 18: Troubleshooting—Safe Mode 18. Troubleshooting—Safe Mode From Safe mode you can: Restore factory defaults—When you cannot access the system—for example, you have forgotten the user name or password— restore factory defaults from Safe mode. (Chapter 15 explains how to restore factory settings from the Web interface). Restore the device firmware—If during a firmware update there is a power failure and you can no longer access the system, you can restore the device firmware from Safe mode. -
Page 43: Restoring Factory Defaults
Chapter 18: Troubleshooting—Safe Mode 4. Type username: “admin”; password: “SAFEmode.” NOTE: The password is case-sensitive, and the username and password only work in Safe mode). A menu appears (see Figure 18-2). Figure 18-2. Safe Mode menu. 18.2 Restoring Factory Defaults To restore factory defaults: 1. -
Page 44: Restoring The Device Firmware
18.3 Restoring the Device Firmware Contact Black Box Technical Support at 724-746-5500 or info@blackbox.com to receive the upgrade firmware required to restore the device firmware. Save the upgrade firmware on the hard disk of a computer connected to the network. -
Page 45: Switching Between Computers
Chapter 19: Switching Between Computers 19. Switching Between Computers Switch between the connected computers by either: • Keyboard hotkeys • The OSD (on-screen display) The keyboard hotkeys: To switch to the next computer forwards press “Shift” then “+.” (Release “Shift,” before pressing “+.”) To switch to the next computer backwards press “Shift”... -
Page 46: The Osd
Chapter 20: The OSD 20. The OSD To display the OSD: 1. Make sure there is no remote user connected. To disconnect the remote user, press the “Local” button on the ServReach KVMultiport. 2. Press “Shift” twice. The OSD main window appears. See Figure 20-1. Lines with yellow text show active computers. Lines with blue text show inactive computers. -
Page 47: The Osd Settings-F2
Chapter 20: The OSD 20.3 The OSD Settings—F2 Press “F2.” The OSD Settings window appears see Figure 20-2. Figure 20-2. Settings window. NOTE: When the OSD is password protected, only the administrator has access to the F2 settings window. The General Settings With the red line on the word “GENERAL,”... - Page 48 Chapter 20: The OSD Security The OSD comes with an advanced password security system that contains three different security levels. Each security level has different access rights to the system. These levels are as follows: 1. Administrator (Status A): The Administrator can: •...
-
Page 49: F7 Defaults
Chapter 20: The OSD 1. Navigate to the Autoskip line. 2. Toggle between the options using the space bar. Serial Port This option is disabled in ServReach KVMultiport. Leave this option on (its default setting is “ON”). Changing the Keyboard Language The keyboard is preset to U.S. -
Page 50: The Time Settings
Chapter 20: The OSD By default, the keyboard mode is set to PS which is suitable for Intel based computers and UNIX servers connected to USB ® SAMs. For systems with UNIX servers connected to PS/2 SAMs, set the KB column as follows: •... -
Page 51: Users
Chapter 20: The OSD 20.8 Users In the Settings window, navigate to the Users line and press “Enter.” NOTE: Users is only enabled if the security status is set to On. The Users Settings window appears (see Figure 20-6). Figure 20-6. Users Settings window. There are three different access levels. -
Page 52: The Osd Help Window-F1
Chapter 20: The OSD 2. Type a new user name/password. User authentication is done solely via the password; there is no security significance to the names. By default, the User Profile settings are full access. 20.10 The OSD Help Window—F1 To access the Help window, press “F1.”... -
Page 53: Moving The Label-F6
Chapter 20: The OSD 20.13 Moving the Label—F6 Position the Confirmation label anywhere on the screen. To position the label, from the Main window: 1. Navigate to the desired computer using the “Up” and “Down” arrow keys. 2. Press “F6.” The selected screen image and Identification label will appear. 3. -
Page 54: Upgrading The Servreach Kvmultiport Kvmoip Firmware
Chapter 21: Upgrading the ServReach KVMultiport Firmware 21. Upgrading the ServReach KVMultiport Firmware With the ServReach KVMultiport Switch Update software, you can upgrade the firmware for the: • Switch processors • SAMs The “Update” software enables you to add new features and fix bugs in a quick and efficient manner. You can also return the OSD to the factory default settings via the Update software. -
Page 55: Installing The Software
Chapter 21: Upgrading the ServReach KVMultiport Firmware To Flash connector RS-232 download cable Update software installed here SAMs to servers Figure 21-1. Setup for firmware upgrades. 21.5 Installing the Software To install the Update software: 1. Download the software from the product page at www.blackbox.com. 2. -
Page 56: Verifying The Version Numbers
Chapter 21: Upgrading the ServReach KVMultiport Firmware 2. To change the COM Port from the Options menu, choose COM Port. The COM Port Dialog box appears. See Figure 21-3. Figure 21-3. COM Port Dialog box. 3. Choose the COM Port the RS-232 Serial cable is connected to and click “OK.” 21.7 Verifying the Version Numbers Before upgrading the firmware, you must first verify which firmware and hardware versions you have. -
Page 57: Sam Version
Chapter 21: Upgrading the ServReach KVMultiport Firmware Table 21-1 explains the functions of the buttons and dialog boxes in the Update window. Table 21-1. Buttons and boxes on the KVMultiport Switch Update window. Selects all SAMs Unselects selected SAMs Starts firmware download Displays the firmware version numbers Displays the hardware version numbers Cancels selected function... -
Page 58: Obtaining New Firmware
Chapter 21: Upgrading the ServReach KVMultiport Firmware 21.8 Obtaining New Firmware Download the latest firmware for your system from the Black Box Web site product page. Updating the Firmware WARNING: Never switch off any computer connected to the ServReach KVMultiport IP system during the updating process. -
Page 59: Update Software-Troubleshooting
Chapter 22: Update Software—Troubleshooting 22. Update Software—Troubleshooting This section covers: • Communication Error message • Electricity failure 22.1 Communication Error Message When updating a unit and a “Communication Error” message appears, do the following: 1. Check that the RS-232 DB9 —> RJ-45 connector is connected to the switch’s Flash port. 2. -
Page 60: Video Resolution And Refresh Rates
Chapter 23: Video Resolution and Refresh Rates 23. Video Resolution and Refresh Rates Table 23-1. Video resolution and refresh rates. 640 x 480 720 x 400 800 x 600 1024 x 768 1152 x 864 1152 x 900 1280 x 720 1280 x 768 1280 x 960 1280 x 1024... -
Page 61: Appendix: Snmp Events Table
Device internal hardware failure. Try disconnecting any other attached device and reboot. If the problem persists, contact “Hardware failure” 1200 Black Box Technical Support at 724-746-5500 or info@blackbox.com. “Hard reset power 1220 Power cycle command issued. Thsi is only relevant when a special power-cycle product is attached to the device. - Page 62 Appendix: SNMP Events Table Table A-1 (Continued). Events recorded. Event Test Code Comment “DHCP server setting 2060 DHCP server seting has been changed. CONF_DHCP_CHANGED has been changed” “Network IP address 2070 Network IP address has been changed. CONF_IP_CHANGED changed” “Network subnet mask 2080 Network subnet mask has been changed.
- Page 63 NOTES Page 63...
- Page 64 About Black Box Black Box provides an extensive range of networking and infrastructure products. You’ll find everything from cabinets and racks and power and surge protection products to media converters and Ethernet switches all supported by free, live 24/7 Tech support available in 30 seconds or less.
Need help?
Do you have a question about the ServReach KVMultiport KVMoIP and is the answer not in the manual?
Questions and answers