Black Box ServSwitch Manual
Ec series
Hide thumbs
Also See for ServSwitch:
- Manual (173 pages) ,
- User manual (115 pages) ,
- Installing and operating information (2 pages)
Table of Contents
Advertisement
Quick Links
ServSwitch
™
Manage and control up to 16 DVI
and USB servers from your desktop.
Order toll-free in the U.S.: Call 877-877-BBOX (outside U.S. call 724-746-5500)
Customer
FREE technical support 24 hours a day, 7 days a week: Call 724-746-5500 or fax
Support
724-746-0746 • Mailing address: Black Box Corporation, 1000 Park Drive, Lawrence,
Information
PA 15055-1018 • Web site: www.blackbox.com • E-mail: info@blackbox.com
EC Series Single-Head DVI USB, 16-Port
KV9516A
Advertisement
Table of Contents

Related Manuals for Black Box ServSwitch


Summary of Contents for Black Box ServSwitch
- Page 1 Order toll-free in the U.S.: Call 877-877-BBOX (outside U.S. call 724-746-5500) Customer FREE technical support 24 hours a day, 7 days a week: Call 724-746-5500 or fax Support 724-746-0746 • Mailing address: Black Box Corporation, 1000 Park Drive, Lawrence, Information PA 15055-1018 • Web site: www.blackbox.com • E-mail: info@blackbox.com...
- Page 2 FCC and IC RFI Statements FEDERAL COMMUNICATIONS COMMISSION AND INDUSTRY CANADA RADIO FREQUENCY INTERFERENCE STATEMENTS This equipment generates, uses, and can radiate radio-frequency energy, and if not installed and used properly, that is, in strict accordance with the manufacturer’s instructions, may cause inter ference to radio communication. It has been tested and found to comply with the limits for a Class A computing device in accordance with the specifications in Subpart B of Part 15 of FCC rules, which are designed to provide reasonable protection against such interference...
- Page 3 NOM Statement 4. Todas las instrucciones de operación y uso deben ser seguidas. 5. El aparato eléctrico no deberá ser usado cerca del agua—por ejemplo, cerca de la tina de baño, lavabo, sótano mojado o cerca de una alberca, etc. 6.
- Page 4 NOM Statement 16. El cable de corriente deberá ser desconectado del cuando el equipo no sea usado por un largo periodo de tiempo. 17. Cuidado debe ser tomado de tal manera que objectos liquidos no sean derramados sobre la cubierta u orificios de ventilación. 18.
- Page 5 Trademarks Used in this Manual Trademarks Used in this Manual Black Box and the Double Diamond logo are registered trademarks, and ServSwitch is a trademark, of BB Technologies, Inc. Macintosh and Mac are registered trademarks of Apple, Inc. Windows and Windows Vista are registered trademarks of Microsoft Corporation.
-
Page 6: Table Of Contents
..................14 Push Buttons ...................14 4.1.1 K/M Reset ................14 4.1.2 Autoscan ................14 LED Indicators .................14 OSD (On-Screen Display) ..............15 Hotkey Commands .................21 Appendix. Troubleshooting ................24 Problems/Causes/Solutions .............24 Contacting Black Box ..............28 Shipping and Packaging ..............28 Page 6 724-746-5500 | blackbox.com KV9516A... -
Page 7: Specifications
Chapter 1: Specifications 1. Specifications Automatic Scan Interval — 3, 8, 15, and 30 seconds Cable Length (Maximum) — At console: 15 ft. (4.5 m); At PC ports for USB server: 15 ft. (4.5 m) Hotkey Control — Yes Hot Plug and Play — Yes On-Screen Display —... -
Page 8: Overview
2. Overview 2.1 Introduction The ServSwitch EC Series Single-Head DVI USB, 16-Port enables a single user to access and control up to 16 DVI computers from a high-definition console. It uses one DVI and/or one VGA monitor, a USB keyboard, and a USB mouse. -
Page 9: System Requirements
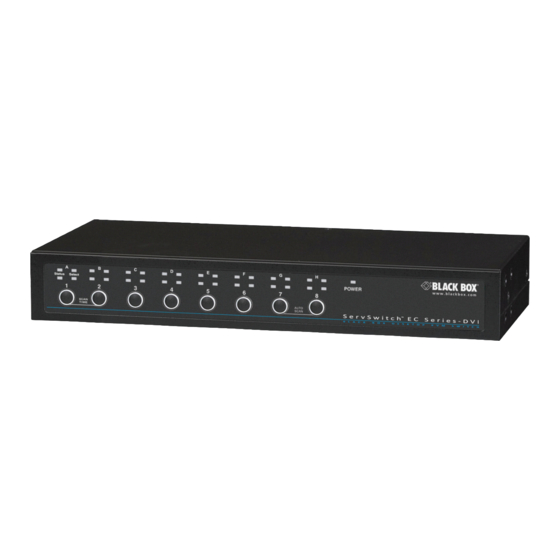
Each computer must be connected to the unit by: • (1) USB cable and (1) DVI cable • (1) ServSwitch cable with DVI and USB (EHN900024U) 2.5 Hardware Description Figures 2-1 and 2-2 illustrate the front and back panels of the KV9516A. Table 2-1 describes its components. - Page 10 Chapter 2: Overview Figure 2-2. KV9516A back panel. Table 2-1. KV9516A front and back panel components. Number Component Description LEDs light when the connected computer is CPU Status LEDs powered on. Port selection buttons Press buttons 1–8 individually to select a computer. CPU Select LEDs LEDs light when the connected computer is selected.
-
Page 11: Configuration
Chapter 2: Overview 2.6 Configuration Figure 2-3 shows a single KVM switch configuration. USB A-B Figure 2-3. Single KVM switch configuraton. Page 11 KV9516A 724-746-5500 | blackbox.com... -
Page 12: Installation
Chapter 3: Installation 3. Installation Before installation, power off all devices that will be connected to this system. • Make sure that all devices you will connect are properly grounded. • Place cables away from fluorescent lights, air conditioners, and machines that are likely to generate electrical noise. - Page 13 Chapter 3: Installation NOTE: The connectors are physically DVI-I, but they only support digital video signals. 2. Use a USB A–B cable to connect the unit’s USB port (B connector, square connector) and the USB port on the corresponding computer (A connector, flat connector).
-
Page 14: Operation
Chapter 4: Operation 4. Operation Figure 4-1 shows the push buttons and LED indicators on the switch’s front panel. Figure 4-1. Front panel. NOTE: You can select a computer by pressing the push button directly, by issuing hotkey commands, or by activating the OSD window. 4.1 Push Buttons NOTE: Ports 1–8 represent the lower 8 ports and Ports A-H are the higher 8 ports. -
Page 15: Osd (On-Screen Display)
Chapter 4: Operation 4.3 On-Screen Display (OSD) Figure 4-2. OSD screen. To bring up the hotkey menu if it is enabled: Press Left-Ctrl + Left-Ctrl within two seconds. Page 15 KV9516A 724-746-5500 | blackbox.com... - Page 16 Chapter 4: Operation Press Left-Ctrl + Left-Ctrl + Left-Ctrl within two seconds to display a KVM Menu screen showing a list of the computers with corresponding port numbers, names, and statuses. See Figure 4-2 above. The port number of the currently selected computer is displayed in red, same as the front indicator, at the upper-right corner of the OSD menu.
- Page 17 Chapter 4: Operation Function key F1: Use this key to edit the name entry of a computer with up to 14 characters. First, highlight a port and then press F1 and enter the computer name. Valid characters are A–Z, 0–9, and the dash (-) character. Lowercase letters are converted to uppercase ones.
- Page 18 Chapter 4: Operation Figure 4-4. KVM menu. Auto Scan: In this mode, the KVM switch automatically switches from one powered-on computer to the next sequentially in a fixed interval. During Auto Scan mode, the OSD displays the name of the selected computer. When Auto Scan detects any keyboard or mouse activity, it suspends the scanning until activity stops.
- Page 19 Chapter 4: Operation Scan Rate: Sets the duration of a computer displayed in Auto Scan mode. The options are 3 seconds, 8 seconds, 15 seconds, and 30 seconds. The non-volatile memory stores the Scan Rate setting. Hotkey Menu: When you press the Left-Ctrl key twice within two seconds, the hotkey menu appears displaying a list of hotkey commands if the option is on.
- Page 20 Chapter 4: Operation Copy VGA Copy DVI Figure 4-5. Copy VGA and DVI. If no new EDID information is available from a display, a default profile in the KVM switch is automatically provided instead. The system can get EDID details from the monitor by using the following methods: •...
-
Page 21: Hotkey Commands
Chapter 4: Operation Sun mark selected Sun computer selected Figure 4-6. With different types of keyboards and computers, the Sun mark must be set up to comply with the instructions listed in Table 4-1. Table 4-1. Sun mark compliance. Keyboard Type Computer Type Sun Mark USB (non Sun) - Page 22 Chapter 4: Operation Figure 4-7. Hotkey menu. The short form hotkey menu can be turned on as an OSD function (F4: More\ Hotkey Menu) every time the Left-Ctrl key is pressed twice. Left-Ctrl is the Ctrl key located at the left side of the keyboard. See Figure 4-8. 1–8/A–H are the number keys 1–8 at the upper row of the keyboard and character keys A-H case-insensitive.
- Page 23 Chapter 4: Operation When Auto Scan detects any keyboard or mouse activity, it suspends the scanning until activity stops; it then resumes with the next computer in sequence. The length of the Auto Scan interval (Scan Rate) is adjustable. To abort the Auto Scan mode, press the Left-Ctrl key twice.
-
Page 24: Appendix. Troubleshooting
Appendix. Troubleshooting Make sure that all cables are well-seated. Check that the keyboard/mouse cables are not swapped. Label and bundle the cables for each computer to avoid confusion when connected to the KVM switch. A.1 Problems/Causes/Solutions Symptom: Mouse does not work. Causes: •... - Page 25 Appendix: Troubleshooting Symptom: Video image is not clear. Cause: Poor quality video cables. Solution: Use UL 2919 rated, double-shielded video cables. ® Symptom: No screen image or no OSD menu. Cause: A powered-on computer is not selected. Solution: Power on a computer and select it using the front-panel push buttons. Symptom: Unable to operate USB Sun server.
- Page 26 Appendix: Troubleshooting • Press any front-panel button to select a PC, and autoscan stops. Symptom: The up-arrow and down-arrow keys do not work in manual scan. Causes: • All PCs are off or only one PC is powered on. Scan mode works for powered-on computers only.
- Page 27 Appendix: Troubleshooting Symptom: Keyboard strokes are shifted. Cause: The computer was in shifted state when last switched. Solution: Press both SHIFT keys. Symptom: In Sun mode, the server shuts down and cannot work normally. Causes: • Country code setting is wrong. •...
-
Page 28: Contacting Black Box
• Package it carefully. We recommend that you use the original container. • If you are returning the unit, make sure you include everything you received with it. Before you ship for return or repair, contact Black Box to get a Return Authorization (RA) number. - Page 29 NOTES Page 29 KV9516A 724-746-5500 | blackbox.com...
- Page 30 NOTES Page 30 724-746-5500 | blackbox.com KV9516A...
- Page 31 NOTES Page 31 KV9516A 724-746-5500 | blackbox.com...
- Page 32 724-746-5500 or blackbox.com. About Black Box Black Box Network Services is your source for an extensive range of networking and infrastructure products. You’ll find everything from cabinets and racks and power and surge protection products to media converters and Ethernet switches all supported by free, live 24/7 Tech support available in 30 seconds or less.
Need help?
Do you have a question about the ServSwitch and is the answer not in the manual?
Questions and answers