Advertisement
Available languages
Available languages
Quick Links
Advertisement

Related Manuals for Gilis Bebe Stars Milano Isofix


Summary of Contents for Gilis Bebe Stars Milano Isofix
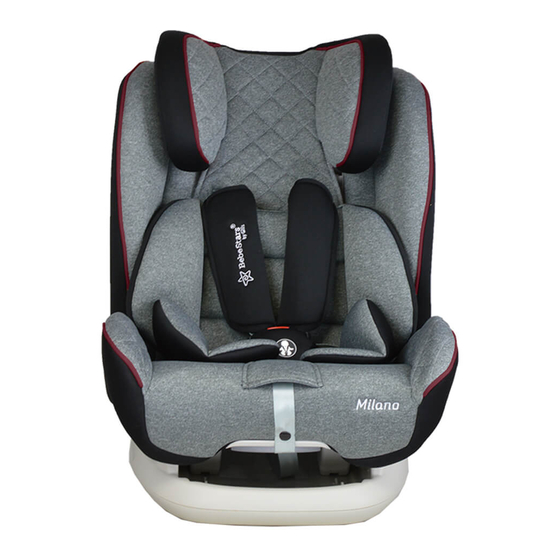
- Page 1 MILANO ISOFIX group 123 9-36KG STANDARDS ECE R44/04...
- Page 2 Introduction IMPORTANT: READ THESE INSTRUCTIONS CAREFULLY BEFORE USE AND KEEP FOR FUTURE REFERENCE. If these instruc ons are not followed, the safety of a child may be severely endangered. 1. No ce: When using as Universal category (Group 123), please no ce below informa on: This is a 'Universal' child restraint.
-
Page 3: Know Your Car Seat
Introduction Seat posi ons in other cars may also be suitable to accept this child restraint. Please refer to the informa on documents or the retailer's website for the suitable car model list. If in doubt, consult either the child restraint manufacturer or the retailer any me. - Page 4 Important 3.IMPORTANT! Please carefully read and make sure you understand all instructions in this manual and in the vehicle owner's manual related to child safety seats. Install and use the child safety seat as described in the instruction manual. Failure to do this could result in serious injury or death of your child.
- Page 5 Instructions 4.SAFETY SEAT USE METHOD 4.1 Install Location When using as Universal category(Group 123), this child restraint system is suitable for seatbelt models equipped with a three-point retractor that complies with ECE R16 and does not apply to models only equipped with 2-point seat belts.
- Page 6 Instructions 4.3 Adjust the headrest A. When Use in Group1, (Use 1-6 level) The shoulder straps are adjusted as follows: Loosen the shoulder straps of the child seat as much as possible. Pull the headrest height adjuster, select the correct height of the shoulder straps and engage it in the position that fits your child by releasing the adjuster.
- Page 7 Instructions 4.4 Adjust Safety Belt Lengthen A. Tighten Safety Belt Pull up shoulder belt and the lap belt will tighten, then pull crotch belt to tighten safety belt. As soon as possible tighten safety belt. Lap belt as lower as possible, the belt should put near child's crotch not belly.
- Page 8 Instructions 4.6 Removing 5-Point Harness A.Removing Shoulder Pads and Belts Loosen the 5-point harness of the child seat as much as possible, remove the belt from the harness connector(Picture A). Take the Gears fixed axle from the plastic stator (Picture B). Finally put redundant belt into cloth cover. (Picture C) B.Removing Buckle Pull down buckle to clot, and vertically push out iron plate from the back of seat.
- Page 9 Instructions 4.7 Removing the Fabric Cover 1. Remove the 5-point harness. 2. Take off the cover from the backrest and base. 3. Move the headrest of the child seat up to the highest position. 4. First take the cover off the base of the headrest, then remove the cover of the headrest.
- Page 10 Instructions 5.2.2 Group II, III (15-36KG) NOTE: When you use this safety car seat in group II,III, please remove the 5-point harness, sleeping pads refer to Chapter 4.6. Place the child seat forward facing on the vehicle seat (in the direction of travel). Step1: First pull out the belt from the belt ALR.
- Page 11 Instructions 5.2.2 Group II, III (15-36KG) NOTE: When you use this safety car seat in group II,III, please remove the 5-point harness, sleeping pads and the triangle pads refer to Chapter 4.6. Place the child seat forward facing on the vehicle seat (in the direction of travel). Put the ISOFIX insert guide into the two ISOFIX attachment points of your vehicle.
- Page 12 Instructions 5.2.2.1 Installed with ISOFIX and Belt Step1: First pull out the belt from the belt ALR. Diagonal belt through guidance and lap belt through the belt slot, then put together through guidance slot. NOTE: Make sure that the diagonal seatbelt section runs over your child's shoulder bone, and not in front of his or her neck.
-
Page 13: Care And Maintenance
Instructions Care and Maintenance Periodically inspect your child seat for worn or damaged parts. If damaged parts are found, replace the child seat. Keep the child seat clean. Do no lubricate any parts of the child seat. To prolong the life of your nursery product, keep it clean and do not leave it in direct sunlight for extended periods of time. -
Page 14: Warranty
Warranty The warranty period starts from the date of purchase and is valid for a period of 24 months. The warranty is only applicable to material and production defects. The date of purchase can only be proven with the original sales receipt. This warranty is only applicable to the original owner and is not transferable. - Page 15 ΕΙΣΑΓΩΓΗ Προειδοποίηση: διαβάστε προσεκτικά αυτές τις οδηγίες και φυλάξτε τες για μελλοντική χρήση Αν αυτές οι οδηγίες δεν ακολουθηθούν, η ασφάλεια του παιδιού τίθεται σε σοβαρό κίνδυνο 1. Οδηγία: Όταν χρησιμοποιείτε ως κατηγορία Universal (Ομάδα 123), παρακαλούμε σημειώστε παρακάτω πληροφορίες: Πρόκειται...
- Page 16 ΕΙΣΑΓΩΓΗ Οι θέσεις καθισμάτων σε άλλα αυτοκίνητα μπορεί επίσης να είναι κατάλληλες για την αποδοχή αυτού του συστήματος συγκράτησης για παιδιά. Ανατρέξτε στα έγγραφα πληροφοριών ή στον ιστότοπο του λιανοπωλητή για τη κατάλληλη λίστα μοντέλων αυτοκινήτων. Σε περίπτωση αμφιβολίας, συμβου- λευτείτε...
- Page 17 Σημαντικό! ΠΡΟΣΟΧΗ! 3.ΣΗΜΑΤΙΚΟ! Παρακαλώ διαβάστε προσεκτικά και σιγουρευτείτε ότι καταλαβαίνετε πλήρως τις οδηγίες αυτού του εγχειριδίου και του οχήματος που πρόκειται να εγκατα- σταθεί. Εγκαταστήστε και χρησιμοποιήστε το παιδικό κάθισμα όπως περιγρά φεται στις οδηγίες χρήσης. Η αποτυχία της εγκατάστασης μπορεί να επιφέρει ζημία...
- Page 18 Οδηγίες 4.ΧΡΗΣΗ ΚΑΘΙΣΜΑΤΟΣ ΑΣΦΑΛΕΙΑΣ 4.1 Θέση εγκατάστασης Όταν το χρησιμοποιείται στη κατηγορία Universal (Ομάδα 123), αυτό το σύστημα συγκράτησης παιδιών είναι κατάλληλο για αυτοκίνητα που είναι εξοπλισμένα με ζώνες τριών σημείων που συμμορφώνεται με το ECE R16 και δεν ισχύει για τα μοντέλα...
- Page 19 Οδηγίες 4.3 Ρύθμιση του προσκέφαλου A. Οταν χρησιμοποιείς την ομάδα 1, (1-6 επίπεδο) Οι ιμάντες ώμου ρυθμίζονται ως εξής: Χαλαρώστε τους ιμάντες ώμου του παιδικού καθίσματος όσο το δυνατόν. Τραβήξτε το ρυθμιστή ύψους του προσκέ- φαλου, επιλέξτε το σωστό ύψος των ιμάντων...
- Page 20 Οδηγίες 4.4 Ρύθμιση μήκους της ζώνης A. Σφίξιμο της ζώνης ασφαλείας Τραβήξτε προς τα πάνω τη ζώνη ώμου και ο κάτω ιμάντας θα σφίξει, στη συνέχεια τραβήξτε τον ιμάντα του καβάλου για να σφίξετε τη ζώνη ασφαλείας. Ο ιμάντας μέσης πρέπει να είναι όσο το δυνατόν πιο...
- Page 21 Οδηγίες πρώτο επίπεδο δεύτερο επίπεδο τρίτο επίπεδο τέταρτο επίπεδο 4.6 Αφαίρεση ζώνης 5 σημείων A.Αφαιρέστε τα μαξιλαράκια ώμου και τις ζώνες Χαλαρώστε όσο το δυνατόν περισσότερο την ζώνη 5 θέσεων του παιδικού καθίσματος, αφαιρέστε τη ζώνης από τον πίσα άξονα των ζωνών (Εικόνα A). Στην...
- Page 22 Οδηγίες 4.7 Αφαιρέστε κάλυμμα του καθίσματος 1. Αφαιρέστε την ζώνη 5 σημείων. 2. Αφαιρέστε το κάλυμμα από την πλάτη και τη βάση. 3. Μετακινήστε το προσκέφαλο του παιδικού καθίσματος μέχρι την υψηλότερη θέση. 4. Πρώτα αφαιρέστε το κάλυμμα από τη βάση του προσκέφαλου και, στη συνέχεια, αφαιρέστε...
- Page 23 Οδηγίες 5.2.2 Ομάδα II, III (15-36KG) ΣΗΜΕΙΩΣΗ: Όταν χρησιμοποιείτε αυτό το κάθισμα ασφαλείας αυτοκινήτου στην ομάδα ΙΙ, ΙΙΙ, παρακαλούμε αφαιρέστε τη ζώνη 5 σημείων και τα μαλακά μέρη όπως αναφέρονται στο Κεφάλαιο 4.6. Τοποθετήστε το παιδικό κάθισμα με κα- τεύθυνση προς τα εμπρός (προς την κατεύθυνση της διαδρομής). Πρώτα...
- Page 24 Οδηγίες 5.2.2 Ομάδα II, III (15-36KG) ΠΡΟΣΟΧΗ: Όταν χρησιμοποιείτε το κάθισμα στο group 2, 3, παρακαλούμε να αφαιρέσετε την ζώνη 5 σημείων και τα εσωτερικά μαλακά μέρη. Τοποθετείται με πρόσωπο προς τα εμπρός στο κάθισμα του οχήματος (φορά ταξιδιού). Τοποθετήστε τον οδηγό ISOFIX στα σημεία σύνδεσης του οχήματος σας. ΠΡΟΣΟΧΗ: Τα...
- Page 25 Οδηγίες 5.2.2.1 Εγκατάσταση με ISOFIX και ζώνη Πρώτα τραβήξτε έξω τη ζώνη του οχήματος. Περάστε τη διαγώνια ζώνη από τον κόκκινο οδηγό στο προσκέφαλο και τη ζώνη μέσης πάνω από το καβάλο του παιδιού και στη συνέχεια στη πόρπη μέχρι να ακούσετε κλικ. ΣΗΜΕΙΩΣΗ: Βεβαιωθείτε...
-
Page 26: Φροντίδα Και Συντήρηση
Οδηγίες Φροντίδα και Συντήρηση Ελέγχετε περιοδικά το παιδικό κάθισμά σας για φθαρμένα μέρη. Εάν εντοπιστούν κατεστραμμένα εξαρτήματα, αντικαταστήστε το παιδικό κάθισμα. Κρατήστε το παιδικό κάθισμα καθαρό. Μην λιπαίνετε κανένα μέρος του παιδικού καθίσματος. Για να επιμηκύνετε την διάρκεια ζωής του καθίσματος, κρατήστε το καθαρό και μην... -
Page 27: Τεχνικά Χαρακτηριστικά
Εγγύηση Η περίοδος εγγύησης αρχίζει από την μέρα αγοράς και διαρκεί για 24 μήνες. Η εγγύηση είναι ενεργή μόνο για εργοστασιακά προβλήματα. Η ημερομηνία αγοράς μπορεί να αποδειχθεί μόνο με την απόδειξη. Η εγγύηση είναι ενεργή μόνο για τον πρώτο αγοραστή και δεν μεταβιβάζεται. Η... - Page 28 THANK YOU / ΕΥΧΑΡΙΣΤΟΥΜΕ Customer service / Εξυπηρέτηση πελατών If you experience a problem with this product or require assistance please contact our local sales agent or contact our customer service department. Αν αντιμετωπίζετε κάποιο πρόβλημα με το προϊόν ή χρειάζεστε βοήθεια παρακαλώ...
Need help?
Do you have a question about the Bebe Stars Milano Isofix and is the answer not in the manual?
Questions and answers