Advertisement
Quick Links
®
Contents
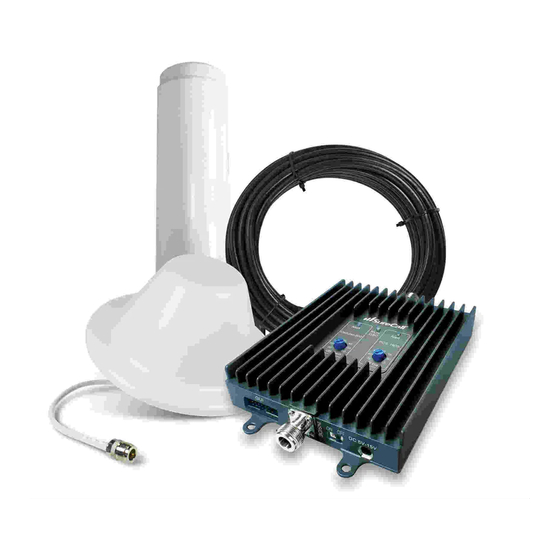
Booster
Inside Antenna -
Omni-directional Whip
(Right Angle)
RG6 Coax
Cable (50 ft.)
Before installation, please note the following important factors:
1. A minimum of 25 ft. of separation is needed between the outside and inside antennas.
2. The booster should be positioned close to an electrical outlet.
3. Ensure sufficient cable length between planned outside antenna location and booster.
Step 1. Find the Area Outside with the Strongest Signal
Before installing the outside antenna, find the area with the strongest cellular signal from your
service provider by following the directions below:
Measure the strength of the outside cellular signal in various locations.
• Apple iPhones: Dial *3001#12345#* and press Call. In the top-left corner, a dB number
appears instead of bars.
• Android devices: download apps such as "Network Signal Info" in the Google Play store to
measure signal strength. Search check real signal strength to find other cell signal measure-
ment apps.
• Internet: go to www.speedtest.net to test 3G and 4G data rates.
This signal booster requires a minimum cellular signal reading of –100dB at the location of the
outside antenna. Signal between -70dB and -90dB is recommended for best performance.
Please note: Signal stronger than -50dB may cause the affected frequency bands to shut down.
Step 2. Install the Outside Antenna
Once you have located the area of strongest signal,
Nut
U-bolt
mount the antenna to a pole or pipe (not included)
Washer
at the highest possible elevation. The directional
Yagi antenna works best when facing the direc-
Bracket
tion of your carrier's cellular tower. To find the
location of your carrier's closest cell tower go to
www.cellreception.com.
To install the outside antenna, assemble the u-bolt,
bracket, nuts and washers as shown in the illustra-
tion. Keep the connections loose enough to allow
the antenna to rotate until the optimum direction is
found.
Note: The outside antenna may be installed on a
variety of pipe angles. Ensure that the mounting area
has at least a 12-inch radius clear of obstructions
and other radiating elements and orient the antenna
Drip Hole
vertically with the drip hole at the bottom.
Once the outside antenna is secured to a pipe or
RG6 Cable
pole, connect one end of the provided RG6 coax
cable to the antenna and tighten the connection.
Outside Antenna Assembly
SC-DualH/O-72-YRA-Kit | Rev. 012216
Quick Install Guide
Download the full product manual at www.SureCall.com
Step 3. Assemble the Signal Booster and Inside Antenna
Connect the inside antenna to the booster by screwing it directly into the port of the booster
labeled "INSIDE". Next, select a location for the booster that is close to a working AC outlet*.
Power
Because the supplied inside antenna is omni-directional (i.e. it delivers signal in a 360º radius),
Supply
the booster should be placed in a central location with the antenna oriented in an upright position.
Outside Antenna -
Directional Yagi
Cellular - 800 MHz Dial
Alert LED
screw tab holes
for wall mounting
(optional)
Should you choose to mount the booster to a wall, screws have been provided. Use the supplied
screws or appropriate screws for surface of mounting location and drill through screw tab holes
on booster (see Booster Components Diagram illustration).
Connect the remaining end of the RG6 coax cable to the booster port marked "OUTSIDE" and
hand-tighten the connection. Next, connect the AC power cord to the booster and plug into a
110V AC power outlet. Once the booster has been completely assembled, turn the booster's
power switch on.
Note: If the Power LED does not turn ON or the Alert LEDs continue to flash, see the Troubleshooting section. This
booster is rated for 5-15V input voltage. DO NOT use the booster with a higher voltage power supply. This can damage
the booster, cause personal injury and void your warranty.
Step 4. Configure Gain Settings
The SureCall gain dials should always be at maximum level unless the control light in a specific
band is flashing red or flashing red-yellow. In either of these cases, the first action should be to
increase the antenna isolation between the inside and outside antenna as much as possible and
restart the booster. If the situation continues, you can lower the gain with an attenuator or, as the
last resort, reduce the booster gain by 5dB at a time until the control light in the frequency band
flashes yellow.
Alert LED
Cellular -
800 MHz Dial
*Note: The booster should not be exposed to excessive heat, direct sunlight, moisture or airtight enclosures.
Inside Antenna
N connector
PCS - 1900 MHz Dial
Alert LED
Programmer
Power Jack
Power Switch
F connector
RG6 Cable to
Outside Antenna
Booster Components Diagram
Alert LED
PCS -
1900 MHz Dial
Booster Dials
SureCall FlexPro
LED Indicators
LED Color
LED Condition
Indication
Red
Solid
Band is off.
If a red light has been flashing for an extended time, the band will automatically shut
off and display a solid red light.
This can also happen when the booster attenuation has been turned all the way down.
Red
Flashing
Indicates that the booster is receiving too much signal which could cause the affected
band to automatically turn off. When this happens:
1. For kits using an OMNI outside antenna, relocate the outside antenna to a location
where the signal is weaker.
2. For kits using a YAGI outside antenna, turn the antenna in short increments away
from the signal source.
3. Increase the separation between antennas (additional vertical separation works
best).
4. Add an inline attenuator to the cable coming into the outside port of the booster.
5. As a last resort, turn down the dB gain on the dial until the light goes OFF or
flashes yellow.
Yellow
Flashing
Indicates that the Automatic Gain Control (AGC) is self-adjusting. This is part of normal
operation.
Yellow
Solid
Indicates that the band is Inactive. After a period of time, if there's no activity the
band will go into sleep mode. Light is off while band is active. This is part of normal
operation.
Yellow/Red
Alternately
Oscillation is detected.
Flashing
First, try increasing the separation between the inside and outside antennas. If your
booster kit uses two directional antennas (example: outside Yagi antenna and inside
panel antenna), ensure that they are facing away from one another.
If oscillation continues, lower the dB gain in small increments until the light turns off
or flashes yellow.
If you Want to Improve Coverage
1. Find a location that receives a stronger signal and relocate the outside antenna to that location.
2. Optimize the Yagi antenna angle.
3. Increase the distance between the outside antenna and booster.
4. Set each dial on the booster to maximum gain.
WARNING: Do not attenuate the uplink and downlink dB settings below 20dB. This could
cause the affected frequency band to turn off.
Outside Antenna
Coaxial Cable
Signal Booster
Inside Antenna
Install Illustration
Yagi/Whip Kit
Power Supply
Advertisement

Related Manuals for SureCall FlexPro


Summary of Contents for SureCall FlexPro
- Page 1 Step 2. Install the Outside Antenna The SureCall gain dials should always be at maximum level unless the control light in a specific Once you have located the area of strongest signal, band is flashing red or flashing red-yellow. In either of these cases, the first action should be to...
- Page 2 Verizon: http://www.verizonwireless.com/wcms/consumer/register-signal-booster.html Be sure the power source is not controlled by a switch that can remove SureCall warrants to the Buyer that each of its products, when shipped, will be free from defects in material and power from the outlet.
Need help?
Do you have a question about the FlexPro and is the answer not in the manual?
Questions and answers