Table of Contents
Advertisement
Advertisement
Table of Contents

Related Manuals for Specialized SHIV


Summary of Contents for Specialized SHIV
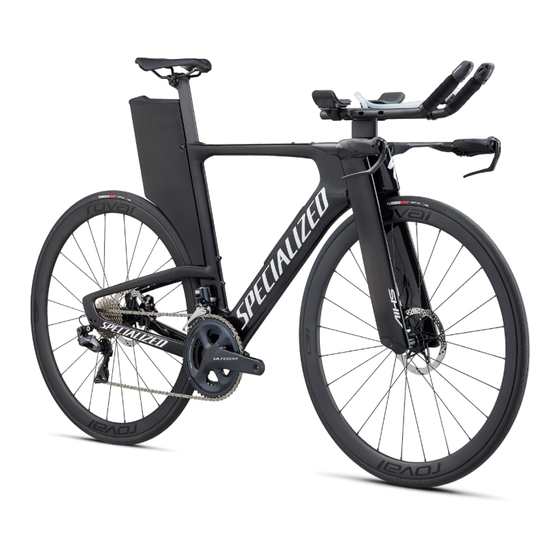
- Page 1 USER MANUAL - ENGLISH SHIV...
-
Page 3: Table Of Contents
SEATPOST / SADDLE ASSEMBLY ......................8 SEATPOST INSERTION ..........................9 The Shiv is intended and tested for Road Riding only (Condition 1). For more BASEBAR ASSEMBLY ..........................9 information on intended use and structural weight limits, please refer to the Di2 WIRE ROUTING - BASEBAR ...................... -
Page 4: General Notes About Maintenance
0000139205_UM_R2, 07/19 can affect the normal function of the bearings. Use a clean, damp cloth We may occasionally issue updates and addendums to this document. Please periodically check www.specialized.com or contact Rider Care and bicycle cleaning agents for cleaning. to make sure you have the latest information. - Page 5 DESCRIPTION TOOL SIZE in-lbf DESCRIPTION TOOL SIZE in-lbf FRAME EXTENSIONS FORK SEATPOST (SADDLE CLAMP) 13.5 BASEBAR SEATPOST WEDGE BASEBAR SPINDLE 5/6mm (one bolt / nut per spindle) SEATPOST WEDGE COVER BASEBAR WEDGE 13.5 NUTRITION FUELCELL BASEBAR HOOD HYDRATION FUELCELL NOSECONE CLIP RESERVOIR NOSECONE BRACKET RESERVOIR UPPER BOLT...
-
Page 6: Assembly
• Upper down tube wire: Down through the port below the head tube Di2 wiring on the Shiv. Use the Park IR-1 Internal Cable Routing Kit to until it exits at the upper opening of the Nutrition Fuelcell cavity. simplify installation of shift wires or cable housings and brake housings. -
Page 7: Bottom Bracket
A number of 22 in-lbf/2.5 Nm. OSBB/BB30-compatible bottom bracket options are available to work with the Shiv in order to use your preferred OSBB/ BB30-compatible crankset. Please consult with your local Authorized Specialized Retailer for additional information. -
Page 8: Seatpost / Saddle Assembly
There will be significant movement between the fork and head tube until the steerer shaft is installed and adjusted. Headset bearing adjustment is performed the same way as a standard headset, gradually tightening the headset while rocking the headset back and forth until the movement is gone, and rotation is smooth and free. -
Page 9: Seatpost Insertion
Remove any burrs or sharp edges using fine grit sandpaper. The Shiv seatpost length is 350mm, and is available in two offsets. If the seatpost is at the maximum insertion and the saddle is too high, the seatpost can be cut. Once cut, the minimum insertion line on the seatpost will no longer be accurate. -
Page 10: Di2 Wire Routing - Basebar
+20° +20° 0° 0° -20° -20° Fig.13: Torque the wedge bolts to 120 in-lbf / 13.5 Nm. „ Fig. 11: The 0 degree spindle option orients the Basebars parallel to the „ While tightening the wedge bolt, wiggle the Basebar until the ground (B). -
Page 11: Front Brake Routing - Fork
• Plug the Di2 wires into the ports in the brake levers, then install the FRONT BRAKE ROUTING - FORK levers in the Basebars. • Adjust the housings so the curves through the cockpit, nosecone, FRONT BRAKE EXIT PORT frame and fork are optimized (no sections that are taut or bowing excessively). -
Page 12: Spacer Stack / Tower Stud Lengths
SPACER STACK / TOWER STUD LENGTHS SPACER STACK STUD LENGTH SPACER STACK STUD LENGTH Choose the Spacer Stack (0 - 115mm spacers) to match the Tower Stud lengths (30 - 150mm studs). Tower Studs are marked in 10mm increments „ on the wrench flat. -
Page 13: Spacer Stack / Basebar Angle
SPACER STACK / BASEBAR ANGLE WARNING! Tower Studs need to be properly oriented, inserted, and torqued as described and illustrated above. SPACER Each Tower Stud is etched with the millimeter length and the word “UP” with an arrow. The Tower Stud must be positioned so the wording is right side up and the arrow points up. -
Page 14: Extension Socket Assembly
MIN: MAX: 12mm 20mm Fig.25: Install the Tower Nuts on the Tower Studs. Tighten them down „ gradually and evenly while alternating between the two Tower Nuts to make FIG.23 WARNING! sure the Extension Socket is seated evenly on the Spacer Stack. Once fully Always use the proper Tower Stud length that corresponds to seated, still alternating between the two Tower Nuts, gradually increase the the chosen Spacer Stack shown in the Spacer Stack/Tower... -
Page 15: Di2 Wire Routing - Cockpit
• The arm cups can also be rotated inward or outward before tightening A dab of grease behind the Crossbar Lockplate can help retain the bolts, to fine-tune the arm position relative to the extensions. the Lockplate in place while installing the extension. Do not grease the interface between the Lockplate and the extension. -
Page 16: Reservoir / Fuelcell Drinking Tube
each 550mm wire going through the center of the Extension Socket, and RESERVOIR / FUELCELL DRINKING TUBE routed internally into the top of the Extension Socket, toward the Di2 exit ports at the front of the Extension Socket (fig.33/34). BOLT TAB KEYS INTO RESERVOIR BOLT HOLE GROOVE THROUGH... -
Page 17: Nutrition Fuelcell Removal
The frame has a permanent guide tube integrated in the frame. When seating the Hydration Fuelcell inside the Reservoir, The Hydration Fuelcell drinking tube is routed through this tube. make sure it’s properly seated around the cutout for the upper Reservoir bolt area. -
Page 18: Between-The-Arms (Bta) Mount Installation
BETWEEN-THE-ARMS (BTA) MOUNT INSTALLATION An optional BTA mount can be installed in front of the Extension Socket/ Crossbar assembly for use with a computer display or optional bottle cage. OPTIONAL BOTTLE CAGE CAN BE MOUNTED RAIL CAN SLIDE FORE-AFT BARFLY MOUNT Fig.41: Install the BTA mount.
Need help?
Do you have a question about the SHIV and is the answer not in the manual?
Questions and answers