Table of Contents
Advertisement
Quick Links
- 1 Chapter 1: Fork / Stem / Handlebar Installation
- 2 Installing the Carbon Aero Handlebar on the Aero Stem
- 3 Installing the Brake Cable Housings and Shifter Wires
- 4 Front and Rear Brake Assembly (Exploded View)
- 5 Adjusting the Front and Rear Brake Assemblies
- 6 Installing and Adjusting the Shiv Seatpost
- Download this manual
Advertisement
Table of Contents

Related Manuals for Specialized SHIV


Summary of Contents for Specialized SHIV
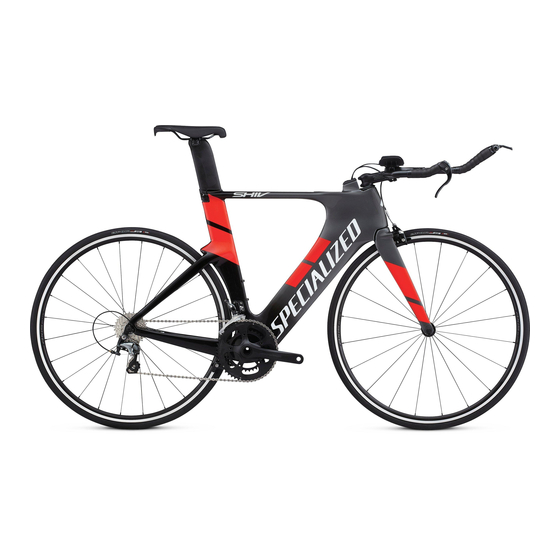
- Page 1 INSTRUCTION GUIDE SHIV...
-
Page 3: Table Of Contents
5.1 INSTALLING AND ADJUSTING THE SHIV SEATPOST ........ -
Page 4: Hardware
HARDWARE SIZE BOLT SHAPE (to scale) ALLEN KEY USE WITH M6 x 80mm Alloy handlebar: 50mm risers M6 x 75mm Alloy handlebar: 45mm risers Carbon handlebar: 50mm risers M6 x 70mm Alloy handlebar: 40mm risers Carbon handlebar: 45mm risers M6 x 65mm Alloy handlebar: 35mm risers Carbon handlebar: 40mm risers M6 x 60mm... - Page 5 ITEM SIDE VIEW ITEM ANGLED VIEW ITEM DESCRIPTION Arm pad holder Pad holder clamp Extension riser clamp Extension riser cap Extension riser cap nut 5mm extension riser 10mm extension riser 20mm extension riser Small Control Tower Medium Control Tower Large Control Tower Page 3 of 25...
-
Page 6: Geometry
+/- 12.5 / 37.5 +/- 12.5 / 37.5 +/- 12.5 / 37.5 Seat-Post Length (mm) * 60mm or 90mm length options are for the Specialized aero stem. ** Two seatpost options available. +/- 12.5mm or +/- 37.5mm Page 4 of 25... - Page 7 THIS PAGE INTENTIONALLY LEFT BLANK Page 5 of 25...
-
Page 8: Chapter 1: Fork / Stem / Handlebar Installation
1.1 INSTALLING THE FORK INTO THE STEERER TUBE Specialized Shiv frames are designed in conjunction with the Specialized aero stem/handlebar combo or a 1 1/8” x 31.8mm standard stem with the Specialized alloy aero handlebar. The Specialized aero handlebars work specifically with the handlebar risers and extensions to offer the greatest range of position adjustment. -
Page 9: Installing The Carbon Aero Handlebar On The Aero Stem
1.2 INSTALLING THE CARBON AERO HANDLEBAR ON THE AERO STEM 90mm 60mm SPECIALIZED AERO STEM: 12. Determine the desired stem length (60 or 90mm) and install the carbon aero handlebar along with the handlebar position wedge TECH TIP: If the stem length is not yet determined, it’s recommended to start at the 90mm position. Changing the stem from the 60mm to 90mm position will require that the cable housings be replaced with longer ones to accommodate the additional stem length. -
Page 10: Installing The Alloy Handlebar With A Standard 31.8Mm Stem
1.3 INSTALLING THE ALLOY HANDLEBAR WITH A STANDARD 31.8MM STEM STANDARD 31.8MM STEM: 15. Determine the desired stem length and angle, then place the Specialized aero handlebar into the stem. 16. Orient the handlebar position horizontally, then torque the stem faceplate bolts to the manufacturer’s specifications. -
Page 11: Chapter 2: Handlebar Extension / Riser Installation
CHAPTER 2: HANDLEBAR EXTENSION / RISER INSTALLATION 2.1 INSTALLING THE EXTENSION RISERS 1. Place an extension riser cap nut into the underside of each extension riser cap 2. Install 4 x riser bolts (M6x20mm length (carbon bar) or M6x30mm (alloy bar), 4mm countersunk Allen hex head). 3. -
Page 12: Installing The Clamps, Extensions And Arm Pads
2.2 INSTALLING THE CLAMPS, EXTENSIONS AND ARM PADS 5. Place the extension clamps on top of the extension caps, with the concave surface in contact with the convex surface of the extension caps and the clamps facing each other. 6. Install 2 x extension clamp bolts (M6 x20mm length, 5mm standard Allen hex head) and washers through the extension clamps and into the extension cap nuts. - Page 13 8. Install the handlebar extensions through the extension clamps and the pad holder clamps. The extensions have the option of being switched to either side, for a wider or narrower hand position. They can also be rotated inward or outward to fine-tune the angle of the hand position (see P.13). 9.
-
Page 14: Adjusting The Clamps, Extensions And Arm Pads
2.3 ADJUSTING THE CLAMPS, EXTENSIONS AND ARM PADS 12. The extension clamps have +/- 15˚ of horizontal angle adjustment. 13. The pad holder clamps have the ability to be positioned in front of, between or behind the extension clamps, and can be rotated up or down to fine- tune the angle of the arm pad. - Page 15 14. The extensions have the ability to be swapped left to right, to adjust the stance width of the hand grip area. They can also be moved fore-aft for length adjustment and rotated for additional hand grip area width and angle fine-tuning. 15.
-
Page 16: Chapter 3: Cable Housing / Wire Installation
CHAPTER 3: CABLE HOUSING / WIRE INSTALLATION 3.1 INSTALLING THE BRAKE CABLE HOUSINGS AND SHIFTER WIRES 1. Route a section of front brake cable housing through the non-drive-side portion of the handlebar. If running electronic shifters, route the electronic shifter wire through the handlebar at before the cable housings, and according to the manufacturer’s instructions. - Page 17 Shifter cable housings 7. Route the shifter cable housings through the handlebar extensions and into the large cable housing port in the top of the top tube. 8. Install the shift levers into the ends of the extensions according to the manufacturer’s instructions. Electronic shifter wires 9.
-
Page 18: Routing The Derailleur Cables / Wires At The Bottom Bracket
3.2 ROUTING THE DERAILLEUR CABLES / WIRES AT THE BOTTOM BRACKET CABLE ELECTRONIC SYSTEM SYSTEM To shifters To rear To front To rear To front derailleur derailleur derailleur derailleur battery OPTION A: STANDARD CABLE Rear derailleur: Route the rear derailleur cable housing through the large hole going into the drive-side chainstay. „... -
Page 19: Installing The Cable Routing Cover Plate
3.4 INSTALLING THE CABLE ROUTING COVER PLATE battery 10. Once the wiring or cable housing is routed, install the cable routing cover plate , followed by the cover plate bolt (M6x15mm, 3mm countersunk Allen hex head). 11. Torque the bolt to 25 in-lbf (2.8 N*m). 3.5 INSTALLING THE CABLE ROUTING CONTROL TOWER Small tower, no spacer Medium tower, 1 spacer... -
Page 20: Chapter 4: Brake Installation
CHAPTER 4: BRAKE INSTALLATION 4.1 FRONT AND REAR BRAKE ASSEMBLY (Exploded view) 1. Aero bolt cap 2. Brake bolt O-ring 3. Brake pivot bolt 4. Brake arm 5. Spring plate 6. Spring 7. Spring cover Non-drive-side Drive-side NON-DRIVE SIDE (Rear View) DRIVE SIDE (Rear View) Place long spring tip facing out... -
Page 21: Installing The Front Brake Assembly
4.2 INSTALLING THE FRONT BRAKE ASSEMBLY 4. Install the drive-side brake arm . A flathead screwdriver with a notch in the flat edge can help rotate the spring into the fork’s spring hole. 5. Install the brake bolt and tighten to 70 in-lbf (7.9 N*m). 6. -
Page 22: Installing The Rear Brake Assembly
10. Place the cable noodle in the cable noodle guide and trim the cable housing so that it has a smooth path to the cable noodle that’s as short as possible while still fully seating in the noodle. Make sure it stays fully seated through the entire range of the brake, from closed to open. 4.3 INSTALLING THE REAR BRAKE ASSEMBLY 11. -
Page 23: Adjusting The Front And Rear Brake Assemblies
13. Route the cable through the brake lever, into the housing and through the rear brake cable noodle. Repeat the routing method for the front brake. 14. Route the cable around the brake pinch bolt, then apply the specified torque shown below. 4.4 ADJUSTING THE FRONT AND REAR BRAKE ASSEMBLIES 1-2mm 15. -
Page 24: Chapter 5: Seatpost Installation
2. Engage the saddle rails into the slots of the conical portions of the clamp mechanism, then place the outer caps over the saddle rails. TECH TIP: The Shiv seatpost can be assembled with outer rail clamps for 7x7 alloy rails or 7x9 carbon rails. Choose the rail clamps that correspond to the saddle. -
Page 25: Seatpost Setback Options
TECH TIP: The application of carbon assembly compound (fiber paste) can increase friction between carbon surfaces. Please visit your Specialized Authorized Dealer for additional information. 5.2 SEATPOST SETBACK OPTIONS 11. The Shiv seatposts are available in +/- 12.5˚ and 37.5˚ setbacks. The seatposts are also reversible, to offer four positions with 25mm offset. Page 23 of 25... -
Page 26: Chapter 6: Fuelselage Installation
CHAPTER 6: FUELSELAGE INSTALLATION 6.1 INSTALLING THE FUELSELAGE 1. Install the empty Fuelselage Integrated Hydration System bladder into the Fuelselage port in the top tube of the frame. 2. Use the hose as a structure to help push and guide the bladder into the down tube. 3. -
Page 27: Installing The Silicone Strap/Magnet
5. Fill the bladder with water, then close the mouth with the rubber cap. 6.2 INSTALLING THE SILICONE STRAP/MAGNET 6. Install the silicone strap with magnet around either the left or right extension, at the desired distance. 7. Hook the loop around the magnet stub to keep the strap in place. 8. - Page 32 SPECIALIZED BICYCLE COMPONENTS 15130 Concord Circle, Morgan Hill, CA 95037 (408) 779-6229...
Need help?
Do you have a question about the SHIV and is the answer not in the manual?
Questions and answers