Table of Contents
Advertisement
Advertisement
Table of Contents

Related Manuals for Specialized TARMAC SL7


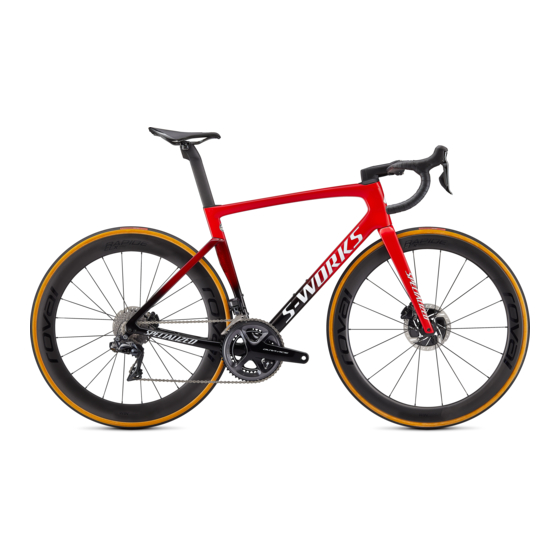
Summary of Contents for Specialized TARMAC SL7
- Page 1 USER MANUAL...
-
Page 3: Table Of Contents
8. FINAL STEPS ........................27 SPECIALIZED BICYCLE COMPONENTS We may occasionally issue updates and addendums to this document. Please periodically check www.specialized.com or contact Rider Care to make sure you have the latest information. 15130 Concord Circle, Morgan Hill, CA 95037 (408) 779-6229 0000145155_UM_R1, 01/20 Info: specialized.com / 877-808-8154... -
Page 4: Introduction
GREASE: This symbol means that high quality grease should be applied as illustrated. This user manual is specific to your Specialized Tarmac SL7 bicycle. It contains important safety, performance and technical information, which you should read before your first ride and keep CARBON FRICTION PASTE: This symbol means that carbon friction paste for reference. -
Page 5: General Notes About Assembly
Please see your Authorized Specialized Retailer for all service, repairs or maintenance. troubleshooting be performed by an Authorized Specialized Retailer. Your Authorized Specialized Retailer may also be able to refer you to classes, clinics or books WARNING! Many components on the Tarmac SL7, including, but not limited on bicycle use, service, repair, and maintenance. -
Page 6: Tools / Torque Specs
2.1. TOOLS / TORQUE SPECS WARNING! Correct tightening force on fasteners (nuts, bolts, screws) on your The Tarmac SL7 is a high performance bicycle. All regular maintenance, troubleshooting, repair bicycle is important for your safety. If too little force is applied, the fastener and parts replacement must be performed by an Authorized Specialized Retailer. - Page 7 If your bicycle exhibits any signs of damage, do not use it and immediately bring it to your Authorized Specialized Retailer for inspection.
-
Page 8: Specifications
4. SPECIFICATIONS 4.1. GEOMETRY FRAME SIZE STACK (MM) REACH (MM) HEAD TUBE LENGTH (MM) HEAD TUBE ANGLE (°) 70.5 71.75 72.5 73.5 73.5 BB HEIGHT (MM) BB DROP (MM) TRAIL (MM) FORK LENGTH, FULL (MM) FORK RAKE/OFFSET (MM) FRONT CENTER (MM) CHAINSTAY LENGTH (MM) WHEELBASE (MM) 1006... - Page 10 BLUE LOCTITE GREASE S179900015: SRAM eTap S159900006: Shimano Di2 S159900006: Mechanical S179900015: No Front Der/Shimano Di2/SRAM eTap S159900006: Campagnolo EPS S169900008: Front derailleur with exposed housing S206500007: Front derailleur with exposed cable...
- Page 11 PART # DESCRIPTION TOOL SIZE in-lbf PART # DESCRIPTION TOOL SIZE in-lbf FRAME STEM FACEPLATE FORK S204800003 STEM CABLE BAT 26.5 S201900003 FRONT DERAILLEUR (FD) HANGER 2.5mm STEM COVER (OPEN) S201900002 RUBBER FD BLOCK OFF PLATE STEM COVER (CLOSED) S182600001 REAR DERAILLEUR (RD) HANGER UPPER TRANSITION S204900002 SEATPOST WEDGE...
- Page 12 TO FRONT TO REAR TRAVEL OPTION BRAKE LEVER BRAKE LEVER Di2 JCT A BOX 500mm - TO JCT A BOX 1400mm - TO SHIFTER Di2 COVER EW-JC200 INLINE Di2 WIRE: OPPOSITE SIDE OF JUNCTION REAR BRAKE 700mm - TO JCT B BOX FRONT BRAKE: ALWAYS IN SLOT 20mm...
-
Page 13: Brake/Shift Assembly
5. BRAKE/SHIFT ASSEMBLY To prevent the JCT B box from rattling, wrap the box in a bit of foam before placing it in front of the bottom bracket shell. 5.1. SHIFTING - ELECTRONIC WIRED SYSTEM SEATPOST REMOVAL: Before removing the seatpost, first remove the EW-RS910 FRAME WIRING LENGTHS: Junction Box A/charge port, then disconnect the 1200mm seat tube wire. - Page 14 OUTER LEFT: TO FRONT INNER RIGHT: TO REAR OR REAR SHIFTER BRAKE LEVER MIDDLE: TO FRONT OUTER RIGHT: TO FRONT BRAKE LEVER OR REAR SHIFTER REAR BRAKE: ALWAYS ON SAME SIDE AS REAR BRAKE LEVER 20mm FRONT BRAKE: ALWAYS IN SLOT CHURROS OVER BRAKE AND SHIFT HOUSINGS START 20mm BELOW HEAD TUBE/...
-
Page 15: Shifting - Mechanical System
5.2. SHIFTING - MECHANICAL SYSTEM until it exits at the housing port in the front of the steerer tube. Use a pick to help guide the housing out through the port. FIG. 2: Route the derailleur housings. • Install the caliper on the fork leg. Torque the caliper bolts according to the brake manufacturer’s •... -
Page 16: Seatpost Assembly
6. SEATPOST ASSEMBLY ITEM DESCRIPTION ITEM DESCRIPTION BOLT (MALE) INBOARD RAIL CLAMP WASHER BOLT (FEMALE) OUTBOARD RAIL CLAMP SEATPOST FIG. 5: Install the seatpost in the frame. FIG. 4: Install the saddle. If there’s wiring and a battery (Shimano Di2), follow the wiring as shown in fig. 1. •... - Page 17 Fig. 5: Once the saddle height is determined torque the seatpost wedge bolt to 55 in-lbf (6.2 Nm). 143mm The Tarmac SL7 seatpost is available in two lengths (300mm and 380mm) and two setbacks (0 and 20mm). If the 380mm post is too long, we 138mm recommend using the 300mm seatpost.
-
Page 18: Fork / Stem Assembly
7. FORK / STEM ASSEMBLY Determine the rider’s fit (page 2), and the resulting steerer tube length. FRONT BRAKE Due to the routing system around the stem area, housing lengths do rely on the final position of the stem height. Before setting the housing lengths, it is best to determine the fit. - Page 19 ELECTRONIC Di2 SHIFTING MECHANICAL SHIFTING Di2 WIRE FRONT SHIFT FRONT BRAKE FRONT BRAKE REAR BRAKE REAR BRAKE ALIGNMENT PINS ALIGNMENT PINS REAR SHIFT COMPRESSION RING COMPRESSION RING INVERTED (OPPOSITE) INVERTED (OPPOSITE) BRAKE LEVER SETUP: BRAKE LEVER SETUP: SWITCH REAR BRAKE IN SWITCH REAR BRAKE IN COMPRESSION RING COMPRESSION RING...
-
Page 20: Aero Stem
ELECTRONIC Di2 SHIFTING MECHANICAL SHIFTING Di2 WIRE FRONT BRAKE FRONT BRAKE UPPER TRANSITION UPPER TRANSITION REAR BRAKE 5/10mm SPACERS 5/10mm SPACERS REAR SHIFT LOWER TRANSITION LOWER TRANSITION REAR BRAKE FRONT SHIFT ALIGNMENT PINS ALIGNMENT PINS LOCATE FRONT COMPRESSION RING COMPRESSION RING LOCATE FRONT BRAKE HOUSING BRAKE HOUSING... - Page 21 The front brake housing must always pass through the front slot of the „ CLOSED STEM COVER compression ring. TOP CAP The rear brake housing must always pass through the side slot of the „ compression ring that matches the rear brake lever side. The brake housings STEERER must not cross each other.
- Page 22 CLOSED STEM COVER OPEN STEM COVER TOP CAP 5mm SPACER MAX 5mm 44mm LENGTH EXPANDER PLUG STEERER TUBE MAX 35mm FIG. 11a: Install the closed stem cover (Steerer tube cut 3mm below stem). Fig. 10b: Open stem cover installation. • Install the top cap and bolt, then install the stem cover without a hole in the top.
- Page 23 OPEN STEM COVER SPACER ABOVE STEM COVER FIG. 11b: Install the open stem cover (Exposed steerer tube above stem). FIG. 12: Closed top cap removal (for stem bolt access). • Install the stem cover with a hole in the top, place a maximum 5mm of spacers above the top cap, •...
-
Page 24: Standard Stem
7.2. STANDARD STEM MECHANICAL - 35mm MAX FRONT OR REAR SHIFT MECHANICAL - FRONT OR REAR SHIFT REAR FRONT ELECTRONIC - BRAKE BRAKE Di2 WIRE FIG. 13: Install a standard stem. FIG. 14: Adjust the stack height. • Install the universal transition on the steerer tube, then guide the housings (and wire if using •... -
Page 25: Handlebar Assembly
If using a standard stem (instead of the Tarmac SL7 stem), only use a standard slotted style stem. Do not use an internal wedge clamp style stem, as internal wedge clamp stems can cause damage to the steerer tube if improperly installed. - Page 26 FIG. 17: Install the brake/shift levers. FIG. 16: Install the handlebar clips. • Slide the brake/shift lever clamps on the handlebar, then install the brake/shift levers on the clamps. • Install the two handlebar clips on their respective sides. • Align the levers and torque the clamp bolts to the manufacturer’s specifications.
- Page 27 1400mm WIRE FROM BOTTOM 750mm WIRE BRACKET FIG. 18 (Shimano Di2): Install the brake housings and shift wires. FIG. 19 (Shimano Di2): Install the brake housings. • Route a 750mm length of wire through the handlebar, with the plugs protruding from the exit ports •...
- Page 28 FIG. 20: Install the handlebar. FIG. 21: Install the stem faceplate. • With the handlebar drops facing down, place the handlebar against the stem clamp, then rotate the • Loosely thread the stem bolts through the faceplate and into the stem body. handlebar into position.
- Page 29 • Install the stem cable bat to secure the brake housings and Di2 wire under the stem. WARNING! The Tarmac SL7 stem is designed with no gap between the stem • Torque the stem cable bat bolt to 26.5 in-lbf / 3.0 Nm.
-
Page 30: Final Steps
MECHANICAL SHIFTING Do not pinch the housings or Di2 wire with the stem cable bat. Before cutting the hydraulic lines, it can be helpful to push some excess hose into the handlebar. This allows for possible minor future fit adjustments. •... - Page 32 SPECIALIZED BICYCLE COMPONENTS SPECIALIZED BICYCLE COMPONENTS 15130 Concord Circle, Morgan Hill, CA 95037 (408) 779-6229 15130 Concord Circle, Morgan Hill, CA 95037 (408) 779-6229...
Need help?
Do you have a question about the TARMAC SL7 and is the answer not in the manual?
Questions and answers