AUMA MATIC AM 01.1 Short Instructions
Actuator controls, bus connection
Hide thumbs
Also See for AUMA MATIC AM 01.1:
- Operation instructions manual (60 pages) ,
- Instructions manual (20 pages) ,
- Operation instructions manual (56 pages)

Related Manuals for AUMA AUMA MATIC AM 01.1


Summary of Contents for AUMA AUMA MATIC AM 01.1
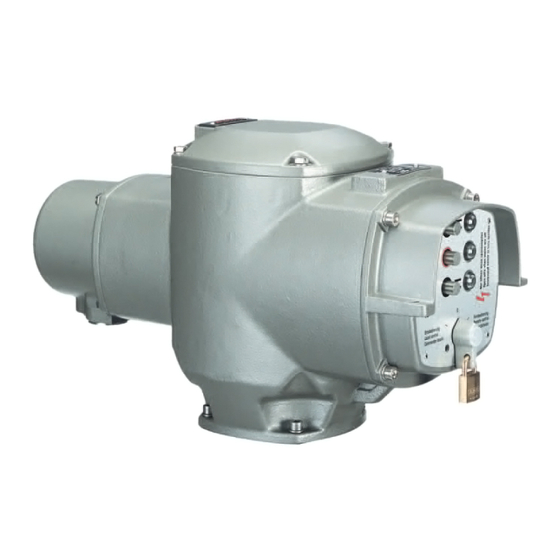
- Page 1 Actuator controls AUMA MATIC AM 01.1/ AM 02.1 AMExB 01.1/ AMExC 01.1 Profibus DP Short instructions bus connection Certificate Registration No. 12 100/104 4269...
-
Page 2: Table Of Contents
Assignment of the customer inputs of the Profibus DP interface (option) Assignment Profibus DP connection Assignment positioner connections Checking/ setting the switches on the logic board Appendix A Literature references Appendix B Connecting the cable shield for the AUMA MATIC AMExB/ AMExC 01.1 Index Addresses of AUMA offices and representatives... -
Page 3: Safety Instructions
“Warning” marks activities or procedures which, if not carried out correctly, can affect the safety of persons or material. Short description AUMA actuators have a modular design. Motor and gearing are mounted in a common housing. The actuators are driven by an electric motor and controlled via the elec- tronic controls AUMA MATIC Profibus DP. -
Page 4: Electrical Connection
The wiring diagram applicable to the actuator is attached to the handwheel in a weather-proof bag, together with the operation instructions. In case the wiring diagram is not available, it can be obtained from AUMA (state commission no., refer to name plate) or downloaded directly from Figure A-2: Parking frame (accessories) the Internet (www.auma.com). -
Page 5: Bus Connection (Standard)
8 or page 10. For version with FO (fibre optics), please refer to separate operation instruc- tions “AUMA MATIC AM 01.1/ AM 02.1 FO connection”. Connect bus cable. Refer to figures B-1 to B2. The termination resistors for channel 1 and channel 2 (options) are switched in via switches (S1) and (S2). -
Page 6: Fitting The Cover
Actuator controls AUMA MATIC AM/ AMExB/ AMExC Profibus DP Short instructions bus connection Figure B-3: Connection board (for overvoltage protection) Bus termination Bus termination channel 2 channel 1 Figure B-4: Connection for overvoltage protection from previous / to next Profibus DP device... -
Page 7: Remote Position Transmitter
For the connection of remote position transmitters (potentiometer, RWG) screened cables must be used. AUMA MATIC on wall bracket The AUMA MATIC can also be mounted separately from the actuator on a wall bracket. Figure B-5: AM on wall bracket For the connection of actuator and AUMA MATIC on wall bracket, use suit- able flexible and screened connecting cables. -
Page 8: Mains And Bus Connection For Ex-Version With Plug/ Socket Connector/ Terminal Board (Kp)
Actuator controls AUMA MATIC AM/ AMExB/ AMExC Profibus DP Short instructions bus connection Mains and bus connection for Ex-version with plug/ socket connector/ terminal board (KP) When working in potentially explosive areas, observe the European Standards EN 60079-14 “Electrical installations in hazardous areas”... - Page 9 Type of customer connection Screws Screws Screws Cross section max. 6 mm 6 mm 1.5 mm Material: Pin/socket carrier Araldite/Polyamide Araldite/Polyamide Araldite/Polyamide Contacts Brass (Ms) Brass (Ms) Brass (Ms) tin-plated Suitable for copper wires. For aluminium wires, please contact AUMA.
-
Page 10: Mains And Bus Connection For Ex-Version With Plug-In Terminal Connection (Kes)
The bus connection is realised via terminals (figure D-1) The terminal compartment is designed for explosion protection “EEx e” (increased Figure D-1: Plug in terminal safety). The controls AUMA MATIC (type of protection EEx d) remain closed. connection Loosen bolts (1) (figure D-1) and remove terminal cover. -
Page 11: Redundant Bus Connection
Short instructions bus connection Profibus DP Redundant bus connection AUMA Profibus DP devices can be connected with a second (redundant) Profibus cable. If the bus on channel 1 fails, e. g. through cable break, the slave automatically switches to channel 2. -
Page 12: 3.10 Bus Cables
Actuator controls AUMA MATIC AM/ AMExB/ AMExC Profibus DP Short instructions bus connection 3.10 Bus cables Only cables according to standard DIN 19245 or EN 50170-2, cable type A, may be used for Profibus DP wiring. A maximum of up to 32 Profibus devices may be connected in one segment. -
Page 13: 3.11 Setting The Profibus Dp Address
Actuator controls AUMA MATIC AM/ AMExB/ AMExC Short instructions bus connection Profibus DP 3.11 Setting the Profibus DP address The bus address is set on the Profibus DP interface board. Loosen screws and remove cover (figure F-1) Figure F-1 Screws... -
Page 14: Description Profibus Dp Interface
Actuator controls AUMA MATIC AM/ AMExB/ AMExC Profibus DP Short instructions bus connection Description Profibus DP interface Figure G: Profibus DP interface board S1.2 Rotary switch S3 Rotary switch S2 S1.1 X8 PROFIBUS X11 AI ¾ X10 AI Table 6: Standard setting of Profibus DP interface board S1.1... -
Page 15: Assignment Of The Customer Inputs Of The Profibus Dp Interface (Option)
Actuator controls AUMA MATIC AM/ AMExB/ AMExC Short instructions bus connection Profibus DP Assignment of the customer inputs of the Profibus DP interface (option) X7 spare This plug provides pins for 4 digital customer inputs. Table 7: Digital inputs Description... -
Page 16: Assignment Profibus Dp Connection
Actuator controls AUMA MATIC AM/ AMExB/ AMExC Profibus DP Short instructions bus connection Assignment Profibus DP connection X8 PROFIBUS The bus signals and the galvanically isolated voltage supply for the bus termination, as well as the bus termination resistors located on the Profibus DP board are connected on this plug. -
Page 17: Checking/ Setting The Switches On The Logic Board
Actuator controls AUMA MATIC AM/ AMExB/ AMExC Short instructions bus connection Profibus DP Checking/ setting the switches on the logic board The settings on the logic board are already made in the factory, according to the order details. The logic board is located below the Profibus DP board. -
Page 18: Appendix A Literature References
+49-721 / 96 58 590 +49-721 / 96 58 589 Http:/ www.profibus.com Appendix B Connecting the cable shield for AUMA MATIC AMExB/ AMExC 01.1 The shield of the fieldbus cable should be largely connected with the respective threads. Recommended threads e.g. WAZU-EMV/EX supplied by Hugro... -
Page 19: Index
Actuator controls AUMA MATIC AM/ AMExB/ AMExC Short instructions bus connection Profibus DP Index Blinker transmitter Literature Remote position Bus cable 11 - 12 Loop resistance transmitter RWG Bus connection Maintenance Safety instructions Cable capacity Motor connection Screening (bus cable) -
Page 20: Addresses Of Auma Offices And Representatives
+49 7631 - 809-0 +49 711 - 34803 0 +49 7631 - 809 1250 +49 711 - 34803 34 Certificate Registration No. 12 100/104 4269 riester@auma.com riester@wof.auma.com www.auma.com www.auma.com For detailed information on AUMA products, please refer to the Internet: Y000.423/003/en/1.09 www.auma.com...
Need help?
Do you have a question about the AUMA MATIC AM 01.1 and is the answer not in the manual?
Questions and answers