Advertisement
Hi-lume Premier 0.1% EcoSystem / 3-Wire Voltage LED Driver
Installation
041597 Rev. A
2/2017
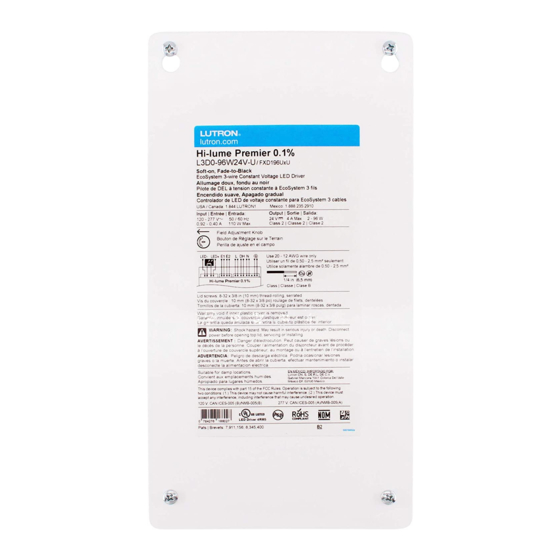
L3D0-96W24V-U UL
Listed Driver
®
Output: 2–96 W 24 V- Input: 120–277 V~ 50 / 60 Hz, Max 110 W
Important Notes: Please read before installing.
• For installation by a qualified electrician in accordance with all local and national electrical codes.
• Use copper conductors only.
• For indoor use only.
• For 277 V~ applications, a suitable barrier may be required between the non-Class 2 and Class 2
wiring, per local and national electrical wiring codes. For your convenience, the driver includes an
optional barrier.
• Check to see that the driver type and rating are suitable for the application.
• DO NOT install if product has any visible damage.
• If moisture or condensation is evident, allow the product to dry completely before installation.
• Operate between 32 °F (0 °C) and 104 °F (40 °C) ambient.
• 0% to 90% humidity, non-condensing.
• Four 8-32 × 3/8 in (9.5 mm), serrated lid screws provided.
• For best practices, please refer to Application Note #591 (P/N 048591) at www.lutron.com
Required Components
For each system, ensure that you have:
One Compatible
At least one Hi-lume
Lutron Control
1,2
Premier 0.1% Driver
At least one compatible
3
LED Load (light engine)
1
See list of compatible controls on the reverse side.
2
Please refer to the control installation sheet for wiring instructions.
3
Refer to LED load manufacturer instructions for proper installation practices.
Load ratings must match driver output ratings.
Lutron Electronics Co., Inc. | 7200 Suter Road | Coopersburg PA, 18036-1299
Need Help? Please visit the Hi-lume Premier 0.1% page at www.lutron.com or
call Lutron Customer Assistance at 1.844.LUTRON1 (1.844.588.7661)
Mounting
(mount as shown on the right)
English
1. Remove top cover to access multi-sided mounting key holes.
2. Mount driver per the options shown to the right.
Notes
• Minimum of 3 in (76 mm) required between any two LED drivers.
• Install in accordance with all national and local electrical codes.
• Mount driver in a position where it can be easily located and accessed if service
or troubleshooting is necessary.
• Any other mounting configuration will require additional mechanical support.
Improper installation may result in hazards to personnel or property.
Wiring
(wire as shown below)
!
WARNING: Shock Hazard. May result in serious injury or death.
Turn off power at circuit breaker before installing the unit.
1. Remove top cover to access the terminal blocks.
2. Open necessary knockouts to pass wires into the wiring compartment.
3. Connect the necessary wires according to the illustration below. For E1 / E2
wiring, please refer to Application Note #142. Terminals accept 12 AWG to
20 AWG (0.50 mm
2
to 2.5 mm
2
).
4. Optional - An AC line cord may be used for a 120 V~ application. The line
cord must include a grounded plug to be a valid installation as shown to the right.
277 V~ applications cannot use a line cord, they must be hard-wired.
5. Optional - Add barrier between non-Class 2 and Class 2 wires (e.g., EcoSystem
wiring shown below has E1 / E2 as Class 2, therefore barrier is placed between
input and control terminal block).
6. Rotate Field Adjustment Knob to full counter-clockwise position.
7. Ensure compatible dimmer and load are installed and restore power to the circuit.
See reverse side for Compatible Controls.
3-Wire Controls
To LED Load
+ LED
– LED
3-Wire Wiring Diagram
+ LED
Hi-lume
Premier
0.1%
Driver
– LED
LED
Light
Engine
* Driver and control must be grounded in accordance with local and national electrical codes.
A barrier (included) in the wiring compartment separates non-Class 2
and Class 2 wires. Barrier can be placed between control and output
terminals (Option 1) or between input and control terminals (Option 2).
Option 1
Option 3
EcoSystem Controls
From Line/Control
120 – 277 V~
50 / 60 Hz
To LED Load
Switched Hot (L)
+ LED
Dimmed Hot (DH)
– LED
Neutral (N)
Ground* (D)
EcoSystem Wiring Diagram
Switched Hot (L)
Line /
Lutron
Dimmed Hot (DH)
Hot
3-Wire
Dimmer
+ LED
Neutral (N)
Ground*
Ground* (D)
– LED
Neutral
Ground*
LED Light
Engine
Option 2
Output
Control
Barrier
Barrier
Input
Output
Control
Input
Mounting Surface
Line Cord
To EcoSystem Digital Link
E1
E2
From Line/Control
120 – 277 V~
50 / 60 Hz
Line / Hot (L)
Neutral (N)
Ground* (D)
E1
To EcoSystem
E2
Digital Link
Line / Hot (L)
Line / Hot
Hi-lume
Neutral (N)
Neutral
Premier
0.1%
Driver
Ground* (D)
Ground*
Advertisement
Table of Contents

Related Manuals for Lutron Electronics L3D0-96W24V-U


Summary of Contents for Lutron Electronics L3D0-96W24V-U
- Page 1 Load ratings must match driver output ratings. Neutral Driver Ground* (D) Light Ground* Engine LED Light Engine Ground* Lutron Electronics Co., Inc. | 7200 Suter Road | Coopersburg PA, 18036-1299 * Driver and control must be grounded in accordance with local and national electrical codes.
- Page 2 § Version 3.1 (or higher) is required to dim lower than 1%. ©2015 – 2017 Lutron Electronics Co., Inc. Version 7.0 (or higher) is required to dim lower than 1%. For lower system versions, please visit www.lutron.com/LEDsystemcheck to check if your system requires changes.
Need help?
Do you have a question about the L3D0-96W24V-U and is the answer not in the manual?
Questions and answers