Table of Contents
Advertisement
Quick Links
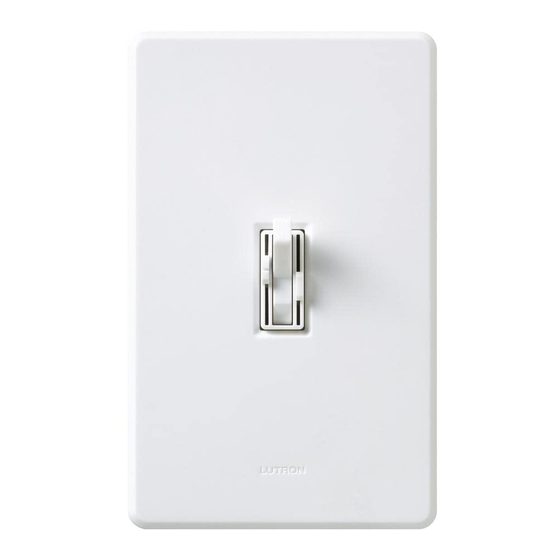
Single Pole/3-Way
Quiet Fan-Speed Controls
120 V~ 60 Hz 1.5 A
120 V~ 60 Hz 2 A
DVFSQ-F-HO
DVFSQ-F
LGFSQ-F
AYFSQ-F
DVSCFSQ-F
LXFSQ-F
DVSCFSQ-F-HO
CTFSQ-F
DVWFSQ-F
TGFSQ-F
LXFSQ-F-HO
DLFSQ-F
Important Notes:
Please read before installing.
1. CAUTION: To avoid overheating and possible damage to other equipment, do not use to control
receptacles, lighting, fluorescent lighting fixtures, or transformer-supplied appliances.
2. Do not use control with a fan and light that operate with the same switch.
3. When no "grounding means" exists within the wallbox for an existing control, the 2011 National
Electrical Code
(NEC
) allows a control to be installed as a replacement as long as 1) a nonmetallic,
®
®
noncombustible faceplate is used with nonmetallic attachment screws or 2) the circuit is protected
by a ground fault circuit interrupter. The 2008 NEC
®
the requirement for nonmetallic attachment screws. When installing a control according to any of
these methods, cap or remove the green wire before screwing the control into the wallbox.
4. Wiring controls in a circuit which contains a ground fault circuit interrupter (GFCI) or an arc fault circuit
interrupter (AFCI) may cause nuisance tripping and is not recommended.
5. Use control with a ceiling paddle fan only. Use only one ceiling paddle fan per control.
6. For new installations, wire a test switch before installing the control.
7. Set multi-speed fans to their highest setting before installing controls.
8. Use only one control in a 3-way circuit.
9. Install in accordance with all national and local electrical codes.
10. Clean control with a soft damp cloth only. Do not use any chemical cleaners.
Multi-Unit Installations
When combining controls in one wallbox,
remove all inner side sections before wiring
(see at right). Use pliers to bend each side
section up and down until it breaks off.
Reduction of control capacity is not required.
Each Control Has Inside
Sections Removed
Break Off Side Sections
English
Installation
1
2
has the same allowances but does not contain
3
Do Not Remove
Outside Sections
Middle Control Has Two
Side Sections Removed
4
For installations involving more than one control in wallbox,
refer to Multi-Unit Installations before beginning.
Turn OFF Power.
• Turn power OFF at circuit break er or remove fuse.
WARNING: Shock Hazard. May result in
serious injury or death. Turn off power
at circuit breaker before installing
the unit.
Removing Wallplate and Switch.
• Remove wallplate and switch mounting screws.
• Carefully remove switch from wall (do not remove wires).
Identifying the Type of Circuit.
Ground
(Bare Copper
or Green Wire)
OR
Different-colored screw
Ground (Bare Copper
(Common). Actual location may vary.
or Green Wire)
Single-Pole:
3-Way:
Insulated wires
Insulated wires connected to three
connected to two
screws. One of these wires is connected
OR
screws of the same
to a screw of a different color (not green)
color. See Step 5a
or labeled COMMON. MARK or TAG this
when wiring.
wire to identify it when wiring. See Step
5b when wiring.
Disconnecting Switch Wires.
Important Note: Your wall switch may have two wires attached to
the same screw (see illustrations below for examples). Tape these
two wires together before disconnecting. Connect both wires to the
control wire in Step 5.
OR
One wire in the backwired
Looped Wire:
hole and one to the screw.
Turn screw to loosen.
OR
Screw Terminals:
Turn screws to loosen.
Push-in Terminals:
Insert screwdriver. Pull wire out.
5
Wiring the Control.
• For installations involving more than one control in a wallbox, refer to the section on
Multi-Unit Installations before beginning.
Note: Depending on model number, the control may include a Lutron
Claro
or Fassada
wallplate.
®
®
A Lutron
wallplate consists of 2 parts, a faceplate (front) that snaps into
®
an adapter plate (back).
Please detach faceplate from adapter plate before installing. This will
expose control mounting holes and prevent faceplate
damage during installation.
Note: Follow recommended strip lengths and combinations for supplied wire
connectors. Wire connectors are suitable for copper wire only. For aluminum
wire, consult an electrician.
5a - Single-Pole Wiring
Red
Red /
White
Black
Ground
Green
Control
Live
Black
Red
Tag
Red/White
120 V~
60 Hz
Green
Fan
Ground
Neutral
5b - 3-Way Wiring
Red
Red /
White
Tag
Ground
Black
Green
3-Way
Control
Switch
Live
Black
Red
Red/White
120 V~
60 Hz
Green
Ground
Ground
Neutral
6
Mounting Control to Wallbox.
• Form wires carefully into the wallbox, mount and align control.
• Install faceplate.
Attach standard wallplate.
Attach ClaroR or FassadaR wallplate which consists of 2 parts, an
adapter plate (back) and faceplate (front).
Note: Do not
overtighten
mounting screws.
OR
Permanent damage
may occur.
7
Turn ON Power.
Turn ON power at circuit break er or replace fuse.
Grasp top
of faceplate
®
and pull
forward to
detach it
from adapter
plate.
Faceplate (Front)
Adapter plate (Back)
Twist wire
connector tight.
Ensure that no
bare wire is
exposed.
• Connect the green ground wire on the control
to the bare copper or green ground wire in the
wallbox. (See Important Note 3.)
• Connect the black control wire to one of the
wires removed from the switch. If you had taped
together two wires (see step 4), connect both
wires to the black control wire and remove
the tape.
• Connect the red wire on the control to the other
wire removed from the switch.
• Cap off the red/white wire on the control. Do
NOT connect to any other wire or ground.
OR
• Note: Only one control can be used in a 3-way
circuit. Control can be used in either location.
• Connect the green ground wire on the control
to the bare copper or green ground wire in the
wallbox. (See Important Note 3.)
• Connect black control wire to the tagged wire
removed from the switch. If you had taped
together two wires (see step 4), connect both
wires to the black control wire screw and
remove the tape
• Connect the red wire on the control to one of the
remaining wires removed from the switch.
• Connect the red/white wire on the control to the
remaining wire removed from the switch.
• Note: Control can be installed in either
Fan
location.
Adapter plate
Faceplate
(Back)
(Front)
Snap on faceplate
Advertisement
Table of Contents

Related Manuals for Lutron Electronics YFSQ-F


Summary of Contents for Lutron Electronics YFSQ-F
- Page 1 Single Pole/3-Way English Quiet Fan-Speed Controls Installation For installations involving more than one control in wallbox, Wiring the Control. refer to Multi-Unit Installations before beginning. 120 V~ 60 Hz 1.5 A 120 V~ 60 Hz 2 A • For installations involving more than one control in a wallbox, refer to the section on DVFSQ-F-HO DVFSQ-F LGFSQ-F...
- Page 2 120 V~ 60 Hz 8 A Installation Instructions AYF-103P LXF-103PL DVF-103P DVSCF-103P 277 V~ 60 Hz 6 A Please Read Before Installing AYF-103P-277 DVF-103P-277 LXF-103PL-277 DVSCF-103P-277 Preset Fluorescent Dimmer • Wire in accordance with all national and local electric codes. •...
- Page 3 Operation Use Toggle, Paddle, or Push Button to turn light(s) on to preset level. Move Slider up to brighten and down to dim light(s) to desired level. Ariadni Diva Lyneo Lx Lamp Seasoning For best dimming performance, fluorescent lamps may need to be operated at full light output for a specified amount of time prior to dimming.
Need help?
Do you have a question about the YFSQ-F and is the answer not in the manual?
Questions and answers