
Related Manuals for Taga Harmony TA-600MULTI


Summary of Contents for Taga Harmony TA-600MULTI
- Page 1 TA-600MULTI CUSTOM INSTALL 4-ZONE STEREO AMPLIFIER Instruction manual Edition 10-2020...
- Page 2 It delivers pure and distortion-limited power as well as rich sound performance with stunning accuracy, soundstage and sensational dynamics. A variety of features and wired connections makes the TA-600MULTI a very versatile device with ability to work in different application: •...
-
Page 3: Table Of Contents
Contents Safety Instructions Front and Rear Panel Hooking Up Speaker Cables Hooking Up the Amplifier Operation Play from a USB Flash Drive Additional Information Specifications... -
Page 4: Safety Instructions
Safety Instructions IMPORTANT READ THIS SECTION CAREFULLY BEFORE PROCEEDING! WARNING: TO REDUCE THE RISK OF FIRE OR ELECTRIC SHOCK, DO NOT EXPOSE THIS PRODUCT TO RAIN OR MOISTURE. DO NOT REMOVE COVER (OR BACK). NO USER-SERVICEABLE PARTS INSIDE. REFER SERVICING TO QUALIFIED SERVICE PERSONNEL. The triangle containing a lightning symbol is intended to alert the user to the presence of uninsulated dangerous voltages within the product’s enclosure that may be of sufficient magnitude to constitute a risk of electric shock to persons. - Page 5 Safety Instructions 1. Read Instructions - All the safety and operating instructions 13. Overloading - Do not overload wall outlets, extension cords or should be read before the product is operated. integral convenience receptacles as this can result in a risk of fire 2.
-
Page 6: Front And Rear Panel
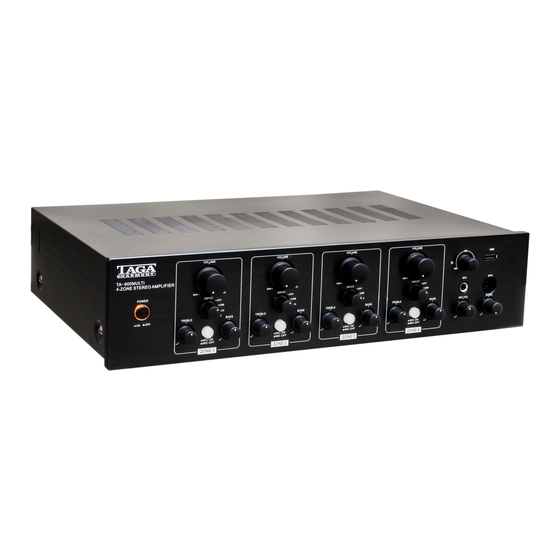
Front and Rear Panel Front Panel Power Switch (ON and OFF) and Power Status Indicator (around the Power Switch) INDIVIDUAL FOR ZONE 1 / ZONE 2 / ZONE 3 / ZONE 4 Treble Regulator Bass Regulator Microphone Switch (ON and OFF) Microphone LED Indicator Volume Regulator Input Selector (OFF, USB, AUX, MP3) -
Page 7: Hooking Up Speaker Cables
Hooking Up Speaker Cables The Speaker Connectors can accommodate up to 10AWG speaker cables as well as most of popular plugs (banana etc.). It is recommended to leave about 150 cm (5 feet) of extra cable at the amplifier end to facilitate positioning and installation of the amplifier. -
Page 8: Hooking Up The Amplifier
Hooking Up the Amplifier SPEAKERS OUT Use only 4~16 ohms impedance speakers Speaker Cable Speaker Cable ZONE 2 ZONE 4 (Kitchen, Bathroom, etc.) (Patio, Garden, etc.) Microphone USB Flash Drive Smartphone, tablet, laptop, etc. - Page 9 Hooking Up the Amplifier 1. Make sure the amplifier is turned off (the Power Switch and the Power Cable is removed from the wall outlet). 2. Turn the Volume Regulator of each ZONE to MIN (max counter clockwise). 3. Using speaker cables (not supplied with this product) connect your speakers to the SPEAKERS OUT (choose the ZONES you want to use) connectors located on the rear panel.
-
Page 10: Operation
Operation 1. Plug the Power Cable to the amplifier and into the electrical outlet. 2. Turn on the amplifier – press the Power Switch (the Power Switch The Power Status Indicator around the Power Switch should turn on in a few seconds. - Page 11 Operation INPUT Selector: For each ZONE you can select one of three available audio inputs (USB, AUX, MP3). If you do not want to play music from these audio inputs in the ZONE, move the Input Selector knob to OFF. The Input Selector works independently from the Microphone Switch –...
-
Page 12: Play From A Usb Flash Drive
Operation ECHO - microphone echo regulator: You can adjust the level of reverberation of the microphone. To increase the reverberation turn the ECHO knob clockwise (+) and to decrease it rotate the knob counterclockwise (-). The default: the knob is in the center position: the marker on the knob in the vertical position. -
Page 13: Additional Information
Additional Information Break-In Your TAGA Harmony amplifier sounds great immediately after it is taken out of the carton but as all amplifiers, the internal components of this amplifier require a “break-in” period to reach its full sonic capabilities. During the “break-in” period it is recommended to operate the amplifier at moderate volume levels. -
Page 14: Specifications
Specifications Type CI 4-zone stereo amplifier with MIC mixing Power Output 2 x 16W RMS per zone / 8Ω [all zones driven] 2 x 18W RMS per zone / 4Ω [all zones driven] 2 x 20W RMS / 8Ω; 2 x 30W RMS / 4Ω [one zone driven] Pairs of 4 to 16Ω... - Page 15 We strongly advise to contact a professional installer or dealer in order to install TAGA Harmony products. We recommend using high quality TAGA Harmony cables and other installation accessories. Kit Content: Amplifier Power Cable Instruction Manual Your product is marked with the symbol as showed on the left.
- Page 16 Notes...
Need help?
Do you have a question about the TA-600MULTI and is the answer not in the manual?
Questions and answers