Advertisement
Quick Links
Advertisement

Subscribe to Our Youtube Channel
Related Manuals for TOORX ERX 65


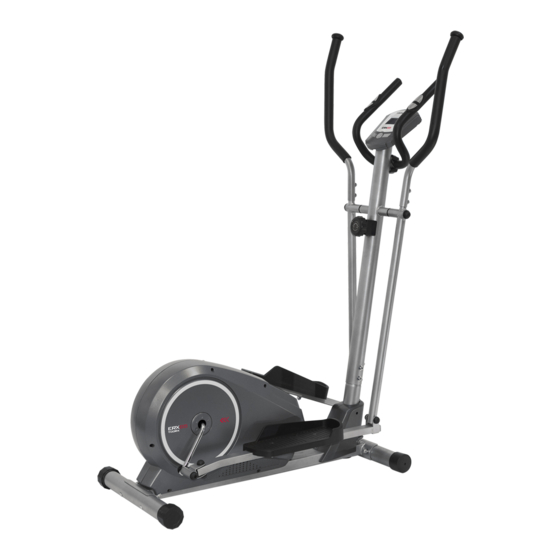
Summary of Contents for TOORX ERX 65
- Page 1 INSTRUCTION...
-
Page 2: Exploaded Diagram
EXPLOADED DIAGRAM... -
Page 3: Parts List
PARTS LIST Description Description Main frame Shaft Bushing Handlebar post Ф14×10×Ф10.1 Front Stabilizer Arc washer Rear Stabilizer Hex bolt M10×45 5L/R Pedal support 1 pr. Flat washer d10×1.5 6L/R Swing tube 1 pr. Nylon nut M10 7L/R Handlebar 1 pr. Cap S17 Fixed handlebar Hex bolt M10×50... - Page 4 NOTE: Most of the listed assembly hardware has been packaged separately, but some hardware items have been preinstalled in the identified assembly parts. In these instances, simply remove and reinstall the hardware as assembly is required. Please reference the individual assembly steps and make note of all preinstalled hardware. PREPARATION: Before assembling, make sure that you will have enough space around the item;...
- Page 5 STEP 2: Connect extension wire (18) to sensor wire (20) together, and then connect the cable of tension controller (17) to the hook of the tension cable (19) as shown in picture A. At last, tighten the handlebar post (2) to the main frame (1) with inner hex bolts (16), spring washers (52) and arc washers (13).
- Page 6 STEP 3: 1. Insert the shaft (27) through the handlebar post (2), put on the wave washer (54) and then insert the left swing tube(6L) to the left side of shaft (27). At last, fix it with flat washer (25), spring washer (52) and hex bolt (24). Note: Please don’t tighten them for now.
- Page 7 STEP 4: 1. Thread the pulse wire (50) through hole of handlebar post (2) then pull out from the hole of computer bracket at the top of the handlebar post (2). Then tighten the fixed handlebar (8) to the handlebar post (2) with inner hex bolts (51) and spring washers (52).
- Page 8 STEP 5: Connect extension wire (18) and pulse wire (50) to the relevant wires of computer (9). Then fix the computer (9) to the computer bracket of handlebar post (2) with cross pan head screws (55) ..
- Page 9 GARLANDO SPA Via Regione Piemonte, 32 - Zona Industriale D1 15068 - Pozzolo Formigaro (AL) - Italy www.toorx.it - info@toorx.it...
Need help?
Do you have a question about the ERX 65 and is the answer not in the manual?
Questions and answers