Table of Contents
Advertisement
Quick Links
Advertisement
Table of Contents

Related Manuals for TOORX BRX-R3000


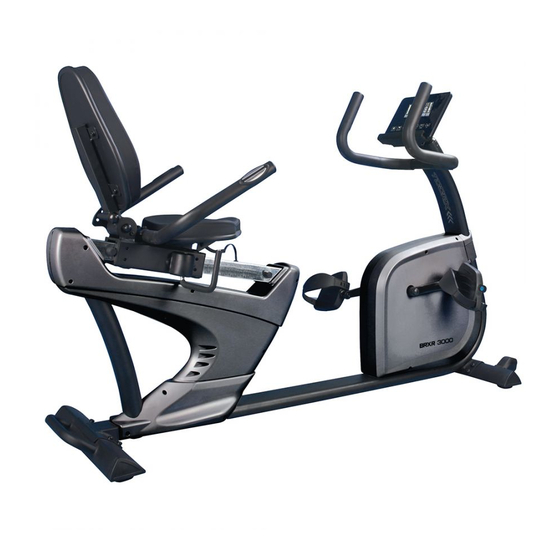
Summary of Contents for TOORX BRX-R3000
- Page 1 INSTRUCTION iConsole App Manual www.toorx.it/iconsole...
- Page 2 CHECK LIST (CONTENTS OF PACKAGE): & KH-817K2...
-
Page 3: Exploded Drawing
Exploded drawing:... -
Page 4: Part List
Part List: Part NO. Description Material Specification Main frame Rear stabilizer Front stabilizer Wheel cover 93.2*64.7*62 Handlebar post Sliding beam Q195 50*100*1.8T*740L Spring washer D15.4 XD8.2x2T Allen bolt M8*1.25*50L,8.8 Allen bolt M8x1.25x20L,8.8 Q235A M8*1.25*8T Curved washer Q235A D22xD8.5x1.5T Rear chain cover (left) Flat washer Q235A D16*D8.5*1.2T... - Page 5 Part NO. Description Material Specification Bushing 125*75*53 Bushing 125*75*53 Upper computer cable 600L Lower computer cable 950L Sensor cable 150L Electric cable 450L Belt wheel ZL102 D260*19 Handle pulse PE18 Waved washer 65Mn D27*D20.3*0.5T Allen bolt M8*1.25*50L,8.8 Round magnet Computer SE-1699-31 Screw M6*1.0*15L,8.8...
- Page 6 Bolt Q235A M5x0.8x15L,8.8 Part NO. Description Material Specification Buffer strip 219*15*2T Screw ST4*1.41*15L Bolt Q235A M5x0.8x10L Line plug D4*D12*13 Flat washer Q235A D14*D6.5*0.8T Computer fixing plate Q235A 220*120*3T Bolt Computer bracket 120*40*70 Computer fixing bracket 120*110*2.5T Screw M8*1.25*45L Connect cable 150L Buffer 40.5*28.5*6T...
- Page 7 STEP 2 1) Suggest assembling this step by two persons. 2) First, lift up the upper protective cover (64) like fig. a. Then connect the handle pulse cable (46 & 47) like fig. b. 3) Insert the handlebar post (5) on the main frame and tighten it by using the spring washer (7), the Allen bolt (8), and the flat washer (13).
- Page 8 STEP 3 1) Assemble the upper handlebar pulse cable (46) & upper computer cable (52A) to the computer (60). 2) Assemble the computer (60) to (110)& the handlebar post (5) by Computer fixing plate using the bolt (111). 3) Assemble the left pedal (16L) on the crank (15L) by anti-clockwise. Assemble the right pedal (16R) and the right crank (15R) by clockwise.
- Page 9 STEP 4 1) Assemble the handlebar (48) to the main frame (1) by using the Allen bolt (8), and the curved washer (11). 2) Connect the lower handle pulse cable (47) with the handle pulse cable (49), then cover with line plug(107).
- Page 10 STEP 5 1) Assemble the seat (42) to the seat support tube(88) by using the screw (61) and the flat washer (108). 2) Assemble the backrest (38) to the backrest post by using the Allen bolt (9) and the flat washer (13). 3) Connect the adaptor (39) to the adaptor input on the front of the bike.
- Page 11 The bike can be moved as per below drawing The backrest can be adjusted as per below drawing.
-
Page 12: Button Function
INSTRUCTION MANUAL 【BUTTON FUNCTION】 To make upward adjustment or increase training resistance. DOWN To make downward adjustment or decrease training resistance. ENTER To confirm all settings. START/ STOP To start or stop workout. RESET To reset current settings or press to have monitor switching to initial training mode for renew selection. -
Page 13: Operating Procedure
【OPERATING PROCEDURE】 (1) POWER ON – Plug in adaptor to power on console, system will have buzzer beeping as a cue. LCD will have all segments displaying for two seconds along with “78.0” (wheel diameter), “E” (EU), and “K” (KM) for one second. (2) USER PROFILE SET UP –... - Page 14 ▼ U-U Use UP (▲) and DOWN ( ) key for TIME, DISTANCE, CALORIES, and PULSE settings. Press “ENTER” each time when value’s determined. U-5 Press “START” and start pedaling. RPM & PULSE bars will display values accordingly. U-6 Press “STOP” to pause exercise and all exercise values will be saved. U-7 Press “RESET”...
-
Page 15: User Program
(7) USER PROGRAM ▼ 7-1 Use UP (▲) and DOWN ( ) key to create user’s desired program, press “ENTER” when each chart value’s determined. 7-2 Press “ENTER” and hold for 2 seconds and skip to TIME setting. 7-3 Press “START” and user may start pedaling. (8) WATT 8-1 WATT default value 120 will be displayed in the alphanumeric column in flashing text waiting for an adjustment. - Page 16 (9) BODY FAT 9-1 This function is valid after user stops pedaling (or press “STOP”). 9-2 A continuous RPM signal input is required during BODY FAT test. 9-3 Press “BODY FAT”, console system will display “UX” for two seconds and start the body fat measurement process and will show results of FAT% and BMI on screen 8 seconds later.
- Page 17 APP: 1.This console has been built in Bluetooth U.0 module for APP function. 2. Once console is connected to smart device via Bluetooth , the console will power off. Noted: 1. After U minutes without pedaling or pulse input, console will enter into power saving mode. Press any key may wake the console up.
- Page 18 GARLANDO SPA Via Regione Piemonte, 32 - Zona Industriale D1 15068 - Pozzolo Formigaro (AL) - Italy contact@toorxprofessional.it www.toorxprofessional.it...
Need help?
Do you have a question about the BRX-R3000 and is the answer not in the manual?
Questions and answers