Table of Contents
Advertisement
Quick Links
Advertisement
Table of Contents

Related Manuals for TOORX BRX FLEXI


Summary of Contents for TOORX BRX FLEXI
- Page 1 INSTRUCTION...
-
Page 2: Assembly Diagram
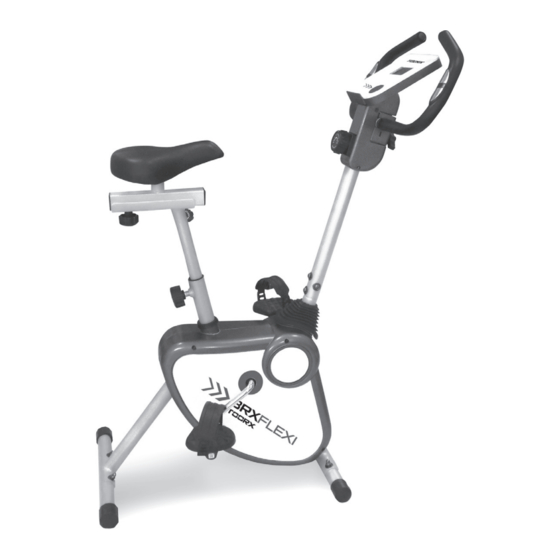
ASSEMBLY DIAGRAM PART LIST Part No. Description Q’ty Part No. Description Q’ty 5R/L Pedal Spacer Main frame Cover Nut M8 Screw M5*10 Curve washer Computer Domed nut Tension wire Flat washer Handlebar Front stabilizer Rear stabilizer support tube Quick Realse Knob Rear stabilizer Seat Slide Upper front post... -
Page 3: Assembly Instruction
ASSEMBLY INSTRUCTION STEP 1 A).Attach the Rear stabilizer (54) to the Rear stabilizer support tube (28), securing with 2X Curve washer (19) and 2X Domed nut (20) . B). Attach the Front stabilizer (52) to the Main frame (8), securing with 2X Curve washer (19) and 2X Domed nut (20) . - Page 4 STEP 3 A).Pull the Middle computer wire(57) from the Upper front post(56),connect with Computer wire(45). B). Lock the Computer (45) to the Upper front post(56),with 2xScrew(44). STEP 4 A). Attach the handle bar(49) onto the Upper Front post(56), tighten with x1 Cover(43),x1Flat washer(21) , x1 Spacer(41) and x 1 T-knob(40) ,...
- Page 5 STEP 5 (A). Attach the Seat (32) to the Seat Slide(31), securing with 3 x Washer(21), and 3 x Nut(15),. (B) Attach the Seat Slide(31) to the seat post(65), tighten with 1xCarve Washer(62), 1xAdjust knob(64). (C)Insert the Seat post (65) into the Main frame (8). And then insert the Quick Release knob(29) into the hole of the seat post at your desired location.
- Page 6 EXERCISE COMPUTER INSTRUCTION MANUAL Functions and Operations 1. Batteries Installation Please install 2 pieces of AAA 1.5V batteries in the battery case on the back of monitor. (Whenever Batteries are removed, all the functions values will be reset to zero.) 2.
- Page 7 displays P and enter the heart rate mode, then user can start test. Heart mode will close and displays ODO if no pulse signal or press the key in 16s.
-
Page 8: Muscle Toning
This stage should last for a minimum of 12 minutes though most people start at about 15-20 minutes 3. The Cool Down Phase This stage is to let your Cardio-vascular System and muscles wind down. This is a repeat of the warm up exercise e.g. -
Page 9: Exploded Diagram
EXPLODED DIAGRAM... -
Page 10: Parts List
PARTS LIST PART NO. DESCRIPTION Q’TY Screw ST4.2*19 Screw ST4.2*25 Cover of Crank Left chain cover Right chain cover 5L/R Pedal Crank w/ Belt-driven wheel B.B Parts Main frame Adjustable Screw M6 U-plate Spring washerφ6 Nut M6 France Nut M10 France Nut M8 Nut M8 Plastic washerφ20... - Page 11 Screw M5*10 Computer Tension knob Round end cap Foam grip Handlebar Cover for Left upper front post Cover for right upper front post Transportation wheel for front stabilizer Front stabilizer Screw ST4.8*15 Rear stabilizer Belt Upper front post Middle computer wire Fly wheel Hand Pulse sensor Washer...
- Page 12 GARLANDO SPA Via Regione Piemonte, 32 - Zona Industriale D1 15068 - Pozzolo Formigaro (AL) - Italy www.toorx.it - info@toorx.it...
Need help?
Do you have a question about the BRX FLEXI and is the answer not in the manual?
Questions and answers