Table of Contents
Advertisement
Advertisement
Table of Contents

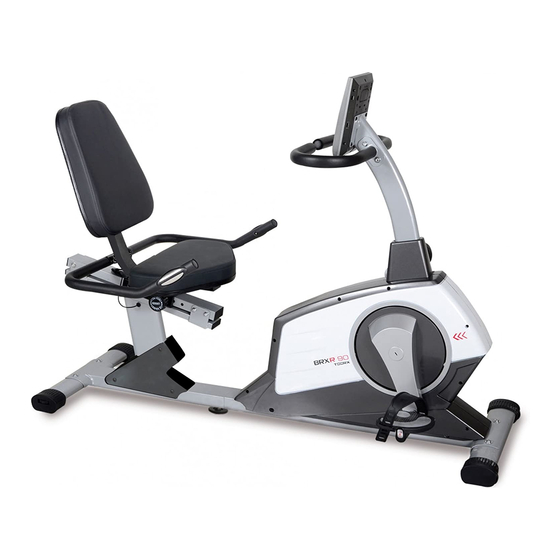
Summary of Contents for TOORX BRXR 90
- Page 1 INSTRUCTION...
-
Page 2: Parts List
PARTS LIST Part No. Q' t y Description Main frame Front stabilizer Rear stabilizer Front post Handlebar L/R Computer Rear support frame Cover for front post Middle sensor wire Middle pulse wire Foam grip for handlebar Screw M5*12 End cap for handlebar Allen screw M8*16 Curve washer M8*20 Flat washer Φ8*Φ17... - Page 3 End cap Φ31.8 Handlebar Hand pulse sensor Flat washer Φ12*Φ5 Self-tapping Screw ST4*20 Foam grip for handlebar Hand pulse wire upper Carriage bolt M8*45 Doomed nut M8 Grommet Run disc cover France bolt Run disc Run Disc Support L/R Back cover for run disc Self-tapping Screw ST5*10 Screw M5*10 Fixed wheel...
- Page 4 Clip Nut M8*20 Motor Power wire Sensor wire Motor wire...
-
Page 5: Exploded Diagram
EXPLODED DIAGRAM 1 9 L 1 9 R 2 3 L 2 0 L 2 3 R 2 0 R... -
Page 7: Pre-Assembly Check List
PRE-ASSEMBLY CHECK LIST N O : 1 N O : 7 N O : 3 2 N O : 4 N O : 3 4 N O : 2 N O : 3 N O : 5 L N O : 5 R N O : 8 N O : 1 9 L / R N O : 2 9... -
Page 8: Hardware Parts List
Seat cushion Back cushion Handlebar Manual HARDWARE PARTS LIST Description Drawing Q’ty Allen screw M8*16 Curve washer M8*20 Flat washer Φ8*Φ17 Allen bolt M8*55 Leverage knob Quick release knob Carriage bolt M8*45 Doomed nut M8 Allen Key L6 Allen Wrench Above described parts are all the parts you need to assemble this machine. -
Page 9: Assembly Instruction
included. ASSEMBLY INSTRUCTION This manual is designed to help you easily assemble, adjust and use this machine. Please read this manual carefully. For the sake of familiarizing yourself with the parts identified in the instruction, first study the overview drawing. Set all parts in a clear area on the floor and remove the packing material. -
Page 10: Middle Sensor Wire
Thread the leverage knob (25) to main frame bottom to stabilize the bike on floor. 2 3 L 2 3 R Step 3 Insert the front post (4) through the cover for front post (8) into the main frame (1). Then connect the middle pulse wire (10) to lower pulse wire (17) &... -
Page 11: Sliding Tube
Step 4 Insert the sliding tube (29) through the seat support bracket (32). Use the quick release knob (35) to lock the seat support bracket at selected position. Attach the seat support bracket to rear support frame(7) and secure them with eight allen screws (14). - Page 12 Step 6 Attach the left and right pedal straps to the left and right pedals (19L/R). Attach the left and right pedals (19L/R) to the left and right crank arms. Note: The pedals and crank arms are marked with "R" and "L". Note that the right pedal should be threaded on clockwise and the left pedal on counter-clockwise.
- Page 13 Step 7 Plug adapter into adapter jack.
-
Page 14: Computer Instructions
CHECK ALL BOLTS AND NUTS ARE TIGHTENED BEFORE USING THE MACHINE COMPUTER INSTRUCTIONS... -
Page 15: Functions And Features
The things you should know before exercise A. Input Power Plug in the adaptor to the equipment then the computer will produce a beep sound and turn on the computer at the Manual mode. B. Program select and setting value 1. -
Page 16: Key Function
well on the grips or the chest transmitter is attached well. 11.TEMPERATURE: Display the current temperature. Key function: There are 6 button keys and the function description as follows: 1. START/STOP key: a. Quick Start function: Allows you to start the computer without selecting a program. Manual workout only. - Page 17 during the workout) with a period of time or a number of calories or a certain distance. Operations: 1. Use UP/DOWN keys to select one of the above programs from P2 to P 13 . 2. Press the ENTER key to enter your workout program. 3.
-
Page 18: Belt
is lower than the TARGET H.R.C. Also the resistance level may decrease every 20 seconds while the heart rate detected is higher than the TARGET H.R.C. Operations: 1. Use UP/DOWN keys to select one of the heart rate control program from P18 to P22. 2. -
Page 19: Motor
BMI (Body Mass Index): BMI is a measure of body fat based on height and weight that applies to both adult men and women. BMR (Basal Metabolic Rate): Your Basal Metabolic Rate (BMR) shows the number of calories your body needs to operate. - Page 20 PROGRAM 7 PROGRAM 8 PROGRAM 9 RAMP MOUNTAIN INTERVALS PROGRAM 10 PROGRAM 11 PROGRAM 12 RANDOM PLATEAU FARTLEK PROGRAM 13 PRECIPICE USER SETTING PROGRAM PROGRAM 14 USER 1 PROGRAM 15 USER 2 PROGRAM 16 USER 3 PROGRAM 17 USER 4...
- Page 21 HEART RATE PROGRAM PROFILES: PROGRAM 18 55% H.R.C. PROGRAM 19 65% H.R.C. PROGRAM 20 75% H.R.C. PROGRAM 21 85% H.R.C. PROGRAM 22 TARGET H.R.C. BODY FAT TEST PROGRAMS: PROGRAM 23 BODY FAT (STOP MODE) BODY FAT (START MODE) One of the Following Six Profiles Will Display Automatically after Measuring Your BODY FAT :...
- Page 22 Workout Time: 40 minutes Workout Time: 40 minutes Workout time: 20 minutes Workout Time: 40 minutes Workout Time: 40 minutes Workout time: 20 minutes...
- Page 23 GARLANDO SPA Via Regione Piemonte, 32 - Zona Industriale D1 15068 - Pozzolo Formigaro (AL) - Italy www.toorx.it - info@toorx.it...


Need help?
Do you have a question about the BRXR 90 and is the answer not in the manual?
Questions and answers