
Related Manuals for Retsch GRINDOMIX GM 300


Summary of Contents for Retsch GRINDOMIX GM 300
- Page 1 Manual Knife Mill GM 300 Translation © Retsch GmbH, 42781 Haan, Retsch-Allee 1-5, Germany | 26.11.2019 Version 0017...
- Page 2 Copyright © Copyright by Retsch GmbH Retsch-Allee 1-5 42781 Haan Germany...
-
Page 3: Table Of Contents
Table of Contents Notes on the manual ..........................6 Explanations of the Safety Instructions ..................... 7 General Safety Instructions ....................... 8 Repairs ............................... 9 Confirmation ............................10 Packaging, Transport and Installation ....................11 Packaging ............................11 Transport............................11 Temperature fluctuations and condensed water ................11 Conditions for the Installation Site .................... - Page 4 Manual Mode ........................... 32 6.6.1 Grinding time..........................32 6.6.2 Speed ............................32 6.6.3 Direction of rotation ........................32 6.6.4 Interval ............................33 6.6.5 Direction reversal ......................... 33 6.6.6 Pause time ........................... 33 6.6.7 Save parameters ......................... 33 Programme Mode ..........................33 6.7.1 Change program ..........................
- Page 5 Notes on the manual...
-
Page 6: Notes On The Manual
This operating manual does not contain any repair instructions. If faults arise or repairs are necessary, please contact your supplier or get in touch with Retsch GmbH directly. Application technology information relating to samples to be processed is not included but can be read on the Internet on the respective device’s page at www.retsch.com. -
Page 7: Explanations Of The Safety Instructions
Notes on the manual 1.1 Explanations of the Safety Instructions In this Operating Manual we give you the following safety warnings Serious injury may result from failing to heed these safety warnings. We give you the following warnings and corresponding content. WARNING Type of danger / personal injury Source of danger... -
Page 8: General Safety Instructions
All persons concerned with the machine in any form This machine is a modern, high performance product from Retsch GmbH and complies with the state of the art. Operational safety is given if the machine is handled for the intended purpose and attention is given to this technical documentation. -
Page 9: Repairs
Notes on the manual 1.3 Repairs This operating manual does not contain any repair instructions. For your own safety, repairs may only be carried out by Retsch GmbH or an authorized representative or by Retsch service engineers. In that case please inform:... -
Page 10: Confirmation
Confirmation Bes tätigung Confirmation This operating manual contains essential instructions for operating and maintaining the device which must be strictly observed. It is essential that they be read by the operator and by the qualified staff responsible for the device before the device is commissioned. This operating manual must be available and accessible at the place of use at all times. -
Page 11: Packaging, Transport And Installation
Packaging, Transport and Installation Packaging, Transport and Installation 3.1 Packaging The packaging has been adapted to the mode of transport. It complies with the generally applicable packaging guidelines. NOTICE Storage of packaging – In the event of a complaint or return, your warranty claims may be endangered if the packaging is inadequate or the machine has not been secured correctly. -
Page 12: Removing The Transportation Lock
Packaging, Transport and Installation NOTICE Atmospheric humidity – Electronic and mechanical components may be damaged and the performance data alter to an unknown extent. • Do not exceed the admissible range for atmospheric humidity. 3.5 Removing the Transportation Lock Remove the cardboard cross, which serves to protect the knives during transport), from the inside of the grinding jar. - Page 13 Packaging, Transport and Installation 1 Device designation 2 Year of production 3 Part number 4 Serial number 5 Manufacturer’s address 6 CE marking 7 Disposal label 8 Bar code 9 Power version 10 Mains frequency 11 Capacity 12 Amperage 13 Number of fuses 14 Fuse type and fuse strength In the case of questions please provide the device designation (1) or the part number (3) and the serial number (4) of the device.
-
Page 14: Technical Data
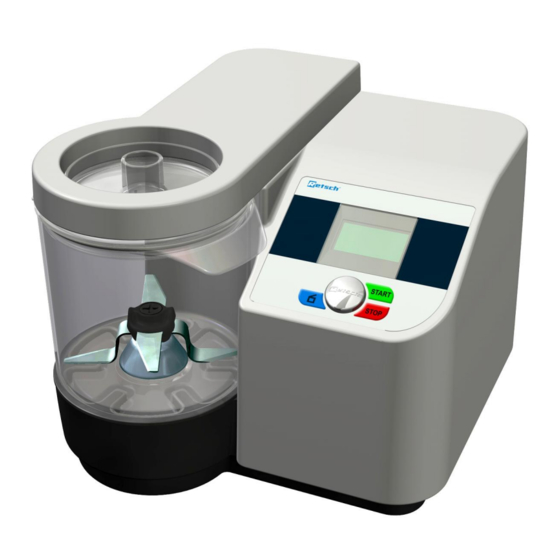
Target group: Operators Machine type designation: GM 300 The GRINDOMIX GM 300 laboratory knife mill serves to mill, homogenise and mix soft to medium-hard, aqueous, fatty, fibrous and dry materials within seconds so that they will be suitable for analysis. -
Page 15: Emissions
Technical Data 4.3 Emissions CAUTION C1.0044 Hearing damage A high sound level may be generated depending on the type of material, the grinding set used, the grinding frequency set and the duration of the grinding − Excessive noise in terms of level and duration can cause impairments or permanent damage to hearing. -
Page 16: Speed
Technical Data 4.8 Speed The knife speedcan be set in 100-rpm steps from 500 to 4000 rpm. 4.9 Dimensions and Weight 4.9.1 Height with Hood Cover Closed Height: 340 mm Width: 440 mm Depth: 440 mm 4.9.2 Height with Hood Cover Open Height: 700 mm Width: 440 mm Depth: 430 mm... -
Page 17: Operating The Device
Operating the Device Operating the Device 5.1 Views of the device Fig. 2: Front view Fig. 3: Rear view... - Page 18 Operating the Device Fig. 4: Detailed views of housing Fig. 5: Detail of grinding jar disassembly...
-
Page 19: Operating Elements And Displays
Operating the Device 5.2 Operating elements and displays Fig. 6: Graphical View of the Control Panel... -
Page 20: Overview Table Of The Parts Of The Device
Operating the Device 5.3 Overview table of the parts of the device Description Function Element Grinding jar cover Closes the grinding chamber Flap Prevents interference with the grinding chamber Grinding chamber Accommodates the sample material Knife Grinds the sample material Jar holder (base frame) Accommodates the grinding jar Control knob... -
Page 21: Switching On And Off
Operating the Device 5.4 Switching On and Off • Switch on the mill by pressing the ON/OFF switch (M) at the back. When the GM300 is switched on for the first time, the language menu is displayed. You can select your national language here by turning the operating knob (G). Pressing this knob confirms the selection and the display shows “Open Lid”. - Page 22 Operating the Device Fig. 7: Recessed grips on the knife Fig. 8: Removing the knife– Fill level of the grinding jar Note that the knife must be inserted before filling the grinding jar. The knife is placed on the shaft and held by magnetic force . The sealing lip (DL) of the V ring seal (V) must point downwards when inserted.
-
Page 23: Inserting The Grinding Jar
Operating the Device Fig. 9: Inserting the sealing ring Fig. 10: Preparing the knife and grinding jar, inserting the knife NOTE • Check the state of the V-ring seal (V) regularly. – The bottom edge of the lip seal (DL) must be clean and smooth. •... - Page 24 Operating the Device 1. Assemble the knife. 2. Use the face spanner (SL) to mount the knife dome and the bearing flange in the grinding jar. (see diagram below) NOTE Before inserting the grinding jar, it is essential to ensure that the bearing flange and the knife dome are positioned securely.
-
Page 25: Grinding Container - Use With Different Materials
Operating the Device Fig. 12: Inserting the grinding jar and closing the device. 5.7.1 Grinding container - use with different materials The material properties specified refer to samples from the main area of applications: food or animal fodder The plastic grinding container is less suitable for dry, tough or fibrous samples. Stainless steel is recommended for these samples as well as all others from the specified field of applications. - Page 26 Operating the Device Fig. 13: Use of one or two sealing rings NOTE Thin fluid samples should be started at a low speed. Increase the speed gradually. The maximum speed for liquid samples may not exceed 2,500 revolutions per minute.
-
Page 27: Starting The Grinding Process
Operating the Device 5.9 Starting the grinding process • Set the desired grinding parameters. • Insert the grinding jar with sample material, blade and lid. • Close the flap until the electromechanical safety lock is closed. • Press the START button (H). NOTICE With thin fluid samples, start at a low speed. -
Page 28: Display And Operation
Display and operation Display and operation 6.1 Symbols in the Display Unit Fig. 1: View of the menu on the display unit Description Function Element Menu navigation Switching between manual operating mode, program and basic settings Specification of grinding Displaying and setting grinding parameters parameters Icons for device functions Displaying the function statuses of sound, automatic... -
Page 29: Adjustment Options Using The Display Menu
Display and operation This device offers a new, very convenient user inteface. All relevant data can be entered and retrieved using a graphics display with one-button operation. The menu is available in different languages. 6.2.1 Adjustment options using the display menu The selection bar in the display should be operated as follows: Rotating function I) •... - Page 30 Display and operation • Switch the device off at the main switch. • Switch the device on while simultaneously pressing the buttons START - STOP – Open hood. • After selecting the correct language, switch the device off and then immediately back on.
-
Page 31: Menu Structure
Display and operation 6.4 Menu structure Complete overview of all menu items: MANUAL OPERATING MODE Grinding time Speed BASIC SETTINGS Direction of rotation Automatic opening Interval Language Direction reversal Brightness Pause time Date Save parameters Time Program Acoustic signal Save Back Service Operating hours... -
Page 32: Sequences 01 To 10
Display and operation 6.5.3 Sequences 01 to 10 The previously set programs can be processed in turn in sequences 01 to 10. Sequence 1 Program 1 Program 1+2 Sequence 2 Program 1+2+3 Sequence 3 Program 1+2+3+4 Sequence 4 Program 1+2+3+4+5 Sequence 5 Program 1+2+3+4+5+6 Sequence 6... -
Page 33: Interval
Display and operation 6.6.4 Interval The interval time can be set here according to the grinding time. If not interval has been set, no direction reversal can be set. 6.6.5 Direction reversal On/off The device is started with the preselected grinding time, speed and direction reversal. The machine rotates in one direction for the set interval time, comes to a halt, and starts again immediately in the other direction without a pause time. -
Page 34: Delete Program
Display and operation NOTICE It is not possible to start a program that has not been saved. 6.7.2 Delete program You can delete the saved parameters for any program in this menu NOTICE Only the saved parameters for the program concerned are deleted. The program memory location continues to exist. -
Page 35: Time
Display and operation 6.8.5 Time The time can be entered here. The time then appears in the stand-by monitor. The device can be disconnected from the mains for up to 30 days before the settings are lost. 6.8.6 Acoustic warning signal Error messages indicating incorrect operation can be supported by an acoustic warning signal. -
Page 36: Update Software
The version of the operating software can be queried and updated where applicable. Contact your Retsch distributor where necessary. If you have accessed the menu inadvertently and it is not possible to return to the preceding menu, switch the device off at the main switch and restart 6.9 Emergency Unlocking... - Page 37 Display and operation The lid can be opened now. • Use the plastic plug to close the side opening again.
-
Page 38: Working Instructions
Working instructions Working instructions Four sharp, sturdy blades rotate in the centre of the grinding container. Depending on the direction of rotation, cutting is done with the blunt side (preliminary size reduction) or with the sharp side (fine size reduction). To protect the knife from damage from hard material, the knife are equipped with a counterblade. -
Page 39: Fault Messages
Fault messages Fault messages DEFECT DESCRIPTION Error code TRANSLATION DRIVE OVERLOAD FAILURE DRIVE/MOTOR FAILURE MAIN BOARD FAILURE FAN FAILURE FREQUENCY CONVERTER FAILURE SPEED SENSOR FAILURE IN SAFETY CIRCUIT SATETY SWITCH DEFECTIVE ALLOW DRIVE TO COOL DOWN DRIVE BLOCKED CLOSE MACHINE OPEN AND CLOSE LID/COVER CHECK LID SWITCH TOTAL GRINDING TIME LONGER... -
Page 40: Cleaning And Service
Cleaning and service Cleaning and service Autoclavable and dishwasher-safe autoclavable Autoclavable and dishwasher-safe Fig. 17: Autoclavable and dishwasher-safe components and exceptions Dishwasher safe Fig. 18: Dishwasher safe components NOTICE • Dry all metallic parts of the grinding jar and the knife after drying to prevent possible corrosion. - Page 41 • This corrosion can be prevented if you dry the grinding tools after rinsing. In the case of the steel used by Retsch, the protective layer is automatically continuously formed through a reaction with oxygen (O •...
-
Page 42: Accessories
Accessories 10 Accessories NOTE The use of the gravity lid reduces the possible filling capacity of the grinding jar by 5 cm under the edge of the jar. This corresponds to a filling capacity of 3.5 litres. Fig. 21: Engaging the gravity lid in the securing recess •... -
Page 43: Disposal
Disposal 11 Disposal Please observe the respective statutory requirements with respect to disposal. Information on disposal of electrical and electronic machines in the European Community. Within the European Community the disposal of electrically operated devices is regulated by national provisions that are based on the EU Directive 2002/96/EC on Waste Electrical and Electronic Equipment (WEEE). -
Page 44: Index
12 Index ) ..............23 Electrical connection .......... 12 Emergency unlocking......... 36 Emergency unlocking of flap ......36 Accessories ............42 Emissions ............15 Acoustic warning signal ........35 End ..............27 Adjustment options using the display menu ..29 Explanations of the safety instructions .... - Page 45 Menu structure ............ 31 Serial number ............. 13 Moderate or mild injury ......... 7 serious injury ............7 motor-driven lid closure ........21 Service ............... 35 Service Address ........... 9 Setting the language .......... 34 Notes on the manual ..........6 Software Number of fuses ..........
- Page 47 Copyright © Copyright by Retsch GmbH Retsch-Allee 1-5 42781 Haan Germany...
Need help?
Do you have a question about the GRINDOMIX GM 300 and is the answer not in the manual?
Questions and answers