
Related Manuals for Retsch PP 35


Summary of Contents for Retsch PP 35
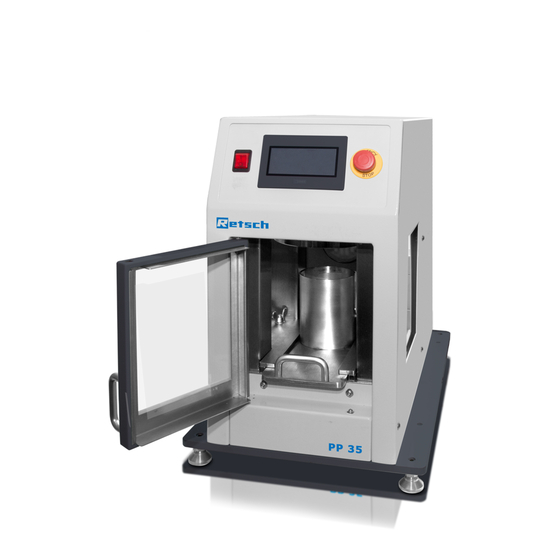
- Page 1 Manual Pellet Press PP 35 Translation © Retsch GmbH, 42781 Haan, Retsch-Allee 1-5, Germany | 14.03.2017 Version 0001...
- Page 2 Notes on the Manual Copyright © Copyright by Retsch GmbH Retsch-Allee 1-5 42781 Haan Germany...
-
Page 3: Table Of Contents
Table of Contents Notes on the Manual ..........................6 Disclaimer ............................6 Copyright............................6 Explanations of the Safety Instructions ..................... 7 General Safety Instructions ....................... 8 Repairs ............................... 9 Confirmation Form for the Managing Operator ................10 Technical Data ............................. 11 Protective Equipment ........................ - Page 4 Notes on the Manual Index ..............................41...
- Page 5 Notes on the Manual...
-
Page 6: Notes On The Manual
However, more information thereof can be found in the internet on the webpage of the respective device on the Retsch GmbH homepage (http://www.retsch.com). Revision status: This document revision 0001 refers to the manual "Pellet Press PP 35" in compliance with the Directive of Machinery 2006/42/EC. 1.1 Disclaimer This document has been prepared with due care. -
Page 7: Explanations Of The Safety Instructions
Notes on the Manual 1.3 Explanations of the Safety Instructions In this document the following signs and symbols are being used: Reference to a recommendation and/or an important information Reference to a chapter, table or figure Action instruction │Name│... -
Page 8: General Safety Instructions
All persons concerned with this device in any form. This device is a modern, high performance product from Retsch GmbH and complies with the state of the art. Operational safety is given if the device is handled for the intended purpose and attention is given to this technical documentation. -
Page 9: Repairs
1.5 Repairs This manual does not contain any repair instructions. For safety reasons, repairs may only be carried out by Retsch GmbH or an authorised representative or by qualified service technicians. In case of repair, please inform… …the Retsch GmbH representative in your country, …your supplier, or... -
Page 10: Confirmation Form For The Managing Operator
Confirmation Form for the Managing Operator Confirmation Form for the Managing Operator This manual contains essential instructions for operating and maintaining the device which must be strictly observed. It is essential that they be read by the user and by the qualified staff responsible for the device before the device is commissioned. -
Page 11: Technical Data
Technical Data Technical Data 3.1 Protective Equipment The PP 35 door closure is monitored. The device can only be started when the door is closed 3.2 Degree of Protection IP 40 3.3 Emissions Noise measurement in conformance to DIN 45635-31-01-KL3 The noise characteristic levels are mainly caused by the hydraulic unit at max. -
Page 12: Receptacle Volume
Technical Data 3.8 Receptacle Volume Depending on the material approximately: 8 – 12 ml Depending on the PP 35 design, the following ring sizes or aluminium cups can be used: Ring size Aluminium cup size 40-mm dia. 40 /32-mm dia. -
Page 13: Packaging, Transport And Installation
N5.0014 Complaints Incomplete delivery or transportation damage The forwarding agent and Retsch GmbH must be notified immediately in the event of transportation damage. It is otherwise possible that subsequent complaints will not be recognised. • Please check the delivery on receipt of the device for its completeness and intactness. -
Page 14: Conditions For The Installation Site
Packaging, Transport and Installation 4.4 Conditions for the Installation Site Installation height: max. 2 000 m above sea level Ambient temperature: 5 °C – 40 °C NOTICE N7.0021 Ambient temperature Temperatures outside the permitted range Electronic and mechanical components may be damaged. ... -
Page 15: Type Plate Description
Packaging, Transport and Installation 4.6 Type Plate Description Fig. 1: Type plate 1 Device designation 2 Year of production 3 Part number 4 Serial number 5 Manufacturer’s address 6 CE marking 7 Disposal label 8 Bar code 9 Power version 10 Mains frequency 11 Capacity 12 Amperage... -
Page 16: Removing The Transportation Aid
Remove the two straps and take the outer cardboard box off the pallet. Loosen the screws on the inner cardboard box and remove them. Fig. 2: Remove the inner cardboard box Loosen the 4 screws which connect the PP 35 pellet press to the transport aid. - Page 17 Packaging, Transport and Installation Fig. 3: Loosen the transport aid screws Lift the PP 35 pellet press onto a sturdy and steady table. NOTE The table must be designed to bear a weight of approx. 120 kg!
-
Page 18: First Commissioning
A separation of the device from the mains must be possible at any time. • Set up the device in such a way, that the connection for the power cable is always easily accessible. Scope of supply: 1x PP 35 pellet press 1x connection cable 1x fuse 4A 1x venting hose... - Page 19 Connect the connection cable to the press and insert it into a shockproof socket. Pull the PP 35 pellet press tool sliding tray out as far as it will go. Make sure the tool sliding tray is clean and that there is no feed material in it as this would destroy the tool sliding tray during the subsequent pressing procedure.
-
Page 20: Operating The Device
The PP 35 pellet press is used successfully in almost all areas of industry and research, particularly where stringent requirements are set for purity, speed, fineness and reproducibility. -
Page 21: Production Of A Pellet
Operating the Device 6.4 Production of a Pellet 6.4.1 Free pressing / Pressing in an aluminium cup Open the door. Fig. 6: Open the door Pull out the tool sliding tray. Fig. 7: Pull out the tool sliding tray. ... - Page 22 Operating the Device Fig. 8: Take the cover off Adjust the catch correctly so that it can hook in as the die moves down. Fig. 9: Adjust the catch Fill the feed material into the aluminium cup or into the pressing tool if doing free pressing.
- Page 23 Operating the Device Fig. 10: Fill in the feed material Close the cover. Fig. 11: Close the cover Push the tool sliding tray into the pellet press again and close the door. Fig. 12: Closed press Touch the display.
- Page 24 Operating the Device Fig. 13: PP35 Display The software opens. Press [Start] to start the pressing procedure. Fig. 14: Start the pressing procedure The pressing procedure can be stopped by pressing [Stop]. Fig. 15: Stop the pressing procedure ...
- Page 25 Operating the Device Fig. 16: End of program Once the “End of program“ message appears, the press is blocked for approx. 25 seconds in order to give the cylinder time to return to the initial position. Open the door, pull out the tool sliding tray and take the cover off. ...
- Page 26 Operating the Device Fig. 19: Cylinder is pulled into the initial position Touch [Sample output] again to start the procedure. Once the sample output starts, a green bar appears. This makes it possible to follow the progression of time during the pressing-out procedure. Fig.
-
Page 27: Pressing In The Steel Ring
Operating the Device 6.4.2 Pressing in the steel ring NOTE When pressing in the steel ring, make sure that the pressure force is reduced to a maximum pressure of 15 t. Insert the pressing tool for steel rings and proceed as described in Chapter 6.4.1. If the pellet is not pressed out completely, the pressing-out time must be extended. -
Page 28: Reusing The Steel Ring
Operating the Device Fig. 24: Fill in the feed material Put the cover on the pressing tool. Proceed as described in Chapter 6.7.1. Close the [Programme end] message after the end of the program. Open the press, pull out the tool sliding tray and remove the steel ring with the sample. 6.4.3 Reusing the steel ring ... -
Page 29: Programme Mode
Operating the Device 6.5 Programme Mode The PP 35 pellet press can store 10 programs. They are called up with stored program numbers 0-9. The 0 program is always loaded when the press is turned on. 6.5.1 Changing programs ... -
Page 30: Edit Program
Operating the Device Select the desired program and confirm with [ENT]. Touch [Menu] to return to the main screen. 6.5.2 Edit program Here is where all previously stored parameters, such as pressure force and holding time, can be altered. It is also possible to enter new parameters. ... -
Page 31: Altering Settings
Fig. 31: Enter holding times and pressure force Press [Save]. 6.5.3 Altering settings Touch the [Retsch logo] on the display Fig. 32: Retsch logo on display Enter password 9876 and the settings menu will appear. Fig. 33: Settings menu ... - Page 32 Operating the Device Return stroke time: the time the cylinder needs to return to the initial position (20 to 50 s) after the pressing procedure. Max. pressing force: depending on the pressing tool, a pressure force limit can be entered here (max. = 35 t).
-
Page 33: Error Messages And Information Notes
Such faults must be resolved before next startup. The PP 35 pellet press does not build up any pressure: Error message Fig. -
Page 34: Information Notes
Error Messages and Information Notes 7.2 Information Notes Notices inform the user on specific device or programme processes. The operation of the device or programme may be interrupted briefly, but there is no fault. The information notice must be acknowledged by the user to continue the process. Information notices provide additional information for the user as an aid, but do not represent any device or programme errors. -
Page 35: Return For Service And Maintenance
When returning a device, attach the return form to the outside of the packaging. In order to eliminate any health risk to the service technicians, Retsch GmbH reserves the right to refuse the acceptance and to return the respective delivery at the expense of the sender. -
Page 36: Cleaning, Wear And Maintenance
C6.0013 Personal injury Improper repairs This manual does not contain any repair instructions. • For safety reasons, repairs may only be carried out by Retsch GmbH or an authorised representative or by qualified service technicians. 9.1 Cleaning WARNING W4.0003... - Page 37 Cleaning, Wear and Maintenance Pull up the latch at the back of the tool sliding tray. Fig. 36: Pull up the latch Holding the grips, take the tool sliding tray out of the press. Fig. 37: Remove the tool sliding tray. ...
- Page 38 Cleaning, Wear and Maintenance Fig. 39: Remove the individual parts. Fig. 40: Clean the pressing chamber.
-
Page 39: Wear
9.3 Maintenance To assure the operational reliability of your PP 35 pellet press, conduct visual checks regularly. In particular, parts that are subject to wear and tear, such as pressing tools and tool sliding trays, should be checked for proper functioning and the absence of damage. Contact our service department when necessary. -
Page 40: Disposal
Disposal 11 Disposal In the case of a disposal, the respective statutory requirements must be observed. In the following, information on the disposal of electrical and electronic devices in the European Community are given. Within the European Community the disposal of electrically operated devices is regulated by national provisions that are based on the EU Directive 2012/19/EU on Waste Electrical and Electronic Equipment (WEEE). - Page 41 ............15, 40 Packaging ............13 regulations ............40 Part number ............15 Drive power ............12 Pellet press PP 35 does not build up any pressure ................ 33 Power version ............ 15 Edit program ............30 Press-screw cap ..........18 Electrical connection ...........
- Page 42 Index Revision status ............. 6 Temperature fluctuations ........13 Temperature range ..........14 Temporary storage ..........13 Safety instruction ..........7 Transport ............13 caution ............... 7 Transportation aid danger ............... 7 removing ............16 notice ..............8 Transportation damage ........13 warning ..............
- Page 43 Index...
- Page 44 Index...
- Page 48 Copyright © Copyright by Retsch GmbH Retsch-Allee 1-5 42781 Haan Germany...
Need help?
Do you have a question about the PP 35 and is the answer not in the manual?
Questions and answers