
Subscribe to Our Youtube Channel
Related Manuals for Retsch BB 600


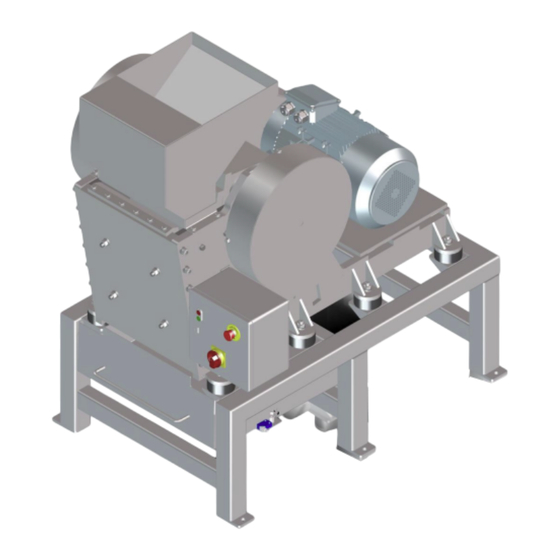
Summary of Contents for Retsch BB 600
- Page 1 Manual Jaw Crusher BB 600 Translation © Retsch GmbH, 42781 Haan, Retsch-Allee 1-5, Germany | 07.10.2019 Version 0001...
- Page 2 Copyright © Copyright by Retsch GmbH Retsch-Allee 1-5 42781 Haan Germany...
-
Page 3: Table Of Contents
Table of Contents Notes on the manual ........................5 Disclaimer ............................ 5 Copyright ............................5 Repairs ............................6 Safety ..............................7 Explanations of the Safety Instructions ..................8 General Safety Instructions ......................9 Protective Equipment ........................10 Intended use..........................10 Improper use .......................... - Page 4 8.3.1 Lubricating the device ......................42 8.3.2 Checking the limit switch ......................43 Return for Service and Maintenance ................... 44 Accessories............................ 45 Disposal............................46 Index ............................... 47...
-
Page 5: Notes On The Manual
This manual does not contain any repair instructions. Please contact your supplier or contact Retsch GmbH directly if anything is unclear or you have questions about these guidelines or the device, or in the case of any faults or necessary repairs. -
Page 6: Repairs
1.3 Repairs This manual does not contain any repair instructions. For safety reasons, repairs may only be carried out by Retsch GmbH or an authorised representative or by qualified service technicians. In case of repair, please inform… …the Retsch GmbH representative in your country, …your supplier, or... -
Page 7: Safety
All those operating, cleaning or working with or on the device. This device is a modern, powerful product from Retsch GmbH and has been developed in line with the state-of-the art. The device is safe to use when operated correctly and when following the instructions in this manual. -
Page 8: Explanations Of The Safety Instructions
Safety 2.1 Explanations of the Safety Instructions The following warnings in this manual warn of possible risks and damage: DANGER D1.0000 Risk of fatal injuries Source of danger − Possible consequences if the danger is ignored. • Instructions and information on how to avoid the risk. Fatal or serious injuries may result if the “Danger”... -
Page 9: General Safety Instructions
− The conformity declared by Retsch GmbH with the European Directives will lose its validity. − Any warranty claims will be terminated. • Do not make any modification to the device. • Use spare parts and accessories that have been approved by Retsch GmbH exclusively. -
Page 10: Protective Equipment
. 2.4 Intended use The Jaw Crusher BB 600 is suitable for grinding medium to extremely hard substances and for brittle and hard ductile materials. The machine has been designed for 8-hour single shift operation. Use is only permitted in the laboratory by appropriately trained and qualified staff. -
Page 11: Confirmation Form For The Managing Operator
Safety 2.6 Confirmation Form for the Managing Operator This manual contains essential instructions for operating and maintaining the device which must be strictly observed. It is essential that they be read by the user and by the qualified staff responsible for the device before the device is commissioned. This manual must be available and accessible at the place of use at all times. -
Page 12: Technical Data
3.1 Use of the Device for the Intended Purpose Da s The Jaw Crusher BB 600 is suitable for grinding medium to medium-hard substances and brittle and hard ductile materials. The machine can be used to grind the following materials: •... -
Page 13: Required Floor Space
Technical Data 3.4 Required Floor Space Width of floorspace: 1,080 mm Depth of floorspace: 1,500 mm No safety distance is required! A space of around 50 cm should be planned on the left-hand side of the machine for better operability. -
Page 14: Installation Drawing
Technical Data 3.5 Installation drawing Fig. 1: Installation drawing... -
Page 15: Rated Power
Technical Data 3.6 Rated Power 15000 watts 3.7 Degree of Protection − IP 55 3.8 Emissions Noise data Noise measurement in accordance with DIN 45635-31-01-KL3 Noise levels are significantly influenced by the properties of the sample material. Example 1: Sound power level L = 101.7 dB(A) Workplace-related emissions value L = 89.5 dB(A) -
Page 16: Electromagnetic Compatibility (Emc)
Technical Data 3.9 Electromagnetic Compatibility (EMC) − EMC class in accordance with DIN EN 55011: B 3.10 Feed Grain Size Feed size: < 350x170 mm Final fineness: < 6 mm 3.11 Degree of hardness of the sample material The degree of hardness of the sample material should be above 3 on the Mohs’ scale to achieve effective grinding. -
Page 17: Packaging, Transport And Installation
Packaging, Transport and Installation Packaging, Transport and Installation 4.1 Packaging The packaging has been adapted to the mode of transport. It complies with the generally applicable packaging guidelines. NOTICE N4.0001 Complaint or return Keeping the packaging − Inadequate packaging and insufficient securing of the device can jeopardise the warranty claim in the event of a complaint or return. - Page 18 To do this, wind ropes through the two transport bolts (TS) on the machine. CAUTION Only use suitable lifting gear that has been approved for the weight of the device. The BB 600 has a base frame (Z) using which the device can be lifted and transported with the help of lifting gear.
-
Page 19: Temperature Fluctuations And Condensation
Packaging, Transport and Installation 4.3 Temperature Fluctuations and Condensation NOTICE N7.0016 Damaged components due to condensation Temperature fluctuations − The device may be exposed to substantial fluctuations in temperature during transport. The ensuing condensation can damage electronic components. • Wait until the device has acclimatised before putting it into service. Temporary storage: Also in case of an interim storage the device must be stored dry and within the specified ambient temperature range. -
Page 20: Electrical Connection
Packaging, Transport and Installation NOTICE N9.0015 Humidity High relative humidity − Electronic and mechanical components may be damaged. − The performance data alter to an unknown extent. • The relative humidity in the vicinity of the device should be kept as low as possible. -
Page 21: Type Plate Description
Packaging, Transport and Installation 4.6 Type Plate Description Fig. 1: Type plate 1 Device designation 2 Year of production 3 Part number 4 Serial number 5 Manufacturer’s address 6 CE marking 7 Disposal label 8 Bar code 9 Power version 10 Mains frequency 11 Capacity 12 Amperage... -
Page 22: Views Of The Device
Views of the device Views of the device 5.1 Front Fig. 4: Front view Element Description Function Feed hopper For adding material. Control element For operating and controlling the machine. Collecting receptacle Collects the sample material. The limit switch in the base frame actuates if the collecting receptacle is removed during operation. -
Page 23: Back
Views of the device 5.2 Back Fig. 5: Rear view Element Description Function Lock nuts Counter the spacer plates when adjusting the gap Spring For adjusting the gap... -
Page 24: View Of The Control Unit
Views of the device 5.3 View of the control unit Fig. 6: Control element Element Description Function On/Off switch Switches the jaw crusher on or off. Emergency stop button Stops the machine in the event of danger. Main switch Switches the machine on or off. -
Page 25: First Commissioning
First Commissioning First Commissioning WARNING W4.0002 Danger to life through electric shock Damaged power cable − Operating the device with a damaged power cable or plug can lead to life- threatening injuries caused by an electric shock. • Before operating the device, check the power cable and plug for damage. -
Page 26: Installation Of The Device
First Commissioning 6.1 Installation of the Device Fig. 7: Securing to the transport pallet On delivery, the Jaw Crusher BB 600 is screwed to the transport pallet. • Remove the hex screws (SC) from the transport pallet. • Using a forklift, lift the machine up. -
Page 27: Establishing The Power Supply
− Serious injuries or death due to fires. • The device may only be connected by a qualified electrician. The Jaw Crusher BB 600 is connected to the power supply as follows: • Ensure that the machine has been securely installed; see “Installation of the... -
Page 28: Operating The Device
Operating the Device Operating the Device CAUTION C5.0005 Risk of injury Potentially explosive atmosphere − The device is not suitable for use in potentially explosive atmospheres. Operating the device in a potentially explosive atmosphere can lead to injuries caused by an explosion or fire. •... -
Page 29: Switching On / Off
“Front view. NOTICE Stop the Jaw Crusher BB 600 when there is no longer any grinding material in the crushing chamber. Mechanical components may be damaged by a possible blockage. The control unit is on the front of the Jaw Crusher BB 600, see “View of the control... -
Page 30: Adjusting The Gap Width
7.2 Adjusting the gap width Fig. 8: Adjusting the gap width The gap width can be adjusted as follows: • Turn the Jaw Crusher BB 600 off at the main switch (H) (see “View of the control element“). • Disconnect the machine from the power supply and secure to prevent it restarting. - Page 31 Operating the Device • Unscrew the middle screw (DSM). Ensure that the spring (E) is tensioned at all times. • Tighten the outer lock nuts (DML) and (DMR). Torque approx. 190 Nm. • Tighten the middle lock nut (DMM). Torque approx. 110 Nm. •...
-
Page 32: Adding Sample Material
Operating the Device 7.3 Adding sample material CAUTION C9.0045 Damage to hearing A high noise level may arise depending on the type of the material, the jaws used and the duration of grinding − Excessive noise in terms of level and duration can cause impairments or lasting damage to hearing. -
Page 33: Removing Sample Material After Grinding
Operating the Device 7.4 Removing sample material after grinding CAUTION C10.0005 Burns Heating of the sample material during grinding − Hot surfaces on the collecting receptacle or the grinding chamber can cause burns. − Hot sample material in the collecting receptacle can cause burns. •... - Page 34 Operating the Device Fig. 11: Collecting receptacle • Switch the Jaw Crusher BB 600 off. • Pull the collecting receptacle (C) out of the base frame. • Remove the ground sample material from the collecting receptacle (C).
-
Page 35: Cleaning, Wear And Maintenance
Improper repairs − Unauthorised and improper repairs can cause injuries. • Repairs to the device may only be carried out by the Retsch GmbH , an authorised representative or by qualified service technicians. • Do not carry out any unauthorised or improper repairs to the device! 8.1 Cleaning... -
Page 36: Cleaning The Machine Housing
8.1.1 Cleaning the machine housing The machine is best cleaned using an industrial vacuum cleaner and brush with a long handle: • Clean the housing of the Jaw Crusher BB 600 with a damp cloth and standard household detergent. •... -
Page 37: Wear
Improper repairs − Unauthorised and improper repairs can cause injuries. • Repairs to the device may only be carried out by the Retsch GmbH , an authorised representative or by qualified service technicians. • Do not carry out any unauthorised or improper repairs to the device! Jaws may wear depending on the frequency of grinding and the property of the sample material. - Page 38 Cleaning, Wear and Maintenance Fig. 14: Removing the cover plates • Loosen the screws (AS) and remove the cover plates (P). Fig. 15: Unscrewing the fixing screws • Unscrew the four fixing screws (FS) on both jaws. • Gently tap the surface of the jaws so that they come away from the support and slide downwards.
- Page 39 Cleaning, Wear and Maintenance Fig. 16: Removing the jaws • Remove the jaws using the supplied lifting pins (TH). The worn jaws have been removed and the new jaws can be inserted in reverse order.
-
Page 40: Replacing The Wearing Plates
Cleaning, Wear and Maintenance 8.2.2 Replacing the wearing plates Proceed as follows to replace the wearing plates: • Remove the feed hopper, see “Cleaning the feed hopper and grinding chamber”. Fig. 17: Wearing plate fastening • Unscrew the four fixing screws (SBS) on each wearing plate (SB). Fig. - Page 41 Cleaning, Wear and Maintenance • Using a crane, lift the wearing plates out from the crushing chamber by the eyebolts. The wearing plates have been removed and the new wearing plates can be inserted in reverse order.
-
Page 42: Maintenance
Improper repairs − Unauthorised and improper repairs can cause injuries. • Repairs to the device may only be carried out by the Retsch GmbH , an authorised representative or by qualified service technicians. • Do not carry out any unauthorised or improper repairs to the device! 8.3.1 Lubricating the device... -
Page 43: Checking The Limit Switch
A functional inspection of the limit switch must be conducted every 6 months. Check the function of the limit switch as follows: • Start the Jaw Crusher BB 600. • Open the draw on the collecting receptacle (D), see “Front view”. -
Page 44: Return For Service And Maintenance
When returning a device, attach the return form to the outside of the packaging. In order to eliminate any health risk to the service technicians, Retsch GmbH reserves the right to refuse the acceptance and to return the respective delivery at the expense of the sender. -
Page 45: Accessories
Retsch GmbH homepage (http://www.retsch.com) under the heading "Downloads" of the device. Information on wear parts and small accessories can be found in the Retsch GmbH general catalogue also available on the homepage. In case of any questions concerning spare parts please contact the Retsch GmbH... -
Page 46: Disposal
Disposal 10 Disposal In the case of a disposal, the respective statutory requirements must be observed. In the following, information on the disposal of electrical and electronic devices in the European Community are given. Within the European Community the disposal of electrically operated devices is regulated by national provisions that are based on the EU Directive 2012/19/EU on Waste Electrical and Electronic Equipment (WEEE). -
Page 47: Index
Index 11 Index Establishing the power supply ......28 Explanations of the safety instructions ....9 Accessories ............46 Adjusting the gap width ........31 Adjusting the gap width ........30 Feed grain size ..........17 Ambient temperature.........20 Feed hopper ........23, 33, 37, 38 Amendment status ..........6 First commissioning ..........26 Amperage ............22 Fixing screws for jaws ........40... - Page 48 Index Small accessories ..........46 Spacer plates ............31 Noise level ..........16, 33 Spare parts ............46 Notes on the manual ...........6 Spring pre-load ..........32 Number of fuses ..........22 Switching on / off ..........30 Operating instructions ........12 Target group ............8 Operating the device .........29 Technical data ..........13 Temperature fluctuations........20 Temperature range ...........20...
- Page 50 Copyright © Copyright by Retsch GmbH Retsch-Allee 1-5 42781 Haan Germany...
Need help?
Do you have a question about the BB 600 and is the answer not in the manual?
Questions and answers