
Related Manuals for Planika GaLiO Fire Pit Insert


Summary of Contents for Planika GaLiO Fire Pit Insert
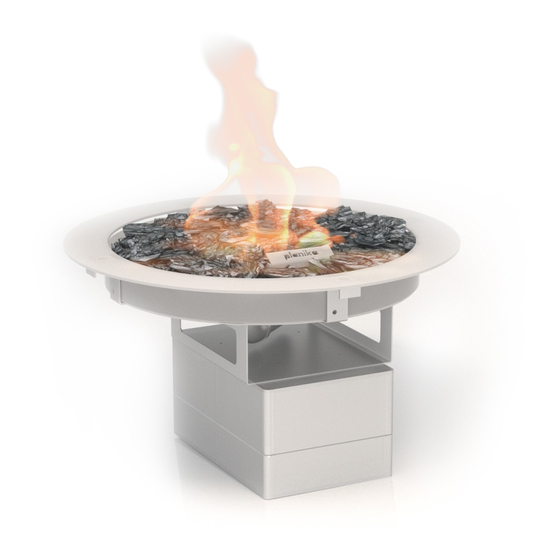
- Page 1 USER’S and INSTALLATION MANUAL GaLiO Fire Pit Insert G20/G25 (Natural Gas) G30/G31 (Propane-Butane/Propane) [mm] Copyright Planika Sp. z o.o. www.planikafires.com IG0115#03 16.03.2020...
-
Page 2: Table Of Contents
Checking the flame appearance ........................25 MAINTENANCE AND UPKEEP ..........................26 Testing and cleaning ............................26 Glass cleaning (if optionally installed)......................26 TROUBLESHOOTING ..............................27 TECHNICAL SPECIFICATION ............................. 28 MANUFACTURER’S CONTACT DETAILS ....................... 28 Copyright Planika Sp. z o.o. www.planikafires.com IG0115#03 16.03.2020... - Page 3 GaLiO Fire Pit Insert fireplace. This manual is to be kept safe for the lifetime of the device. The Planika company designs and manufactures gas devices that meet the highest standards of quality, and safety.
-
Page 4: Safety Instruction
• During the first ignition the GaLiO Fire Pit Insert fireplace needs to be burnt on maximum level for a few hours in order for the elements to acquire correct temperature and for the remains of paint, lacquer and lubricant to evaporate. -
Page 5: Safety Instruction Regarding The Use Of The Gas Cylinder
During the installation process do not allow an open flame or any ignited object to reach the gas cylinder. • The gas cylinder should be in a distance not shorter than 1,5 metres away from the GaLiO Fire Pit Insert fireplace. -
Page 6: Installation
Photo 1 • In the case of GaLiO Fire Pit Insert powered with natural gas, to obtain the optimum image of the flame, cover the burner with a single layer of decorative stones leaving some spaces uncovered of approximately every 10 cm (Photo 2). -
Page 7: Montage
Additionally, Planika doesn’t recommend placing heat-sensitive objects above the fireplace as it may shorten their lifetime. Planika will not be responsible for any damage caused by high temperature affecting objects installed above the fire. Ventilation grate or slot with ventilation... -
Page 8: Directions Of How To Design A Housing For The Fireplace
It is not permitted to use a device which is not housed in some way. 4.3 Directions of how to design a housing for the fireplace Ventilation grate or slot with ventilation area of minimum 150cm2 Copyright Planika Sp. z o.o. www.planikafires.com IG0115#03... -
Page 9: Gas Cylinder Montage
Ventilation grate or slot with ventilation area of minimum 150cm2 4.4 Gas cylinder montage In case of installation of GaLiO Fire Pit Insert it is crucial to manufacture a slot in the side of the housing where the insert is placed for the gas linkage and the pressure regulator. - Page 10 (of an area min 1/50 of the area of the base of the housing). The dimensions of the housing may vary to accommodate different types and dimensions of the gas cylinders however they also have to be sufficient for hassle-free installation of the gas cylinder. Copyright Planika Sp. z o.o. www.planikafires.com IG0115#03...
-
Page 11: Installation Of The Gas Linkage
4.5.2 Connection and replacement of the gas cylinder (LPG version) The GaLiO Fire Pit Insert is delivered together with an elastic gas linkage which, on one end is connected to the valve of the device and on the other end to the 37mbar regulator (in the twist-on version) ready to be connected to the gas cylinder. - Page 12 If the switch is correctly (left thread) Do not allow the gas cylinder turned off you will hear a characteristic click. connectors to be fastened too tightly. Copyright Planika Sp. z o.o. www.planikafires.com IG0115#03 16.03.2020...
- Page 13 Disconnection of the gas cylinder Twist-on connection Quick-release Turn off the GaLiO Fire Pit Insert – put it into the OFF position. The main and pilot burner need to be turned off. 2. Turn the bottle valve into the OFF position 2.
-
Page 14: Pressure Regulator Replacement (Lpg Version)
5 years. Allowed pressures: 30 mbar, 37 mbar (recommended), 50 mbar. Use only the redactors that comply with the EN16129 European Norm. 2. Turn off the GaLiO Fire Pit Insert – the „OFF” position. The main burner and the pilot burner need to be turned off. -
Page 15: Operating Instructions
5. OPERATING INSTRUCTIONS The GaLiO Fire Pit Insert fireplace has a remotely control valve with a built-in ignition for the pilot flame. The flame height of the main burner may be appropriately regulated by Wall Switch (Touch Panel) or remote control (if delivered). -
Page 16: Installing The Control Unit (Wall Switch)
Make sure you have ca 12 cm cable length outside of the opening for replacing the batteries. • Connect the switch with the cable and insert the plug into the terminal. • Insert the batteries into the holder and connect the battery holder with the cable. Copyright Planika Sp. z o.o. www.planikafires.com IG0115#03 16.03.2020... -
Page 17: Replacing The Batteries
If the appliance is equipped with a 230 VAC connection, no batteries are present in the receiver or in battery box. • The battery are placed in battery holder which is integrated into the control unit (Wall Switch). Copyright Planika Sp. z o.o. www.planikafires.com IG0115#03 16.03.2020... - Page 18 • Remove the battery holder. • Replace 4 pieces of AA/LR6 Alkaline long live batteries. • Replace the battery holder and mount the Wall Switch plate. • Screw the Wall Switch plate. Copyright Planika Sp. z o.o. www.planikafires.com IG0115#03 16.03.2020...
-
Page 19: Remote Control (If Delivered)
5.4 Remote control (if delivered) GaLiO Fire Pit Insert can be operated by radio remote control. This comprises a hand-held transmitter and a receiver. The receiver is part of the gas control block assembly. • Electrical connections and batteries: Hand-held transmitter: 2x 1.5V AAA battery Receiver: 4x1.5V AA battery or 6 VDC... -
Page 20: Switch The Fire On And Off
If the appliance is not to be used for some time, please close the gas supply valve in the gas pipe (or valve of the gas cylinder). • WARNING! If the pilot flame goes out for any reason wait for 5 minutes before attempting to re-light it. Copyright Planika Sp. z o.o. www.planikafires.com IG0115#03 16.03.2020... -
Page 21: Stand-By Mode (Pilot Flame)
The properly fired pilot flame consist of 3 smaller parts. 5.4.2 Stand-by mode (Pilot flame) „-“ Press and hold button to set appliance to pilot flame. Pilot flame remains burning (standby position). Copyright Planika Sp. z o.o. www.planikafires.com IG0115#03 16.03.2020... -
Page 22: Flame Height Adjustment
Pressing the button twice automatically decreases the flames to the LOW position NOTE: Flame goes to high fire first before going to low fire. Backlight must be on for low fire double-click operation! Copyright Planika Sp. z o.o. www.planikafires.com IG0115#03 16.03.2020... -
Page 23: Flame Height Directly To Maximum Position
Eco Modes. Maximum countdown time is 9 hours and 50 minutes. Low Battery Receiver With low battery power in the receiver the system shuts off the fire completely. This will not happen if the power supply is interrupted. Copyright Planika Sp. z o.o. www.planikafires.com IG0115#03 16.03.2020... -
Page 24: Wall Switch
5.5 Wall Switch Depending on customers preferences GaLiO Fire Pit Insert may be additionally operated either by Wall Switch (included) or Touch panel. Both can be placed maximum 8 meters away from the Insert. Additionally behind Wall Switch the battery box can be placed. -
Page 25: Testing
6.2 Checking the flame appearance • Burn the GaLiO Fire Pit Insert on max flame height and check the appearance of the flame. • The flame should be linear and evenly placed on the whole length of the main burner. -
Page 26: Maintenance And Upkeep
Always dry the glass screen to avoid damp patches which could irreversibly embed into the glass. Warning!!! Avoid leaving fingerprints on the glass. They will be embedded into the glass and you will not be able to clean them. Copyright Planika Sp. z o.o. www.planikafires.com IG0115#03 16.03.2020... -
Page 27: Troubleshooting
A vivid/ bright orange and Holes blocked in the apparatus Unmount the burner and clean/ smoky flame of the producing the gas and air mixture. unblock the apparatus’ holes. burner. Copyright Planika Sp. z o.o. www.planikafires.com IG0115#03 16.03.2020... -
Page 28: Technical Specification
External ⅜” 10. MANUFACTURER’S CONTACT DETAILS Company Name: Planika Sp. z o.o. Address: Bydgoska 38 86-061 Brzoza Poland Telephone: + 48 52 364 11 60 Fax: + 48 52 364 11 70 Copyright Planika Sp. z o.o. www.planikafires.com IG0115#03 16.03.2020...
Need help?
Do you have a question about the GaLiO Fire Pit Insert and is the answer not in the manual?
Questions and answers