Table of Contents
Advertisement
Quick Links
Advertisement
Table of Contents

Related Manuals for Planika Galio Corten Black Automatic


Summary of Contents for Planika Galio Corten Black Automatic
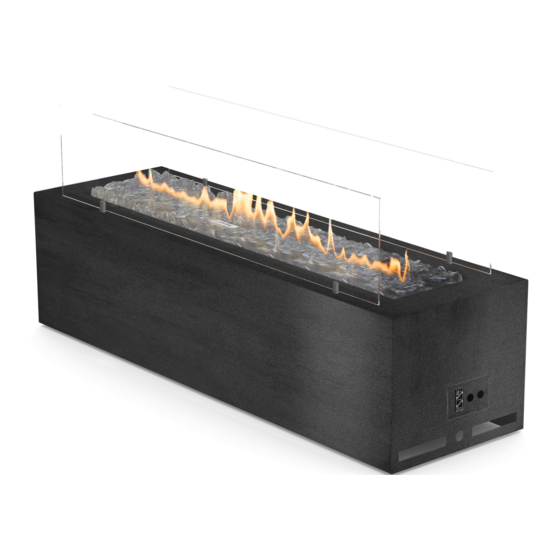
- Page 1 INSTALLATION and USER’S MANUAL Galio Corten/Black Automatic G20/G25 (Natural Gas) G30/G31 (Propane-Butane/Propane) Manufactured by Planika Sp. z o.o. Bydgoska 38 86-061 Brzoza Poland Copyright Planika Sp. z o.o. www.planikafires.com IG0033#09 19.05.2020...
-
Page 2: Table Of Contents
Checking the flame appearance............................21 MAINTENANCE AND UPKEEP ..............................21 6.1. Testing and cleaning ................................ 21 6.2. Glass cleaning .................................. 22 TROUBLESHOOTING ................................. 22 TECHNICAL SPECIFICATION ..............................23 MANUFACTURER’S CONTACT DETAILS ............................ 23 Copyright Planika Sp. z o.o. www.planikafires.com IG0033#09 19.05.2020... -
Page 3: Introduction
When the Galio Corten/Black Automatic fireplace is on it’s not to be exposed to rain. • When not being used the Galio Corten/Black Automatic is to be protected from atmospheric conditions and the main valve of the gas cylinder needs to be turned off. Copyright Planika Sp. z o.o. www.planikafires.com IG0033#09 19.05.2020... -
Page 4: Safety Instruction Regarding The Use Of The Gas Cylinders
(of an area min 1/100 of the area of the base of the housing) and a lower ventilation slot (of an area min 1/50 of the area of the base of the housing). Copyright Planika Sp. z o.o. www.planikafires.com IG0033#09... -
Page 5: Installation
Place Galio Corten/Black Automatic on a flat, paved surface outside of the building, preferably on the place of final installation. Leave sufficient space on the side of the appliance where control panel is located (minimum 1 m). Copyright Planika Sp. z o.o. www.planikafires.com IG0033#09... -
Page 6: Installation Of Glass Screens
Remove all contaminations from the glass shields which could burn out on the glass during operation of the Galio Corten/Black Automatic (in particular fingerprints). • Install glass shields in the corresponding slots on the appliance as shown on Figure 3. Copyright Planika Sp. z o.o. www.planikafires.com IG0033#09 19.05.2020... -
Page 7: Gas Cylinder Montage (Only Lpg Version)
Figure 5 Copyright Planika Sp. z o.o. www.planikafires.com IG0033#09 19.05.2020... -
Page 8: Installation Of The Gas Linkage
In case of using a connector with a thread regulator of an old type put a special emphasis on checking if the connecting nut has been tightly fastened with the help of wrench. Copyright Planika Sp. z o.o. www.planikafires.com IG0033#09... - Page 9 (See point 5.1). • After removing the leak one may open the gas bottle valve again. Copyright Planika Sp. z o.o. www.planikafires.com IG0033#09 19.05.2020...
-
Page 10: Regulator Replacement (Lpg Version)
2. Turn off the Galio Corten/Black Automatic – the „OFF” position. The main burner and the pilot burner need to be turned off. 3. Disconnect the regulator from the gas bottle (description above). Copyright Planika Sp. z o.o. www.planikafires.com IG0033#09... - Page 11 7. Attach a new linkage on the stub of regulator. 8. Move the clamp into the stub again and tighten it. WARNING! In the event of visible damage on the clamp, replace it for a new one. Copyright Planika Sp. z o.o. www.planikafires.com IG0033#09 19.05.2020...
-
Page 12: Operating Instructions
Photo 4: Receiver “RESET” button 4.3. Replacing the batteries If the batteries are inserted incorrectly, the electronics or drive may be irreparably damaged. Only replace the batteries when the appliance has been completely switched off. Copyright Planika Sp. z o.o. www.planikafires.com IG0033#09 19.05.2020... -
Page 13: Receiver
Automatic. (See Photo 6). Photo 6: Receiver batteries containers • Unscrew the cover of the first battery container with a wide screwdriver or a coin. Photo 7: Cover of the batteries container Copyright Planika Sp. z o.o. www.planikafires.com IG0033#09 19.05.2020... - Page 14 Photo 8: Removing the first battery using the magnetic gripper • To remove the second battery, insert the magnetic gripper into the battery container. Photo 9: Removing the second battery from the container Copyright Planika Sp. z o.o. www.planikafires.com IG0033#09 19.05.2020...
- Page 15 Remember about proper polarization of the batteries. Photo 10: Placing the battery in the container • Screw the cover of the batteries container. • Repeat the same procedure for changing the batteries in the second container. Copyright Planika Sp. z o.o. www.planikafires.com IG0033#09 19.05.2020...
-
Page 16: Remote Control (Optionally)
3. Main gas flows once pilot ignition is confirmed. 4. Handset automatically goes into Manual Mode after main burner ignition. 5. Press and hold button to turn OFF the fire. Copyright Planika Sp. z o.o. www.planikafires.com IG0033#09 19.05.2020... -
Page 17: Stand-By Mode (Pilot Flame)
The properly fired pilot flame consist of 3 smaller parts. 5.1.2 Stand-by mode (Pilot flame) „-“ Press and hold button to set appliance to pilot flame. Pilot flame remains burning (standby position). Copyright Planika Sp. z o.o. www.planikafires.com IG0033#09 19.05.2020... -
Page 18: Flame Height Adjustment
NOTE: If you turn on the burner by pressing the button, it must ignite within 10 seconds. If this does not happen, immediately close the gas tap and warn the fitter. Copyright Planika Sp. z o.o. www.planikafires.com IG0033#09 19.05.2020... -
Page 19: Automatic Turn Down To Pilot
• The programmed length of inactivity to activate the system is specified by the appliance manufacturer and cannot be altered in the field. Copyright Planika Sp. z o.o. www.planikafires.com IG0033#09 19.05.2020... -
Page 20: Touchpad
NEVER TURN ON THE DEVICE IF THE CHARACTERISTIC SMELL OF GAS IS PERCEPTIBLE. If you smell gas during the operation of the fireplace turn off the device immediately and cut off the gas supply from the gas cylinder by shutting its valve. Copyright Planika Sp. z o.o. www.planikafires.com IG0033#09... -
Page 21: Checking For Gas Leaks
If you encountered problems with the regulator, gas linkage, burner or regulation valves do not try to fix these parts. Contact a sales person, an authorised service or an importer in order to acquire spare parts. To ensure the device is working efficiently use only original spare parts. Copyright Planika Sp. z o.o. www.planikafires.com IG0033#09... -
Page 22: Glass Cleaning
A vivid/ bright orange and Holes blocked in the apparatus Unmount the burner and clean/ smoky flame of the producing the gas and air mixture. unblock the apparatus’ holes. burner. Copyright Planika Sp. z o.o. www.planikafires.com IG0033#09 19.05.2020... -
Page 23: Technical Specification
Mertik GV 60 Gas linkage Ø9mm Ø9mm Ø9mm External ⅜” MANUFACTURER’S CONTACT DETAILS Company Name: Planika Sp. z o.o. Address: Bydgoska 38 86-061 Brzoza Poland Telephone: + 48 52 364 11 60 Copyright Planika Sp. z o.o. www.planikafires.com IG0033#09 19.05.2020...
Need help?
Do you have a question about the Galio Corten Black Automatic and is the answer not in the manual?
Questions and answers