Advertisement
Quick Links
L E E & P L U M P TO N
Important Information
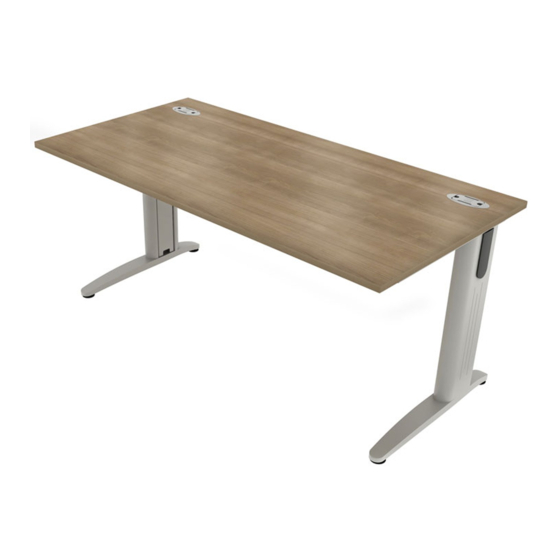
This instruction leaflet is suitable for building
the DOMINOBEAM Rectangular and Wave
desks including the plus one option.
Safety Guide
• Apply manual handling guidelines when
building this item.
• Only use component fixings supplied with
this item.
• Build product on a flat surface.
Recommendations
Levelling the Beam desk
Plastic Foot 50mm Dia
It is important to level the feet at the start and
17mm Stem Black
F/0596
finalise at the end to ensure the product is
Plastic Foot 80mm Dia
23mm Stem Black
F/0595
level. This can be done by hand.
M8 x 30mm Coutersunk
40 x 20 x 4mm Bracket
with M6 hole Zinc
Bzp F/0604
F/0592
Parts Required
Plastic End Cap163 x 60 Black
60mm Beam Attactment Zinc
A/0901
F/0594
Zinc Insert
A
Single desk
Quantity = 2
M8 x 30mm Coutersunk
Plastic Foot 50mm Dia
M8 x 30mm Coutersunk
Bzp F/0604
Bzp F/0604
17mm Stem Black
Pozi head Standard Screwdriver
Plus One Desk Quantity = 2
F/0596
4mm x 25mm Flange Pozi HSA Blk
4mm x 25mm Flange Pozi HSA Blk
M6 x 12mm Button
F/0453
F/0453
Screw BZP F/0603
M6 x 25mm Socket Cap BZP
M6 x25mm Socket Cap BZP
Plastic Foot 80mm Dia
M6 x 12mm Button
B
23mm Stem Black
Screw BZP F/0603
F/0595
F/0618
M6 x 12mm Button
M6 x25mm Socket Cap BZP
F/0618
Code: F/0618
Quantity = 4
Screw BZP F/0603
M6 x25mm Socket Cap BZP
Plus One Desk Quantity = 2
F/0618
M6 Spring Washer
F/0608
40 x 20 x 4mm Bracket
with M6 hole Zinc
M6 12mm Socket Cap Bzp
F/0592
F/0605
M8 x 30mm Coutersunk
Bzp F/0604
M6 Spring Washer
M6 Spring Washer
C
F/0608
M8 External Shakeproof
M6 Spring Washer
4mm x 25mm Flange Pozi HSA Blk
Washer F/0460
M6 12mm Socket Cap Bzp
F/0453
Code: F/0608
Quantity = 4
F/0608
F/0605
M6 Nut
Plus One Desk Quantity = 2
M6 12mm Socket Cap Bzp
F0594
Plastic End Cap163 x 60 Black
M8 External Shakeproof
A/0901
F/0605
10 x 3/4 Pozzie Flange
Washer F/0460
S/ Tap BZP
F/0619
M6 x 12mm Button
Screw BZP F/0603
4mm x 25mm Flange Pozi (Black)
M6 x25mm Socket Cap BZP
D
Plastic Foot 50mm Dia
M8 x 30mm Coutersunk
M6 Nut
F/0618
17mm Stem Black
F0594
Bzp F/0604
Code: F/0453
Quantity = 1
F/0596
M8 External Shakeproof
4mm x 25mm Flange Pozi HSA Blk
Plastic Beam Spacer
5mm Allen Key
10 x 3/4 Pozzie Flange
4mm Allen Key
Pozi head Standard Screwdriver
F/0593
F/0453
Washer F/0460
S/ Tap BZP
Plus One Desk Quantity = 1
4mm x 25mm Flange Pozi HSA Blk
F/0619
F/0453
M6 Spring Washer
F/0608
M6 12mm Socket Cap Bzp
Plastic Foot 80mm Dia
23mm Stem Black
Plastic Beam Spacer
F/0605
F/0595
E
M6 x25mm Socket Cap BZP
F/0618
M6 Nut
Plastic Beam Spacer
5mm Allen Key
4mm Allen Key
Pozi head Standard Screwdriver
Code: F/0593
Quantity = 1
F/0593
F0594
M8 External Shakeproof
Washer F/0460
Plus One Desk Quantity = 1
4mm x 25mm Flange Pozi HSA Blk
M6 x 12mm Button
10 x 3/4 Pozzie Flange
F/0453
M6 Spring Washer
Screw BZP F/0603
S/ Tap BZP
F/0608
40 x 20 x 4mm Bracket
M6 Nut
with M6 hole Zinc
M6 12mm Socket Cap Bzp
F/0619
F0594
F/0592
F/0605
10 x 3/4 Flange Pozi S/Tap BZP
M6 x25mm Socket Cap BZP
F
10 x 3/4 Pozzie Flange
F/0618
S/ Tap BZP
F/0619
Code: F/0619
Quantity = 12
M8 External Shakeproof
Washer F/0460
Plastic Foot 50mm Dia
Plus One Desk Quantity = 6
17mm Stem Black
F/0596
4mm x 25mm Flange Pozi HSA Blk
F/0453
M6 Nut
M6 x25mm Socket Cap BZP
F0594
Plastic End Cap163 x 60 Black
F/0618
A/0901
10 x 3/4 Pozzie Flange
M8 X 30mm Countersunk BZP
Plastic Beam Spacer
5mm Allen Key
4mm Allen Key
Pozi head Standard Screwdriver
S/ Tap BZP
M6 Spring Washer
G
F/0593
F/0619
F/0608
M8 x 30mm Coutersunk
Plastic Beam Spacer
5mm Allen Key
Code: F/0604 (Packed in Leg)
Plastic Foot 80mm Dia
Bzp F/0604
23mm Stem Black
F/0593
F/0595
M6 12mm Socket Cap Bzp
4mm x 25mm Flange Pozi HSA Blk
F/0453
M6 x25mm Socket Cap BZP
Plus One Desk Quantity = 2
F/0605
F/0618
Plastic Beam Spacer
5mm Allen Key
4mm Allen Key
Pozi head Standard Screwdriver
F/0593
M6 12mm Socket Cap Bzp
M6 x 12mm Button
M8 External Shakeproof Washer
Screw BZP F/0603
F/0605
H
M8 External Shakeproof
40 x 20 x 4mm Bracket
with M6 hole Zinc
M6 x25mm Socket Cap BZP
Washer F/0460
Code: F/0460 (Packed in Leg)
F/0592
F/0618
Plus One Desk Quantity = 2
M6 Spring Washer
F/0608
M6 Nut
Tools needed
M6 12mm Socket Cap Bzp
F/0605
F0594
Plastic End Cap163 x 60 Black
A/0901
M6 Nut
M8 External Shakeproof
10 x 3/4 Pozzie Flange
F0594
Washer F/0460
S/ Tap BZP
Pozi Head Screwdriver
F/0619
Quantity = 1
M6 Nut
F0594
10 x 3/4 Pozzie Flange
S/ Tap BZP
4mm Allen Key
Pozi head Standard Screwdriver
F/0619
5mm Allen Key
Quantity = 1
Plastic Beam Spacer
Plastic Beam Spacer
5mm Allen Key
5mm Allen Key
4mm Allen Key
Pozi head Standard Screwdriver
5mm Allen Key
F/0593
4mm Allen Key
Pozi head Standard Screwdriver
F/0593
DOMINOBEAM Assembly Instructions
1.
Ensure part A, a Zinc Insert, is present in
each end of the Beam Crossrail, this must
be inserted as shown in diagram (Step 1)
if it is not already present.
2.
Remove the Top Plate from both upright
Beam legs provided. These are secured
by 2 screws, part B and washers part C.
Put these to one side for later.
3.
Keeping one Beam leg upright, slot the
Beam Crossrail into the leg, as shown
in position 1, ensuring the open side of
the rail faces the front of the desk and
the access hole for the Beam Spacer is
facing the floor. Repeat for the second
Beam leg.
WARNING Please note if adding a
plus 1 option ensure that the beam is
placed in position 2 and also add the
Beam Crossrail from the next desk at
4mm x 25mm Flange Pozi HSA Blk
this stage. Please refer to full Plus 1
F/0453
Beam desk instructions on reverse.
4.
Re-attach the Top Plate to each leg and
Plastic Foot 50mm Dia
17mm Stem Black
secure using part B screws each with
F/0596
a washer, part C. Remember to place
the first screw in the rear hole to ensure
Plastic Foot 80mm Dia
23mm Stem Black
F/0595
the correct positioning of the Top Plate.
WARNING It is important to ensure the
Plastic Foot 50mm Dia
17mm Stem Black
F/0596
top plate is 90 degrees to the beam
40 x 20 x 4mm Bracket
with M6 hole Zinc
F/0592
Crossrail, so that the screw holes line
up with the desk top holes.
Plastic Foot 80mm Dia
23mm Stem Black
F/0595
Plastic Foot 50mm Dia
17mm Stem Black
Plastic End Cap163 x 60 Black
A/0901
F/0596
Continue overleaf
40 x 20 x 4mm Bracket
with M6 hole Zinc
F/0592
Step 3: Position 1
Plastic Foot 50mm Dia
Single desk
17mm Stem Black
F/0596
Plastic Foot 80mm Dia
23mm Stem Black
F/0595
Plastic End Cap163 x 60 Black
A/0901
Plastic Foot 80mm Dia
23mm Stem Black
F/0595
Plastic Foot 50mm Dia
40 x 20 x 4mm Bracket
4mm Allen Key
17mm Stem Black
Pozi head Standard Screwdriver
F/0596
with M6 hole Zinc
F/0592
40 x 20 x 4mm Bracket
with M6 hole Zinc
Plastic Foot 80mm Dia
23mm Stem Black
F/0592
F/0595
40 x 20 x 4mm Bracket
with M6 hole Zinc
F/0592
Plastic End Cap163 x 60 Black
A/0901
Plastic End Cap163 x 60 Black
A/0901
Plastic End Cap163 x 60 Black
A/0901
4mm Allen Key
Pozi head Standard Screwdriver
B
B
C
C
TOP PLATE
Plastic Foot 50mm Dia
17mm Stem Black
F/0596
Plastic Foot 80mm Dia
23mm Stem Black
F/0595
B
40 x 20 x 4mm Bracket
with M6 hole Zinc
F/0592
Step 3: Position 2
Plus 1 desk for leg sharing
Plastic End Cap163 x 60 Black
A/0901
DOMINOBEAM Rectangular / Wave Desk Instructions
Step 1: Zinc Insert
A
BEAM CROSSRAIL
INNER COVER PLATE
B
ACCESS HOLE FOR
BEAM SPACER
BEAM LEG
No. 096 A/0960
2 People
Required
Step 4: Top Plate
Top Plate MUST be
positioned 90 degrees
to the Beam Crossrail
TOP PLATE
B
B
C
C
OUTER
COVER
PLATE
Advertisement

Related Manuals for Lee & Plumpton DOMINOBEAM


Summary of Contents for Lee & Plumpton DOMINOBEAM
- Page 1 L E E & P L U M P TO N DOMINOBEAM Rectangular / Wave Desk Instructions No. 096 A/0960 Important Information DOMINOBEAM Assembly Instructions This instruction leaflet is suitable for building Step 1: Zinc Insert Ensure part A, a Zinc Insert, is present in the DOMINOBEAM Rectangular and Wave...
- Page 2 L E E & P L U M P TO N DOMINOBEAM Rectangular / Wave Desk Instructions No. 096 A/0960 WARNING If assembling more than Adding a Plus 1 Beam Desk Step 5: Plastic Beam Spacer one desk steps 5, 6 and 7 should be Prepare the leg: Screw the adjustable completed in an upright position.
Need help?
Do you have a question about the DOMINOBEAM and is the answer not in the manual?
Questions and answers