Avery Dennison Pathfinder 6059 Equipment Manual
Hide thumbs
Also See for Pathfinder 6059:
- Manual (2 pages) ,
- Operator's handbook manual (34 pages) ,
- Operating instructions manual (8 pages)

Related Manuals for Avery Dennison Pathfinder 6059


Summary of Contents for Avery Dennison Pathfinder 6059
- Page 1 EQUIPMENT MANUAL Avery Dennison ® Pathfinder ® 6059 Printer TC6059EM Rev. AA 6/19 © 2019 Avery Dennison Corp. All rights reserved. Classification: Avery Dennison - Public...
- Page 2 Each product and program carries a respective written warranty, the only warranty on which the customer can rely. Avery Dennison Corp. reserves the right to make changes in the product, the programs, and their availability at any time and without notice. Although Avery Dennison Corp.
-
Page 3: Table Of Contents
Clearing Supply Jams ........................4-1 Cleaning ............................4-1 Cleaning the Printhead ......................... 4-2 Cleaning the Platen, Liner Drive, and Pinch Rollers ................ 4-2 Cleaning the Supply Sensors ......................4-3 Cleaning the Display Screen and Scanner Window................4-4 Classification: Avery Dennison – Public... - Page 4 Technical Support ........................... 5-2 SPECIFICATIONS & ACCESSORIES ...................... A-1 Printer Specifications ........................A-1 Battery Specifications ........................A-2 Radio Specifications ........................A-2 Bluetooth Specifications ........................A-2 RFID Specifications ......................... A-2 Supply Specifications........................A-2 Accessories ............................ A-3 Classification: Avery Dennison – Public...
-
Page 5: Getting Started
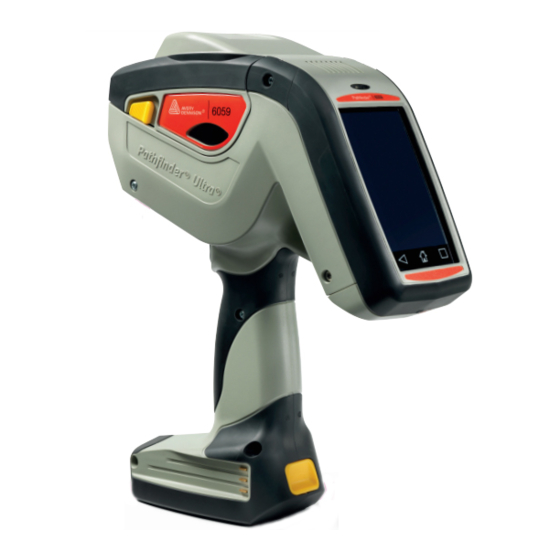
G E T T I N G S T A R T E D The Avery Dennison® Pathfinder® 6059 prints, scans, and collects data. The printer operates in peel mode or non-peel mode. The printer uses the Android™ 7.1 platform. The printer may contain an optional 802.11 a/b/g/n/ac WLAN plus Bluetooth 4.2 dual mode radio and... -
Page 6: About The Printer
Back - returns to the previous screen/menu Home – user sees the Home screen. Overview – opens thumbnails of recently used applications, which allows you to switch tasks easily. Apps – shows your applications and widgets. 1-2 Equipment Manual Classification: Avery Dennison – Public... -
Page 7: Display
For more information about how to recycle batteries in your area, visit www.rbrc.org. Batteries can also be returned postage-paid to: Avery Dennison ERC; 200 Monarch Lane; Door #39; Miamisburg, OH 45342 Classification: Avery Dennison – Public... -
Page 8: Charging The Battery
3. Remove the battery. 4. Insert a new battery (label side up) into the compartment (connector end last). Batter y Connec tor End 5. Close the compartment door until it clicks into place. 1-4 Equipment Manual Classification: Avery Dennison – Public... -
Page 9: Loading Supplies
L o a d i n g L a b e l s , T a g s , o r R e c e i p t P a p e r To load supplies: 1. Turn on the printer. Swipe up the screen to unlock. Classification: Avery Dennison – Public Loading Supplies 2-1... - Page 10 1.2”. Adjust it to the middle position to lock the supply holder at 1.5”. Adjust it all the way up (towards the opening of the printer) to lock the supply holder at 2.0”. 2-2 Equipment Manual Classification: Avery Dennison – Public...
- Page 11 5. Place the supply roll in the supply holder so the supply unrolls from the bottom. 6. Continue loading supply for the printing mode you need: peel or non-peel. Classification: Avery Dennison – Public Loading Supplies 2-3...
-
Page 12: Loading For Non-Peel Mode
Loading Labels, Tags, or Receipt Paper, then: 1. Feed the supply over the platen roller, peel bar, and label deflector. Platen Roller (blac k rubber ) Peel Bar (metal) Label Defle ctor 2-4 Equipment Manual Classification: Avery Dennison – Public... - Page 13 2. Close the supply cover. 3. Calibrate the supply. See “Calibrating the Supply” for more information. The printer is ready to print supplies. Classification: Avery Dennison – Public Loading Supplies 2-5...
-
Page 14: Loading For Peel Mode
Platen Roller (blac k rubber ) Peel Bar (metal) Label Defle ctor 3. Feed the backing paper over the peel bar and through the slot at the base of the label deflector. 2-6 Equipment Manual Classification: Avery Dennison – Public... - Page 15 5. Hold the backing paper and push up the label deflector until it snaps into place. 6. Close the supply cover. 7. Calibrate the supply. See “Calibrating the Supply” for more information. The printer is ready to print supplies. Classification: Avery Dennison – Public Loading Supplies 2-7...
-
Page 16: Calibrating The Supply
The third label prints a message if the calibration is successful. When calibrating the on-demand sensor, the printer feeds a label looking for and calibrating the die cut. Then, the printer prints a message if the calibration is successful. 2-8 Equipment Manual Classification: Avery Dennison – Public... -
Page 17: Printing Labels
E n t e r i n g D a t a If your application requires you to enter data, the printer displays the standard keyboard. Depending on your application, data may be entered or scanned. Classification: Avery Dennison – Public Printing Labels 3-1... -
Page 18: Scanning Bar Codes
Class II laser scanners use a low power, visible light diode. As with any very bright light source, the user should avoid staring directly into the light beam. Momentary exposure to a Class II laser is not known to be harmful. 3-2 Equipment Manual Classification: Avery Dennison – Public... -
Page 19: Printing Test Labels
Printing a Parallel Quality Label Select Energy, then Print Parallel Quality Label. A label prints parallel bar codes for you to scan to check the quality of parallel bar codes. Classification: Avery Dennison – Public Printing Labels 3-3... -
Page 20: Printing A Diagnostic Label
R e ad P o w e r -1 5 W ri t e P o w er -1 5 R F I D R eg i o n E T S I 3-4 Equipment Manual Classification: Avery Dennison – Public... -
Page 21: Care & Maintenance
♦ after clearing a supply jam. ♦ if there are voids or streaking in the print as shown. Voids Streak s Classification: Avery Dennison – Public Care & Maintenance 4-1... -
Page 22: Cleaning The Printhead
Wait a few minutes for the printer to dry. 5. Reload the supplies, close the label deflector and supply cover. 6. Turn on the printer. 4-2 Equipment Manual Classification: Avery Dennison – Public... -
Page 23: Cleaning The Supply Sensors
4. Clean the black mark sensor and on-demand sensor with a dry cotton swab. Black M ark Sensor On-Demand Sensor 5. Reload the supplies. 6. Close the supply cover and the label deflector. Classification: Avery Dennison – Public Care & Maintenance 4-3... -
Page 24: Cleaning The Display Screen And Scanner Window
Do not use household cleaners on the display or scanner window. Do not press too hard on the scanner window – it may move or crack. 4-4 Equipment Manual Classification: Avery Dennison – Public... -
Page 25: Troubleshooting
The display does not turn on. Make sure the power is on. Switch to a fully charged battery. A label with an overstrike The RFID inlay failed to encode. See your System pattern prints. Administrator. Classification: Avery Dennison – Public Troubleshooting 5-1... -
Page 26: Technical Support
If these solutions do not work or you have a problem or error code not listed, see your System Administrator or call Technical Support. Before calling Technical Support, print a test label. 5-2 Equipment Manual Classification: Avery Dennison – Public... -
Page 27: Specifications & Accessories
Up to 4" (101.6 mm) per second Memory: 2 GB RAM; 4 GB NAND Flash Operating Temperature: 40°F – 110°F (4°C – 43°C) Humidity 5% – 90% non-condensing (Operating & Storage): Classification: Avery Dennison – Public Specifications & Accessories A-1... -
Page 28: Battery Specifications
1.2 – 2.0” (30 mm – 51 mm) Lengths .55" – 8.0" (14mm –203mm) Peel mode supports .785" (20 mm) or greater lengths. Non-Peel mode supports .55" (14mm) or greater lengths. A-2 Equipment Manual Classification: Avery Dennison – Public... -
Page 29: Accessories
M06056 Docking Module Stand alone, single printer charger that offers communication while charging. 130606 Deluxe Hand Strap 130605 Shoulder Strap 130604 Petite Wrist Strap 125859 USB Cable 12009502 Extra Battery Classification: Avery Dennison – Public Specifications & Accessories A-3... - Page 30 A-4 Equipment Manual Classification: Avery Dennison – Public...
- Page 32 AMERICAS 170 Monarch Lane Miamisburg, OH 45342 937 865 2123 (direct) Tel +800 543 6650 (8:00 a.m. – 6:30 p.m., EDT) Fax +937 865 6663 ASIA No. 7 Chun Ying Street Tseung Kwan O Industrial Estate New Territories, Hong Kong Tel +852 2372 3169 Fax +852 2995 0014 WESTERN EUROPE...
Need help?
Do you have a question about the Pathfinder 6059 and is the answer not in the manual?
Questions and answers