Avery Dennison 6059 Operator's Handbook Manual
Hide thumbs
Also See for 6059:
- Manual (2 pages) ,
- Equipment manual (32 pages) ,
- Operating instructions manual (8 pages)

Related Manuals for Avery Dennison 6059


Summary of Contents for Avery Dennison 6059
- Page 1 6059 Printer Operator’s Handbook TC6059OH Rev. AA 1/19 ©2019 Avery Dennison. All rights reserved.
- Page 2 Each product and program carries a respective written warranty, the only warranty on which the customer can rely. Avery Dennison Corp. reserves the right to make changes in the product, the programs, and their availability at any time and without notice. Although Avery Dennison Corp.
-
Page 3: Table Of Contents
Cleaning the Black Mark Sensor ....................4-3 Cleaning the Display Screen and Scanner Window................4-4 TROUBLESHOOTING ..........................5-1 Checking the Software Version ......................5-2 Printing a Test Label ........................5-2 Error Codes ............................ 5-3 Technical Support ........................... 5-4 Classification: Avery Dennison – Public... - Page 4 SPECIFICATIONS & ACCESSORIES ...................... A-1 Specifications ..........................A-1 Accessories ............................ A-2 Classification: Avery Dennison – Public...
-
Page 5: Getting Started
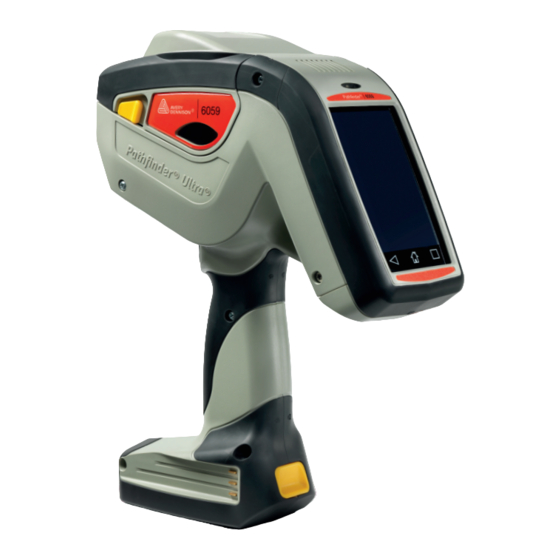
G E T T I N G S T A R T E D The Avery Dennison® Pathfinder® 6059 prints, scans, and collects data. The printer operates in peel mode or non-peel mode. The printer uses the Android™ 7.1 platform. Your printer may include the optional RFID module, which the printer uses to encode (program) an RFID (Radio Frequency Identification) inlay while printing. -
Page 6: Charging The Battery
“Specifications & Accessories.” The battery might explode if placed on a different charger. Charging time is approximately 1 – 3 hours. Refer to the documentation provided with the chargers for more information. 1-2 Operator's Handbook Classification: Avery Dennison – Public... -
Page 7: Replacing The Battery
The battery should be charged before long-term storage or after the battery has been exhausted from a printing session. Frequent charging actually prolongs battery life and has no negative effects such as memory loss. Getting Started 1-3 Classification: Avery Dennison – Public... -
Page 8: Using The Keypad And Display
Displa y Icons The status bar displays the battery voltage, connection type, wireless signal strength, etc. There’s no need to show these icons as they are so common in smart devices, etc. 1-4 Operator's Handbook Classification: Avery Dennison – Public... -
Page 9: Loading Supplies
♦ strip. When you load a new roll of supplies, check the battery’s power, if it is low, switch to a fully charged battery. To load supplies: 1. Turn on the printer. Loading Supplies 2-1 Classification: Avery Dennison – Public... - Page 10 1.2”. Adjust it to the middle position to lock the supply holder at 1.5”. Adjust it all the way up (towards the opening of the printer) to lock the supply holder at 2.0”. 2-2 Operator's Handbook Classification: Avery Dennison – Public...
- Page 11 5. Place the supply roll in the supply holder so the supply unrolls from the bottom. 6. Continue loading supply for the printing mode you need: peel or non-peel. Loading Supplies 2-3 Classification: Avery Dennison – Public...
-
Page 12: Loading For Non-Peel Mode
Non-Peel mode does not remove the backing paper – supplies are printed in a continuous strip. 1. Feed the supply over the platen roller, peel bar, and label deflector. Platen Roller (blac k rubber ) Peel Bar (metal) Label Defle ctor 2-4 Operator's Handbook Classification: Avery Dennison – Public... - Page 13 2. Close the supply cover. 3. Where is calibrate routine and is it needed? What button advances supply? Loading Supplies 2-5 Classification: Avery Dennison – Public...
-
Page 14: Loading For Peel Mode
Platen Roller (blac k rubber ) Peel Bar (metal) Label Defle ctor 3. Feed the backing paper over the peel bar and through the slot at the base of the label deflector. 2-6 Operator's Handbook Classification: Avery Dennison – Public... - Page 15 4. Close the supply cover. 5. Hold the backing paper and push up the label deflector until it snaps into place. 6. Where is calibrate routine and is it needed? What button advances supply? Loading Supplies 2-7 Classification: Avery Dennison – Public...
- Page 16 2-8 Operator's Handbook Classification: Avery Dennison – Public...
-
Page 17: Printing Labels
Printing over the RFID inlay causes printing irregularity and may impact bar code print quality. On 6059, will users need to enter settings to program the inlay – such as encode position? Where will those settings come from? RFID Printer Setup Utility on our website? -
Page 18: Adjusting The Display Backlight
Will this be a user function or only at Sys Admin level? P o w e r M a n a g e m e n t ? Will this be a user function or only at Sys Admin level? 3-2 Operator's Handbook Classification: Avery Dennison – Public... -
Page 19: Scanning Bar Codes
Class II laser scanners use a low power, visible light diode. As with any very bright light source, the user should avoid staring directly into the light beam. Momentary exposure to a Class II laser is not known to be harmful. Printing Labels 3-3 Classification: Avery Dennison – Public... - Page 20 3-4 Operator's Handbook Classification: Avery Dennison – Public...
-
Page 21: Care & Maintenance
♦ after clearing a supply jam. ♦ if there are voids or streaking in the print as shown. ♦ Voids Streak s Care & Maintenance 4-1 Classification: Avery Dennison – Public... -
Page 22: Cleaning The Printhead
Wait a few minutes for the printer to dry. 5. Reload the supplies, close the label deflector and supply cover. 6. Turn on the printer. 4-2 Operator's Handbook Classification: Avery Dennison – Public... - Page 23 4. Clean the black mark sensor and on-demand sensor with a dry cotton swab. Black M ark Sensor On-Demand Sensor 5. Reload the supplies. 6. Close the supply cover and the label deflector. Care & Maintenance 4-3 Classification: Avery Dennison – Public...
-
Page 24: Cleaning The Display Screen And Scanner Window
Do not use household cleaners on the display or scanner window. Do not press too hard on the scanner window – it may move or crack. 4-4 Operator's Handbook Classification: Avery Dennison – Public... -
Page 25: Troubleshooting
See “Scanning Bar Codes” in Chapter 3 for more code. information. The display does not turn on. Make sure the power is on. Switch to a fully charged battery. Any RFID messages to note? Troubleshooting 5-1 Classification: Avery Dennison – Public... -
Page 26: Checking The Software Version
Blackmark sensor: 1.56 V Test Pattern Prints a label to verify that the printhead strobes are working. If your printed sample has fewer lines or no lines, keep the sample and call Service. 5-2 Operator's Handbook Classification: Avery Dennison – Public... -
Page 27: Error Codes
Check supply. Remove any printed labels. Check for a label jam. Clear the supply path or reload supplies. Low battery. Recharge the battery. See “Charging the Main Battery” in Chapter 2 for more information. Troubleshooting 5-3 Classification: Avery Dennison – Public... -
Page 28: Technical Support
T e c h n i c a l S u p p o r t If these solutions do not work or you have a problem or error code not listed, see your System Administrator or call Technical Support. 5-4 Operator's Handbook Classification: Avery Dennison – Public... - Page 29 The recommended charging temperature is 68°F to 77°F (20°C to 25°C) ♦ Many factors affect your battery’s performance, including the quantity of labels printed, ♦ percentage of black per label, and battery life. Specifications & Accessories A-1 Classification: Avery Dennison – Public...
- Page 30 M06056 Docking Module Stand alone, single printer charger that offers communication while charging. part#? Deluxe Hand Strap part#? Shoulder Strap part#? Petite Wrist Strap part#? Holster 125859 USB Cable 12009502 Extra Battery A-2 Operator’s Handbook Classification: Avery Dennison – Public...
- Page 31 Specifications & Accessories B-1 Classification: Avery Dennison – Public...
- Page 33 Specifications & Accessories B-1 Classification: Avery Dennison – Public...
- Page 34 B-2 Operator’s Handbook Classification: Avery Dennison – Public...
Need help?
Do you have a question about the 6059 and is the answer not in the manual?
Questions and answers