Table of Contents
Advertisement
Quick Links
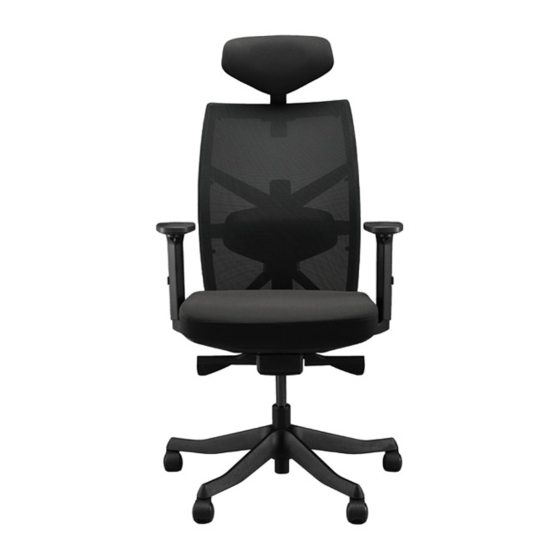
Facet Ergonomic Chair
SKU: CHR466
Package Contents
Headrest
Seat
© UPLIFT Desk • 800-349-3839 • info@upliftdesk.com • upliftdesk.com
Back
Arms
(qty 2)
Cover plate
(optional)
Casters
(qty 5)
Base
Cylinder
Step 1
With the Base turned upside down, insert the Caster stems into the
holes on the Base, and press them firmly to secure them in place.
Flip the Base, so the Casters are on the floor, and insert the Cylinder
into the Base in the orientation shown with the smaller diameter
end up. Be cautious around the small end of the Cylinder to avoid
getting grease on you or your clothes.
Step 2
Place the Seat upside down on the edge of a stable surface, such
as a table.
Insert the tab of the Back into the slot on the Seat and line up the
holes on each. Have a friend help keep the Seat steady while you
attach the Back to it. Using the 6 mm Allen wrench, attach the
Back to the Seat with three M8x30 screws and three M8 wash-
ers. Start all screws loosely, then tighten them all using the 6 mm
Allen wrench.
Step 3
Note: The screws and washers may arrive inserted into the
Seat. Simply remove, and then use to attach the Arms to the
Seat. Line each Arm with the holes on either side of the seat.
They should angle towards the front of the chair when installed.
Attach them using the M6x25 screws and M6 washers you
removed earlier. Start screws loosely, then tighten using the 5
mm Allen wrench.
Step 4
Flip the chair assembly from Steps 2 and 3 right-side up, and
lower it onto the Cylinder.
Press down on the seat (or sit on it) to secure it in place on the
Cylinder.
Step 5
If you don't want to install the Headrest, snap the Cover plate in
place where shown. This will cover the area where the Headrest
would have attached.
If you would like to install the Headrest, line it up with the screw
holes at the top of the Back and attach with the two M6x20
screws. Start both screws loosely, then tighten them using the 4
mm Allen wrench.
Allen wrenches
(sizes: 4 mm, 5 mm, 6mm)
M6x25 screws
(qty 8)
M6 washers
(qty 8)
M6x20 screws
(qty 2)
M8x30 screws
(qty 3)
M8 washers
(qty 3)
Advertisement
Table of Contents

Related Manuals for Uplift Desk CHR466


Summary of Contents for Uplift Desk CHR466
- Page 1 If you would like to install the Headrest, line it up with the screw holes at the top of the Back and attach with the two M6x20 screws. Start both screws loosely, then tighten them using the 4 mm Allen wrench. © UPLIFT Desk • 800-349-3839 • info@upliftdesk.com • upliftdesk.com...
- Page 2 Angle- Grasp armpads and rotate them inwards or outwards to ad- just angle. Lumbar Depth Twist both knobs on the back frame to adjust the depth of the Lum- bar support cushion. © UPLIFT Desk • 800-349-3839 • info@upliftdesk.com • upliftdesk.com...
- Page 3 CAUTION: Read all instructions before assembly. Failure to assemble properly may result in damage or personal injury. WARNING: This product’s maximum weight capacity is 250 lb (113.4 kg). DO NOT exceed the maximum weight capacity. © UPLIFT Desk • 800-349-3839 • info@upliftdesk.com • upliftdesk.com...
- Page 4 © guide is also available on the UPLIFT Desk website: upliftdesk.com. Excerpts or copies may not be forwarded to third parties or used in any other published form without the prior written consent of UPLIFT Desk. These instructions are subject to United States copyright law.
Need help?
Do you have a question about the CHR466 and is the answer not in the manual?
Questions and answers