Table of Contents
Advertisement
Quick Links
WIDOS
W. Dommer Söhne GmbH D-71254 Ditzingen-Heimerdingen
Working Instructions
Headquarters: D-71254 Ditzingen-Heimerdingen Country Court Stuttgart HRB 200973 Managing director: Dieter Dommer
Einsteinstr. 5
Website: www.widos.de
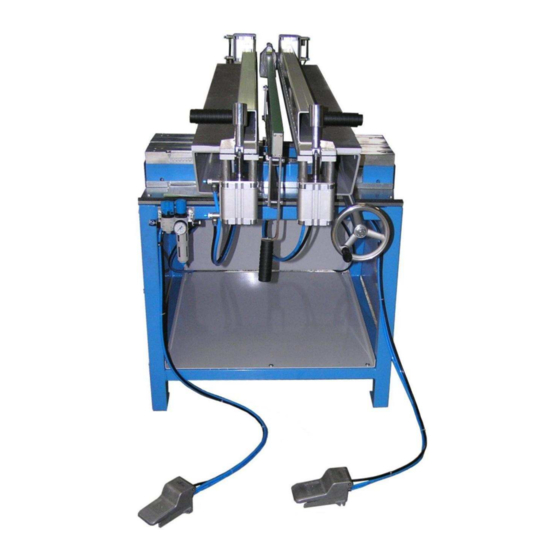
Sheet Welding Machine
WIDOS PSM 15
with pneumatic clamping
Keep for further use!
Phone +49 (0) 71 52 99 39 - 0
Fax
+49 (0) 71 52 99 39 - 40
Email:
info@widos.de
Ku nst sto ffschweißtec hni k
Advertisement
Table of Contents

Related Manuals for widos PSM 15


Summary of Contents for widos PSM 15
- Page 1 +49 (0) 71 52 99 39 - 40 Website: www.widos.de Email: info@widos.de Ku nst sto ffschweißtec hni k Working Instructions Sheet Welding Machine WIDOS PSM 15 with pneumatic clamping Keep for further use! Headquarters: D-71254 Ditzingen-Heimerdingen Country Court Stuttgart HRB 200973 Managing director: Dieter Dommer...
- Page 2 Phone: ++49 371 / 8 15 73 - 0 Phone: ++41 71 / 3 88 89 79 Fax: ++49 371 / 8 15 73 - 20 Fax: ++41 71 / 3 88 89 73 03.03.2009 Working Instructions WIDOS PSM 15 with pneumatic clamping Page 2 of 33...
- Page 3 03.03.2009 WIDOS W. Dommer Söhne GmbH Einsteinstraße 5 D-71254 Ditzingen-Heimerdingen All rights reserved Reprinting only allowed with permission of the corporation. Any changes subject to technical innovations. 03.03.2009 Working Instructions WIDOS PSM 15 with pneumatic clamping Page 3 of 33...
-
Page 4: Table Of Contents
How to clamp sheets for angle welding ................17 STARTING AND OPERATING................... 18 5.1. Starting ...........................18 5.2. Welding process ......................19 WELDING TABLES ......................21 MAINTENANCE / STORAGE / TRANSPORT..............24 03.03.2009 Working Instructions WIDOS PSM 15 with pneumatic clamping Page 4 of 33... - Page 5 Disposal..........................25 ELECTRIC AND PNEUMATIC DIAGRAMS ..............26 SPARE PARTS LIST ......................28 9.1. Basic machine with motion ...................28 9.2. Heating element ......................31 DECLARATION OF CONFORMITY ................33 03.03.2009 Working Instructions WIDOS PSM 15 with pneumatic clamping Page 5 of 33...
-
Page 6: Description Of Product
All technical details of the machine are put together as a general arrangement. 1.1. Usage and non-intended use The WIDOS PSM 15 with pneumatic clamping is a workshop machine for the heating element butt welding of sheets made out of PE, PP, PVDF for the thickness range up to 20 mm and width of sheet up to 1500 mm. -
Page 7: Designation Of The Product
Ring / flat spanner SW 13 / 17 Order numbers and individual parts, please see „spare parts lists“, when ordering please indicate serial no. of the machine! 03.03.2009 Working Instructions WIDOS PSM 15 with pneumatic clamping Page 7 of 33... -
Page 8: Safety Rules
T h e r e g u l a t i o n s f o r t h e p r e v e n t i o n o f a c c i d e n t s a r e v a l i d ( U V V ) . 03.03.2009 Working Instructions WIDOS PSM 15 with pneumatic clamping Page 8 of 33... -
Page 9: Obligations Of The Operator
• Only skilled and trained persons are allowed to work at the machine. A person who is being trained may only work at the machine under supervision of an • experienced person. 03.03.2009 Working Instructions WIDOS PSM 15 with pneumatic clamping Page 9 of 33... -
Page 10: Dangers While Handling The Machine
Ku nst sto ffschweißtec hni k 2.7. Dangers while handling the machine The WIDOS PSM 15 with pneumatic clamping is constructed according to the latest technical standard and the acknowledged technical safety rules. However, dangers for the operator or other persons standing nearby may occur. Also damages of the machine itself or of other parts are possible. -
Page 11: Danger Of Crushing Near And Between The Clamping Beams
• structural changes at the machine without permission • unsatisfactory checking of machine parts which are worn out • repairs performed in an inexpert way • catastrophes by external influence and Acts of God. 03.03.2009 Working Instructions WIDOS PSM 15 with pneumatic clamping Page 11 of 33... -
Page 12: Functional Description
The welding joint can be clamped out and the welding process is completed. Image of a heating element butt welding: Heating element heats the sheets up to welding temperature Completed weld joint with bead on top and below 03.03.2009 Working Instructions WIDOS PSM 15 with pneumatic clamping Page 12 of 33... -
Page 13: Operating And Indicating Elements
- to open / shut mobile slide - to apply adjusting and joining force 13 Foot valve on the right (optional) - to clamp / release clamping beam right side 03.03.2009 Working Instructions WIDOS PSM 15 with pneumatic clamping Page 13 of 33... -
Page 14: Components At The Heating Element
- cable for the connection with local power supply 230 V / 50 Hz, covering 16 A The heating element shown in welding position is descended below by slewing the lever (5) in direction of the arrow. 03.03.2009 Working Instructions WIDOS PSM 15 with pneumatic clamping Page 14 of 33... -
Page 15: How To Clamp The Sheet
(Image rear clamping beam) (Image showing clamping beam supported with manual clamping) Clamping beam shut Clamping beam props in the mouth 03.03.2009 Working Instructions WIDOS PSM 15 with pneumatic clamping Page 15 of 33... -
Page 16: Service Unit
The input pressure must be at least 1 bar larger than the output pressure. • Press the pressure regulator button downwards (towards the housing). Thereby, it is secured against unintentional twisting. 03.03.2009 Working Instructions WIDOS PSM 15 with pneumatic clamping Page 16 of 33... -
Page 17: How To Clamp Sheets For Angle Welding
Ku nst sto ffschweißtec hni k 4.4. How to clamp sheets for angle welding You may weld an angle out of two plastic sheets on the WIDOS PSM 15. The horizontal sheet of 10 up to 20 mm is clamped onto the left side (chapter: 4.2). -
Page 18: Starting And Operating
• If local temperature is under 5° C the following measures have to be taken: − if necessary heat up sheet ends. • Take measures against rain, wind and dust. 03.03.2009 Working Instructions WIDOS PSM 15 with pneumatic clamping Page 18 of 33... -
Page 19: Welding Process
The maximum time for this process is given by the value for the change-over time indicated in the table. 03.03.2009 Working Instructions WIDOS PSM 15 with pneumatic clamping Page 19 of 33... - Page 20 • release the clamping beams with the optional foot valves or hand lever valves and swivel it open. • Take out the welded piece. • Then open the machine. 03.03.2009 Working Instructions WIDOS PSM 15 with pneumatic clamping Page 20 of 33...
-
Page 21: Welding Tables
W. Dommer Söhne GmbH D-71254 Ditzingen-Heimerdingen +49 (0) 71 52 99 39 - 40 Website: www.widos.de Email: info@widos.de Ku nst sto ffschweißtec hni k 6. Welding tables 03.03.2009 Working Instructions WIDOS PSM 15 with pneumatic clamping Page 21 of 33... - Page 22 Table for PE Heating up time = 10 x wall thickness [sec] Cooling down time under joining force = 1,333 * wall thickness [min] PE 80 The standard value for the heating element temperature is between 200° C - 220° C. For smaller wall thickness higher temperatures should be relized.
- Page 23 Table for PE Heating up time = 10 x wall thickness [sec] Cooling down time under joining force = 1,333 * wall thickness [min] PE 80 The standard value for the heating element temperature is between 200° C - 220° C. For smaller wall thickness higher temperatures should be relized.
- Page 24 Table for PE Heating up time = 10 x wall thickness [sec] Cooling down time under joining force = 1,333 * wall thickness [min] PE 80 The standard value for the heating element temperature is between 200° C - 220° C. For smaller wall thickness higher temperatures should be relized.
- Page 25 Table for PE Heating up time = 10 x wall thickness [sec] Cooling down time under joining force = 1,333 * wall thickness [min] PE 80 The standard value for the heating element temperature is between 200° C - 220° C. For smaller wall thickness higher temperatures should be relized.
- Page 26 Table for PE Heating up time = 10 x wall thickness [sec] Cooling down time under joining force = 1,333 * wall thickness [min] PE 80 The standard value for the heating element temperature is between 200° C - 220° C. For smaller wall thickness higher temperatures should be relized.
- Page 27 Table for PP Heating up time = 15 x wall thickness [sec], for 2 - 4 mm wall thickness; and 16 x wall thickness [sec], for 5 - 10 mm wall thickness Cooling down time under joining force = 2,0 x wall thickness [min], for 2 - 4 mm; and 1,75 x wall thickness [min] for >4 - 10 mm wall thi The standard value for heating element temperature is 210°...
- Page 28 Table for PP Heating up time = 15 x wall thickness [sec], for 2 - 4 mm wall thickness; and 16 x wall thickness [sec], for 5 - 10 mm wall thickness Cooling down time under joining force = 2,0 x wall thickness [min], for 2 - 4 mm; and 1,75 x wall thickness [min] for >4 - 10 mm wall thi The standard value for heating element temperature is 210°...
- Page 29 Table for PP Heating up time = 15 x wall thickness [sec], for 2 - 4 mm wall thickness; and 16 x wall thickness [sec], for 5 - 10 mm wall thickness Cooling down time under joining force = 2,0 x wall thickness [min], for 2 - 4 mm; and 1,75 x wall thickness [min] for >4 - 10 mm wall thi The standard value for heating element temperature is 210°...
- Page 30 Table for PP Heating up time = 15 x wall thickness [sec], for 2 - 4 mm wall thickness; and 16 x wall thickness [sec], for 5 - 10 mm wall thickness Cooling down time under joining force = 2,0 x wall thickness [min], for 2 - 4 mm; and 1,75 x wall thickness [min] for >4 - 10 mm wall thi The standard value for heating element temperature is 210°...
-
Page 31: Maintenance / Storage / Transport
Prescribed maintenance and repair works are to be carried out in due time. DVS recommends repair works after one year. Machines which are loaded above the average, the checking cycle should be shortened. The works have to be executed by company WIDOS GmbH or by one of its authorized representatives. 7.2. Clamping elements In order to warrant a long lifetime, threaded spindles and joint pieces for clamping the sheets should be regularly cleaned and greased. -
Page 32: Transport
The machine and wear parts have to be disposed of at the end of their service life according to the common Waste Management Laws in a proper and environmentally sound manner. 03.03.2009 Working Instructions WIDOS PSM 15 with pneumatic clamping Page 25 of 33... -
Page 33: Electric And Pneumatic Diagrams
W. Dommer Söhne GmbH D-71254 Ditzingen-Heimerdingen +49 (0) 71 52 99 39 - 40 Website: www.widos.de Email: info@widos.de Ku nst sto ffschweißtec hni k 8. Electric and pneumatic diagrams 03.03.2009 Working Instructions WIDOS PSM 15 with pneumatic clamping Page 26 of 33... - Page 34 Electric and pneumatic diagrams Chapter 8 Ku nst sto ffschweißtec hni k 03.03.2009 Working Instructions WIDOS PSM 15 with pneumatic clamping Page 27 of 33...
-
Page 35: Spare Parts List
18 - 23 24 - 26 27 – 29 30 - 32 51 - 55 42 - 44 45 - 47 48 - 50 56 - 59 03.03.2009 Working Instructions WIDOS PSM 15 with pneumatic clamping Page 28 of 33... - Page 36 76 - 77 86 - 87 88 - 91 79 - 81 92 - 95 99 - 99 100 - 101 (Machine with hand lever valves, optional) 03.03.2009 Working Instructions WIDOS PSM 15 with pneumatic clamping Page 29 of 33...
- Page 37 Hexagon-head screw M 6 x 18 DIN 933 0933F018 Washer M 6 DIN 9021 9021F Handwheel DIN 950-GG-160-B15-D BH160 Tread bolt for cylinder 8217676 Protector cap 82176761 Page 30 / 1 of 33 03.03.2009 Working instructions WIDOS PSM 15 with pneumatic clamping...
- Page 38 Guiding for shafting 380165 Pan-head screw M 8 x 50 DIN 912 0912H050 Shafting for spring 380166 Pressure spring FE033 Plate for spring support 3801641 Page 30 / 2 of 33 03.03.2009 Working instructions WIDOS PSM 15 with pneumatic clamping...
- Page 39 Pan-head screw M 4 x 10 DIN 912 0912D010 Holding plate for hand lever valve 82176751 Hand lever valve H-5-1/4-B on request Data plate on request Page 30 / 3 of 33 03.03.2009 Working instructions WIDOS PSM 15 with pneumatic clamping...
-
Page 40: Heating Element
8 / 9 11 - 13 31 / 32 34 / 35 21 / 22 36 - 38 24 - 26 39 / 40 28 / 29 03.03.2009 Working Instructions WIDOS PSM 15 with pneumatic clamping Page 31 of 33... - Page 41 Tie plate 82156121 Spring lock washer M 6 DIN 127 0127F Pan-head screw M 6 x 18 DIN 6912 6912F018 Insulating piece 092503 Insulating piece 821515 03.03.2009 Working instructions WIDOS PSM 15 with pneumatic clamping Page 32 of 33...
-
Page 42: Declaration Of Conformity
Safety technology requirements at fluid technical devices and components The technical documentation is completely available. The working instructions are available in German and English. Ditzingen-Heimerdingen, the 03.03.2009 Dieter Dommer (Manager) 03.03.2009 Working Instructions WIDOS PSM 15 with pneumatic clamping Page 33 of 33...
Need help?
Do you have a question about the PSM 15 and is the answer not in the manual?
Questions and answers