Table of Contents
Advertisement
Quick Links
WIDOS
W. Dommer Söhne GmbH
Working Instructions
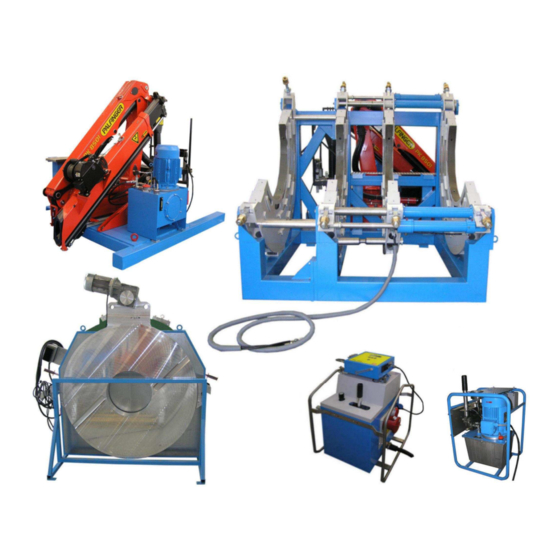
Heating element butt welding machine
Headquarters: D-71254 Ditzingen-Heimerdingen Country court Stuttgart HRB 200973 Managing director: Jürgen Dommer
Einsteinstr. 5
D-71254 Ditzingen-Heimerdingen
website: www.widos.de
Translation
WIDOS 20000
Keep for further use!
Phone ++49 7152 9939 - 0
Fax ++49 7152 9939 - 40
email: info@widos.de
Kunststoffschweißtechnik
Advertisement
Table of Contents

Related Manuals for widos 20000


Summary of Contents for widos 20000
- Page 1 W. Dommer Söhne GmbH D-71254 Ditzingen-Heimerdingen Fax ++49 7152 9939 - 40 website: www.widos.de email: info@widos.de Kunststoffschweißtechnik Working Instructions Translation Heating element butt welding machine WIDOS 20000 Keep for further use! Headquarters: D-71254 Ditzingen-Heimerdingen Country court Stuttgart HRB 200973 Managing director: Jürgen Dommer...
- Page 2 ++49 371 / 8 15 73 - 0 Phone: ++41 71 / 388 89 79 Fax: ++49 371 / 8 15 73 - 20 Fax: ++41 71 / 388 89 73 16.01.12 Working Instructions WIDOS 20000 Page 2 of 98...
- Page 3 Due to this structure, the searched information can be easily found. 1/16/2012 WIDOS W. Dommer Söhne GmbH Einsteinstraße 5 D-71254 Ditzingen-Heimerdingen All rights reserved. Reprinting only allowed with permission of the corporation. Any changes are subject to technical innovations. 16.01.12 Working Instructions WIDOS 20000 Page 3 of 98...
-
Page 4: Table Of Contents
1.4. Machine overview .........................8 1.5. Designation of the product ....................8 1.5.1. Technical data ........................8 1.5.1.1. WIDOS 20000 General data ..................9 1.5.1.2. Basic frame ........................9 1.5.1.3. Hydraulic aggregate enclosed for welding (optional) ..........9 1.5.1.4. Hydraulic aggregate naked for welding (optional)............10 1.5.1.5. - Page 5 Bar code reading pen (optional)..................48 6.7. How to read out WICON with USB card reader (optional) ..........49 6.8. How to read the welding data ....................49 6.9. Diagnosis program ......................49 WELDING PROCESS WITHOUT SPA ................ 51 16.01.12 Working Instructions WIDOS 20000 Page 5 of 98...
- Page 6 12.3. Planer ...........................85 12.4. Hydraulic aggregate, enclosed (optional) ................87 12.5. SPA-600..........................89 12.6. Hydraulic aggregate, naked (optional)................92 12.7. Protection box ........................94 12.8. Assembly frame for crane (optional).................96 13. DECLARATION OF CONFORMITY................98 16.01.12 Working Instructions WIDOS 20000 Page 6 of 98...
-
Page 7: Description Of The Product
All technical details of the machine are put together as a general arrangement. 1.1. Usage and purpose-oriented use The WIDOS 20000 has been designed for the heating element butt welding of pipes and fittings with a diameter range from Ø 1200 mm up to Ø = 2000 mm. -
Page 8: Machine Overview
They contain the type, the serial number and the year of construction of the machine. 1.5.1. Technical data All important technical data of each single component are displayed. They allow a rapid information about the working capacity and the structure. 16.01.12 Working Instructions WIDOS 20000 Page 8 of 98... -
Page 9: Widos 20000 General Data
Description of the product Chapter 1 Kunststoffschweißtechnik 1.5.1.1. WIDOS 20000 General data Pipe diameter range: ∅ ∅ ∅ ∅ 1200 - 2000 mm outside Material which can be welded: PP, PE 80, PE 100 Weight (without accessories): appr. 10800 kg Emissions - Noise exceeding 80 dB (A) may occur;... -
Page 10: Hydraulic Aggregate Naked For Welding (Optional)
Hydraulic oil tank: appr. 100 l Insulation system IP 55 Electromotor and pump: Speed: 1445 rpm Max. working pressure of pump: appr. 250 bar Working pressure: 0-250 bar adjustable Weight: appr. 190 kg 16.01.12 Working Instructions WIDOS 20000 Page 10 of 98... -
Page 11: Heating Element
4 / 5 / 14 1 each Spanner wrench size 13 / 19 / 24 / 30 Torx-Screw driver T10 Socket spanner size 65 Wire rope with hook (J9994) 16.01.12 Working Instructions WIDOS 20000 Page 11 of 98... -
Page 12: Safety Rules
• It is a help for using all the functions on your machine in an optimal way and helps you to make the job easier. The regulations for the prevention of accidents are valid (UVV). 16.01.12 Working Instructions WIDOS 20000 Page 12 of 98... -
Page 13: Obligations Of The Owner
A person who is being trained may only work at the machine under supervision of an • experienced person. 16.01.12 Working Instructions WIDOS 20000 Page 13 of 98... -
Page 14: Maintenance And Inspection, Repair
2.8. Dangers while handling the machine The machine WIDOS 20000 is constructed according to the latest technical standard and the acknowledged technical safety rules. However, dangers for the operator or other persons standing nearby may occur. Also material damages are possible. -
Page 15: Dangers Caused By The Hydraulics
• During the installation of the reducer inserts use a lifting device, do not reach between reducer insert and clamping tool. • Do not block the opening and closing of the machine carriages. 16.01.12 Working Instructions WIDOS 20000 Page 15 of 98... -
Page 16: Danger Of Catching Clothes By The Planer
• Machine parts which are not in a perfect condition are to be replaced immediately. • Only use original WIDOS spare and wear parts. • In case of purchase orders please always state the machine number! 2.12. -
Page 17: Functional Description
T h e w e l d e d j o i n t c a n b e u n c l a m p e d , t h e w e l d i n g p r o c e s s i s f i n i s h e d . Heating element heats the pipes up to welding temperature Finished welding with internal and external bead 16.01.12 working Instructions WIDOS 20000 page 17 of 98... -
Page 18: Operating And Indicating Elements
Clamping ring flexible to drive the right clamped pipe to and fro Tear-off bar to separate the heating element from the pipe ends after heating Hydraulic hoses to connect with the hydraulic aggregate 16.01.12 working Instructions WIDOS 20000 page 18 of 98... -
Page 19: Hydraulic Aggregate, Enclosed, For Welding (Optional)
- to the right side: slides open Setting screw for pressure Limitation of the pressure to the desired value. relief valve Pressure gauge Display of the hydraulic pressure Plug 230V / 16A Connection for SPA-600 16.01.12 Working Instructions WIDOS 20000 Page 19 of 98... - Page 20 • Detach the screws from the panel with the power sockets. • Activate the fuse again. • Mount the panel with the power sockets again. • Reconnect the aggregate to the power supply. 16.01.12 Working Instructions WIDOS 20000 Page 20 of 98...
-
Page 21: Weld Log Recording Apparatus Spa 600 (Optional)
Interface for barcode reading pen (optional) Connecting cable Holder for T-piece - Plug box for the heating element (when 230 V) - Plug box for heating element probe (when 400V) Outside temperature probe 16.01.12 Working Instructions WIDOS 20000 Page 21 of 98... -
Page 22: Hydraulic Aggregate, Naked, For Welding (Optional)
Hydraulic connection for Non-dropping quick-action coupling closing the slides Hydraulic connection for Non-dropping quick-action coupling opening the slides Screw with oil dipstick - Checking the oil level - Oil filler neck 16.01.12 Working Instructions WIDOS 20000 Page 22 of 98... -
Page 23: Heating Element
To set the required temperature. On / off switch with control To switch the heating element on / off. lamp red Steel wire with hook To transport the heating element. image 16.01.12 Working Instructions WIDOS 20000 Page 23 of 98... -
Page 24: Planer
Possibility to hinge the planer * Pull the rod with the ball knob in arrow direction in order to release the locking and to lift the planer out of the base frame. 16.01.12 Working Instructions WIDOS 20000 Page 24 of 98... -
Page 25: Protective Motor Switch At The Planer
Phase changing switch If the red control lamp lightens, the planer turns in the wrong direction. Absolutely change the turning direction by turning the phase changing switch. 16.01.12 Working Instructions WIDOS 20000 Page 25 of 98... -
Page 26: Crane (Optional)
Fixing hook To fix the crane console to the base frame Rope winch To roll up the rope with brake Inspection glass To check the oil level Ring bolt To transport 16.01.12 Working Instructions WIDOS 20000 Page 26 of 98... -
Page 27: Starting And Operating
(e.g. PE cleaner or pipe cleaning cloths which are available at the WIDOS company). Never discard the heating element unprotected onto its coated surfaces. -
Page 28: How To Install The Base Frame
• Mount base frame and holder to each other by 12 Pan-head screws M20 + washers. The clamping rings have been prepared with aliphatic rust-protective agent for the transport. • Necessarily degrease the inner surfaces prior to welding in order that correct clamping is warranted. 16.01.12 Working Instructions WIDOS 20000 Page 28 of 98... -
Page 29: Lifting Crane
• Lift up the crane by a lifting device and put it behind the base frame. • Fix the lifting crane to the base frame according to the image. Fixing screws to lift the crane at the base frame Fix ring screws here 16.01.12 Working Instructions WIDOS 20000 Page 29 of 98... -
Page 30: How To Operate The Crane
• If you want to work with the Palfinger crane, turn the crane button on: <1> and make sure that the transport look has been removed. • Please refer to the separately enclosed working instructions from Palfinger for operation and maintenance. 16.01.12 Working Instructions WIDOS 20000 Page 30 of 98... -
Page 31: How To Connect The Machine With The Naked Hydraulic Aggregate (Optional)
(CEE 63A / 400 V / 50 Hz, right-hand rotary field). Observe correct mains voltages. Lay the hydraulic and electric wires carefully (danger of stumbling). Verify whether the hydraulic pump is connected clockwise! 16.01.12 Working Instructions WIDOS 20000 Page 31 of 98... -
Page 32: How To Set The Heating Element Temperature
The standard value for heating element temperature is (210°C ± 10°C *). PVDF The standard value for heating element temperature is (240°C +/- 8°C *). * The smaller the pipe wall the higher the temperature. 16.01.12 Working Instructions WIDOS 20000 Page 32 of 98... -
Page 33: Welding Process With Spa 600
In order to carry out planing and for the joining you must select the slow speed: • With <control lever> on „FORWARDS“ or „BACKWARDS“ without pressing <button>. 6.1. Connect the SPA 600 to the hydraulic aggregate 16.01.12 working Instructions WIDOS 20000 page 33 of 98... -
Page 34: Description Of The Display
• In case the T-piece (2) is not mounted to position, remove it from holder (7) and connect it to the upper hydraulic connector of the aggregate. • Connect both hydraulic hoses (3) of the basic machine e.g. WIDOS 20000 steel version there. -
Page 35: Programming Of The Spa 600
• Selecting menu: Select the pipe data and the project number by pressing simultaneously <+> and <−>. • Setting menu: Set the machine type and printing the welding data by pressing simultaneously <−> and <Enter>. • Diagnosis menu by pressing simultaneously <+> and <Enter>. 16.01.12 Working Instructions WIDOS 20000 Page 35 of 98... -
Page 36: Selection Of The Pipe Data
Display of the currently set machine type Display: WIDOS 20000 Current time and date line: 11:00 01.12.2011 alternating with: 21°C HE= - - - °C current outside and heating element temperature 16.01.12 Working Instructions WIDOS 20000 Page 36 of 98... -
Page 37: Setting Menu
In case traceability has been confirmed with „yes“, the display indicates: Display: Select pipe length for traceability Pipe length line: Press button <+> for Yes Confirm Yes or No by pressing button <Enter> 16.01.12 Working Instructions WIDOS 20000 Page 37 of 98... - Page 38 Set time with buttons <+>, <-> and <Enter>. Next menu by pressing button <Enter> Display: WIDOS 20000 line: date 11:00 01.12.2011 Set date with buttons <+>, <-> and <Enter>. Next menu by pressing button <Enter> 16.01.12 Working Instructions WIDOS 20000 Page 38 of 98...
-
Page 39: Parameter Menu / Laboratory Menu
SWP line: 0.00 N/mm² Change the aligning pressure by pressing buttons <+> and <−>, jump to next parameter by <Enter> Display: indication of heating time t-heat line: 000 s 16.01.12 Working Instructions WIDOS 20000 Page 39 of 98... - Page 40 <Enter> Display: Indication of cooling pressure / joining pressure p-cool line: By pressing <+> and <-> the cooling pressure time is changed, jump to next parameter by <Enter> Display: Parameter line: 16.01.12 Working Instructions WIDOS 20000 Page 40 of 98...
-
Page 41: Welding Process
Tighten firmly the clamping nuts, respectively close the clamping cylinders and align the pipe ends with respect to each other. Always use WIDOS rollerstands for the alignment. 6.4.2. Drag pressure measurement When the pressure is > 2 bar, the SPA switches from basic menu to drag pressure measurement. -
Page 42: Dimension
<+ / - / Enter> Simultaneously pres all buttons <+ / - / Enter>. Then manually enter barcode of the 1 pipe: Select first digit with <+/-> and jump to the next digit with <Enter>. 16.01.12 Working Instructions WIDOS 20000 Page 42 of 98... -
Page 43: Weather / Protection
Separate the pipes, with <control lever> on „BACKWARDS“ until the chip will tear off, only then switch off planer. Detach the planer locking device and lift crane out of the machine again. Remove the produced chips without contacting the worked surfaces. 16.01.12 Working Instructions WIDOS 20000 Page 43 of 98... -
Page 44: Compensation Of Mismatch
Take care that the heating element lies in the zone of the diminution of the tear-off bar. Drive the pipes continuously to the heating element, < control lever > on “FORWARDS”. 16.01.12 Working Instructions WIDOS 20000 Page 44 of 98... -
Page 45: Heating Up
“BACKWARDS” until the heating element detaches from both pipe ends. Remove heating element out of the machine quickly and move pipe ends together <control lever> on “FORWARDS”. Display: chg. over line: Remaining change over time and actual pressure t=21s Pi=0 16.01.12 Working Instructions WIDOS 20000 Page 45 of 98... -
Page 46: Pressure Ramp
OK welding is finished with shortened cooling time: Display: shorten cooling t line: parameter OK Display: Display of the errors occurred during welding tabl. of errors line: (see chapter: 6.4.13). TAWURtp9 16.01.12 Working Instructions WIDOS 20000 Page 46 of 98... -
Page 47: Signification Of The Error Codes
Only displayed if there is no card in the drive: Display: Message appears if there is no SD card in the error SD card line: drive Confirm the error message by pressing <Enter>. 16.01.12 Working Instructions WIDOS 20000 Page 47 of 98... -
Page 48: Sd Card And Drive
• The card can be read out with a WICON program (optional). • The card may not be bent, opened, overheated and become wet! Please only use SD cards purchased from WIDOS. We will not be liable for any cards from other manufacturers! 6.6. -
Page 49: How To Read Out Wicon With Usb Card Reader (Optional)
As soon as the USB card reader has been plugged, it appears as removable medium in the drive list. Open the WIDOS folder, there you will find: - WICON2000 viewer for considering and printing the welding data, - working instructions for WICON2000 viewer as PDF file. - Page 50 - Bit values from 0-1023 appear which will change together with the change of the corresponding analog values Environmental temperature Heating element temperature NTC Pressure (4-20 mA) Heating element temperature PT 1000 16.01.12 Working Instructions WIDOS 20000 Page 50 of 98...
-
Page 51: Welding Process Without Spa
• Put on the upper parts of the clamping ring and tighten the pipes with the clamping nuts and adjust the workpieces to each other. Use WIDOS roller stands for that purpose. • Close the slides <valve lever> on „FORWARDS“ thereby reading the movement pressure on the pressure gauge. - Page 52 Take care that the heating element lies in the zone of the diminution of the tear-off bar. • Shut slides smoothly to the set adjustment pressure, <valve lever> on „FORWARDS“. 16.01.12 Working Instructions WIDOS 20000 Page 52 of 98...
- Page 53 • Release the clamping nuts and remove the upper clamping ring. • Remove the welded part and open the slide with <valve lever> on „BACKWARDS“. The w elding process is finished. 16.01.12 Working Instructions WIDOS 20000 Page 53 of 98...
-
Page 54: Welding Log And Tables
WIDOS Einsteinstr. 5 Phone ++49 7152 9939 - 0 W. Dommer Söhne GmbH D-71254 Ditzingen-Heimerdingen ++49 7152 9939 - 40 website: www.widos.de email: info@widos.de Kunststoffschweißtechnik 8. Welding log and tables 16.01.12 Working Instructions WIDOS 20000 Page 54 of 98... - Page 55 Welding log and tables Chapter 8 Kunststoffschweißtechnik 16.01.12 Working Instructions WIDOS 20000 Page 55 of 98...
- Page 56 42,9 1400 53,5 1400 82,4 1600 39,2 1600 49,0 1600 61,2 1600 94,1 1800 48,3 1800 49,0 1800 60,9 1800 61,4 1800 69,1 1800 71,6 1800 105,9 1059 16.01.2012 Working instructions WIDOS 20 000 Page 56 / 1 of 98...
- Page 57 • no additional pressure during further cooling down • load onto the workpieces only after being completely cooled down • Join parts with wall thickness ≥15 mm 16.01.2012 Working instructions WIDOS 20 000 Page 56 / 2 of 98...
-
Page 58: Maintenance, Care And Repair
For machines with a specially high usage percentage the testing cycle should be shortened. The work should be performed at the WIDOS GmbH company or by an authorized partner. The operators are to be informed prior to the maintenance and repair work. -
Page 59: Storage
• If the oil level is under the lower mark, then hydraulic oil of the quality HLDP 35 must be added. • The oil level may not be above the upper mark since otherwise there is the danger of spilling in certain situations. 16.01.12 Working Instructions WIDOS 20000 Page 58 of 98... -
Page 60: How To Check The Hydraulic Oil Level / Refilling
Grease nipples are mounted to the flexible lower parts of the clamping rings. In order to warrant a long durability, you should lubricate the guide rods if necessary via these grease nipples. 16.01.12 Working Instructions WIDOS 20000 Page 59 of 98... -
Page 61: How To Vent The Hydraulic Cylinders
• If air remains in the lower cylinder, it will ascend in the upper cylinder when pressure is applied. There must always be enough oil in the tank. 16.01.12 Working Instructions WIDOS 20000 Page 60 of 98... -
Page 62: Planer
(e.g. AVILUB NCI 9840). 9.12. Disposal At the end of the life time, the machine has to be disposed of properly, non-polluting and in accordance with the national laws of waste disposal. 16.01.12 Working Instructions WIDOS 20000 Page 61 of 98... -
Page 63: Transport
Grease the holders Transport the heating element hinged or in the reception box. Never discard the heating element onto is coated surfaces, the coating must be undamaged in the welding area! 16.01.12 Working Instructions WIDOS 20000 Page 62 of 98... -
Page 64: Hydraulic And Electric Diagrams
W. Dommer Söhne GmbH D-71254 Ditzingen-Heimerdingen Telefax +49 (0) 71 52 / 99 39 - 40 Kunststoffschweißtechnik info@widos.de Internet: www.widos.de 11. Hydraulic and electric diagrams 11.1. Electric diagram with enclosed hydraulic aggregate 16.01.12 Working Instructions WIDOS 20000 Page 63 of 98... - Page 65 Hydraulic and electric diagrams Chapter 11 Kunststoffschweißtechnik 16.01.2012 Working Instructions WIDOS 20000 Page 64 ofd 98...
- Page 66 Hydraulic and electric diagrams Chapter 11 Kunststoffschweißtechnik 16.01.2012 Working Instructions WIDOS 20000 Page 65 ofd 98...
- Page 67 Hydraulic and electric diagrams Chapter 11 Kunststoffschweißtechnik 16.01.2012 Working Instructions WIDOS 20000 Page 66 ofd 98...
- Page 68 Hydraulic and electric diagrams Chapter 11 Kunststoffschweißtechnik 16.01.2012 Working Instructions WIDOS 20000 Page 67 ofd 98...
- Page 69 Hydraulic and electric diagrams Chapter 11 Kunststoffschweißtechnik 16.01.2012 Working Instructions WIDOS 20000 Page 68 ofd 98...
- Page 70 Hydraulic and electric diagrams Chapter 11 Kunststoffschweißtechnik 16.01.2012 Working Instructions WIDOS 20000 Page 69 ofd 98...
- Page 71 Hydraulic and electric diagrams Chapter 11 Kunststoffschweißtechnik 16.01.2012 Working Instructions WIDOS 20000 Page 70 ofd 98...
- Page 72 Hydraulic and electric diagrams Chapter 11 Kunststoffschweißtechnik 16.01.2012 Working Instructions WIDOS 20000 Page 71 ofd 98...
-
Page 73: Electric Diagram With Naked Hydraulic Aggregate
Hydraulic and electric diagrams Chapter 11 Kunststoffschweißtechnik 11.2. Electric diagram with naked hydraulic aggregate 16.01.2012 Working Instructions WIDOS 20000 Page 72 ofd 98... - Page 74 Hydraulic and electric diagrams Chapter 11 Kunststoffschweißtechnik 16.01.2012 Working Instructions WIDOS 20000 Page 73 ofd 98...
- Page 75 Hydraulic and electric diagrams Chapter 11 Kunststoffschweißtechnik 16.01.2012 Working Instructions WIDOS 20000 Page 74 ofd 98...
- Page 76 Hydraulic and electric diagrams Chapter 11 Kunststoffschweißtechnik 16.01.2012 Working Instructions WIDOS 20000 Page 75 ofd 98...
- Page 77 Hydraulic and electric diagrams Chapter 11 Kunststoffschweißtechnik 16.01.2012 Working Instructions WIDOS 20000 Page 76 ofd 98...
- Page 78 Hydraulic and electric diagrams Chapter 11 Kunststoffschweißtechnik 16.01.2012 Working Instructions WIDOS 20000 Page 77 ofd 98...
- Page 79 Hydraulic and electric diagrams Chapter 11 Kunststoffschweißtechnik 16.01.2012 Working Instructions WIDOS 20000 Page 78 ofd 98...
- Page 80 Hydraulic and electric diagrams Chapter 11 Kunststoffschweißtechnik 16.01.2012 Working Instructions WIDOS 20000 Page 79 ofd 98...
-
Page 81: Hydraulic Diagram For Welding Aggregates
Hydraulic and electric diagrams Chapter 11 Kunststoffschweißtechnik 11.3. Hydraulic diagram for welding aggregates 11.4. Hydraulic diagram for crane aggregat: 16.01.2012 Working Instructions WIDOS 20000 Page 80 ofd 98... -
Page 82: Spare Parts List
26 - 27 10 - 11 28 - 30 32 - 33 14 - 16 17 - 18 44 - 45 37 - 38 49 - 50 39 - 40 52-54 16.01.12 Working Instructions WIDOS 20000 Page 81 of 98... - Page 83 Spare parts list Chapter 12 Kunststoffschweißtechnik Basic machine WIDOS 20000 Pos. Name Piece Article no. Socket spanner SW 65 ZRS65 Hexagon-head screw M 16x60 DIN 933 0933P060 Washer M 16 DIN 125 0125P Hexagon-head screw M 20x40 DIN 933 0933T040...
- Page 84 Spare parts list Chapter 12 Kunststoffschweißtechnik Basic machine WIDOS 20000 Pos. Name Piece Article no. Bow-shaped nipple VP3810R11 T-piece VT12LR Outer clamping tool, fixed 2291631 Hexagon-head screw M 20x80 DIN 933 0933T080 Washer M 20 DIN 125 0125T Disc for tear-off bar...
-
Page 85: Heating Element
8 - 11 18 - 19 (Terminal box front view) 31 - 32 33 – 34 20 - 22 38 - 39 23 - 25 40 - 49 28 - 29 16.01.12 Working Instructions WIDOS 20000 Page 83 of 98... - Page 86 Spare parts list Chapter 12 Kunststoffschweißtechnik Heating element WIDOS 20000 Pos. Name Piece Article no. Heating element complete on request Heating plate new 2295440 Handle H0205 Handlebar for heating element 2265143 Locking handle 2265142 Flat-head screw M 8 xx30 DIN 7991va...
- Page 87 Spare parts list Chapter 12 Kunststoffschweißtechnik Heating element WIDOS 20000 Pos. Name Piece Article no. Terminal box for heating element 2295407 Housing for terminal box 22954071 Bottom for terminal box 22954073 Bottom frame for terminal box 22954072 Cover for terminal box...
-
Page 88: Planer
1 - 2 22 - 31 3 - 4 33 - 38 39 - 42 6 - 8 43 - 44 9 - 12 15 - 16 45 - 47 18 - 21 16.01.12 Working Instructions WIDOS 20000 Page 85 of 98... - Page 89 Rear reinforcementn plate, left 22944011 Rear reinforcementn plate, right 22944013 Pan-head screw M12x50 DIN 912 0912L050 Cylinder pin 12x60 DIN 6325 6325L Ball button C 40 DIN 319 0319C40 16.01.2012 Working Instructions WIDOS 20000 Page 86 / 1 of 98...
- Page 90 22944092 Flat-head screw M 10x30 DIN 7991 7991J030 Guide rail for suspension 22944091 Pan-head screw M 8x30 DIN 912 0912H030 Cap for planer holder 2294404 Planer disc, left-hand 2294403 16.01.2012 Working Instructions WIDOS 20000 Page 86 / 2 of 98...
-
Page 91: Hydraulic Aggregate, Enclosed (Optional)
Chapter 12 Kunststoffschweißtechnik 12.4. Hydraulic aggregate, enclosed (optional) 7 - 9 4 - 6 13 - 14 22 - 23 24 - 25 26 - 27 29 - 30 33 - 38 16.01.12 Working Instructions WIDOS 20000 Page 87 of 98... - Page 92 Spare parts list Chapter 12 Kunststoffschweißtechnik Hydraulic aggregate WIDOS 20000 Pos. Name Piece Order no. Press button ES3801 Grip with thread H09061 Button for pressure relief valve 101022 Grip for hydraulic aggregate 1060061 Skintop screwing M 12x1,5 EV1012 Hexagon nut M 10 DIN 935...
-
Page 93: Spa-600
Spare parts list Chapter 12 Kunststoffschweißtechnik SPA-600 12.5. 2 - 3 9 - 10 16.01.12 Working Instructions WIDOS 20000 Page 89 of 98... - Page 94 Spare parts list Chapter 12 Kunststoffschweißtechnik 21 - 23 24 - 25 16.01.2012 Betriebsanleitung WIDOS 20000 Seite 90 von 98...
- Page 95 Flat-heat screw M 6x15 DIN 7991 7991F015 Pan head screw M 5x40 DIN 912 0912E040 Washer M 5 DIN 9021 9021E Distance sleeve for SPA girder 106005 * When ordering, please state the machine type ! 16.01.2012 Working Instructions WIDOS 20000 Page 91 of 98...
-
Page 96: Hydraulic Aggregate, Naked (Optional)
Chapter 12 Kunststoffschweißtechnik 12.6. Hydraulic aggregate, naked (optional) 3 - 4 7 - 8 10 - 11 15 - 16 25 - 26 17 - 18 29 - 30 23 - 24 16.01.12 Working Instructions WIDOS 20000 Page 92 of 98... - Page 97 Spare parts list Chapter 12 Kunststoffschweißtechnik Hydraulic aggregate WIDOS 20000 Pos. Name Piece Article No. Pushbutton ES3801 Grip with thread H09061 Grip for hydraulic aggregate 101022 Skintop-screwing M 12 x 1,5 EV1012 Button for pressure setting 101022 Valve box on request...
-
Page 98: Protection Box
Spare parts list Chapter 12 Kunststoffschweißtechnik 12.7. Protection box 16.01.12 Working Instructions WIDOS 20000 Page 94 of 98... - Page 99 Spare parts list Chapter 12 Kunststoffschweißtechnik Protection box WIDOS 20000 Pos. Name Piece Article no. Protection box, complete 2295421 Protective cap 60 x 60 x 3 J0228 16.01.2012 Working Instructions WIDOS 20000 Page 95 of 98...
-
Page 100: Assembly Frame For Crane (Optional)
Spare parts list Chapter 12 Kunststoffschweißtechnik 12.8. Assembly frame for crane (optional) 1 - 2 5 - 6 16.01.12 Working Instructions WIDOS 20000 Page 96 of 98... - Page 101 Spare parts list Chapter 12 Kunststoffschweißtechnik Assembly frame for crane WIDOS 20000 Pos. Name Piece Article no. Tread plate 2292634 Flat-head screw M8x20 DIN 7991 7991H020 Assembly frame 2292631 Ring bolt M 20 DIN 580 0580T Hexagon-head screw M 16x40 DIN 933...
-
Page 102: Declaration Of Conformity
The technical documentation is completely available. The following technical documentation can be examined at the corporation mentioned above: - testing documents - other technical documents Ditzingen-Heimerdingen, 1/16/2012 Martin Dommer (Technical director) 16.01.12 Working Instructions WIDOS 20000 Page 98 of 98...
Need help?
Do you have a question about the 20000 and is the answer not in the manual?
Questions and answers