
Summary of Contents for Haskel Q-Drive QGD Series
- Page 1 88544_A Q-Drive Installation, Operation, and Maintenance Manual Model: QGD and QGT...
- Page 2 All trademarks used herein are the property of their respective owners. © 2020 Haskel International, LLC. All Rights Reserved. Haskel International, LLC Telephone 818-843-4000 Website www.haskel.com Email for Sales sales@haskel.com Mailing Address: 100 East Graham Place Burbank CA 91502 USA...
-
Page 3: Table Of Contents
Contents About This Product ............................v Your Model Number and Serial Number ....................v Symbols in This Manual ..........................v Limited Warranty ............................vi Safety Instructions ............................1 Warnings ............................... 1 Cautions ................................ 2 Safe Transport .............................. 3 Lifting Instructions for Q-Drive ........................3 Introduction.............................. - Page 4 Monitoring the Gas Pressure at Inlet and Outlet ..................21 Monitoring the Gas Temperature ......................22 Monitoring the Coolant Temperature ....................... 22 Managing the System ..........................22 About Alarms ............................... 23 Troubleshooting ............................25 Inspection and Preventive Maintenance ..................... 26 Inspection Schedule ..........................
-
Page 5: About This Product
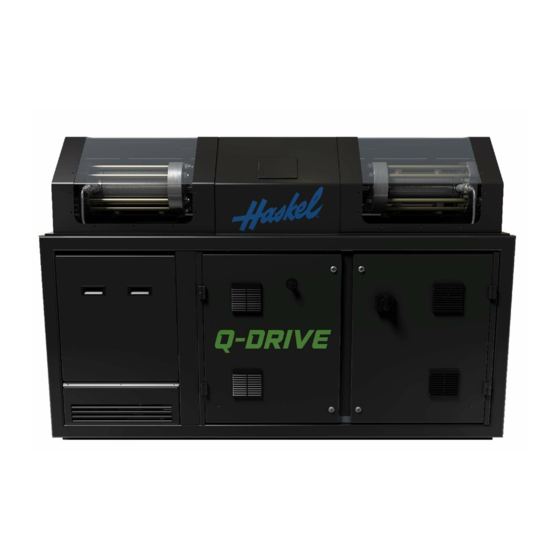
About This Product This manual describes how to install, operate, and maintain the following models of the Haskel Q- Drive: Haskel, LLC reserves the right to make changes to the Q-Drive and its firmware that might not be documented in this manual. -
Page 6: Limited Warranty
If unit has been disassembled and reassembled in a facility other than Haskel, warrranty is void if it has been improperly reassembled or substitute parts have been used in place of factory- manufactured part. -
Page 7: Safety Instructions
Q-Drive Installation, Operation, and Maintenance Manual Safety Instructions Use this system in strict accordance with all safety regulations. Follow all applicable national and regional regulations. Make sure the environment in which the machinery is to be used is safe for the processed media. ... -
Page 8: Cautions
Q-Drive Installation, Operation, and Maintenance Manual Cautions CAUTION: Conditions that can cause damage to the equipment. Be alert for high gas temperature and oil leaks. Alarms are not audible by default. Do not spray water on the system. ... -
Page 9: Safe Transport
Q-Drive Installation, Operation, and Maintenance Manual Safe Transport This work instruction is designed to ensure the consistent handling and shipping practices are used on Q-Drive units. Use this procedure to prepare unit for shipping and place unit in shipping container. Tools Purpose Required for Operator Protection... - Page 10 Q-Drive Installation, Operation, and Maintenance Manual 3. Once the forks are inserted, the unit can be lifted and transported as desired. **NOTE**: Only individuals with a Forklift Driving License (which requires classroom and practical training/testing) can use the Forklift. 4 of 59...
-
Page 11: Introduction
Q-Drive Installation, Operation, and Maintenance Manual Introduction The Haskel Q-Drive system is a Gas Booster driven by electricity that pumps gas from a supply vessel, increases the gas pressure, and then delivers the gas to a pipeline or another vessel. See “Performance”... -
Page 12: Gas Section
Q-Drive Installation, Operation, and Maintenance Manual Adapter Piece Drive Rod Piston Assembly Gas Section with Cooling Jacket and Barrel. 45kW Servo Actuator Retainer Gas Section without Plate Cooling Jacket and Barrel. Q-Drive with exposed Gas Section Gas Section Each gas section boosts the inlet pressure independently through a common gas inlet. The Compression Ratio (Cr) is the ratio of Outlet Pressure to Inlet Pressure. -
Page 13: Q-Drive Actuator
Circulating coolant draws heat from the gas sections and the lubrication circuit. A Chiller must be connected to the coolant ports.The capacity needed for the Chiller depends on your application. Consult with Haskel representative for specific recommendation for your application. Modes of Operation Three modes of operation control the way the system functions. - Page 14 Q-Drive Installation, Operation, and Maintenance Manual After you log in, you see the home screen for your model of the Q-Drive model. Example of the Home screen (for Two-Stage) The screens in the user interface use the following symbols for indicators and buttons. 8 of 59...
-
Page 15: Symbols On The Screen
Q-Drive Installation, Operation, and Maintenance Manual Symbols on the Screen Symbol Definition Banner reports status: Running = pumping and compression in process Off Ready = Pump is in Stop condition and ready to be started. Off Not Ready = there is an active alarm, refer to your alarms. Operator CPM Limit = Operator is in control of Cycle Rate. - Page 16 Q-Drive Installation, Operation, and Maintenance Manual Symbol Definition Pauses the pump temporarily, regardless of operating mode, but does not vent or isolate the system. When using Fill & Pause mode, the Ack button restarts the pump. Set or change the Cycle Rate, Cycles per Minute (CPM). The button shows the current value.
-
Page 17: Performance
2.5 m L x 0.86 m W x 1.4 m H Weight 2500 lbs (estimated max) 1134 kgs Noise Level 77.0 dB(A) Connections (Haskel International recommends BuTech ¾ in M/P fittings and tubing.) Blow By 3/4 in tube OD, 316 SST Purge 1/4 in tube OD, 316 SST Vent Lines... -
Page 18: Site Preparation And Inspection
Keep all damaged product and packaging for a possible inspection. 3. Go to the Field Evaluation Report and fill out the report within 14 days of delivery. Send the report and following information to the Haskel regional sales office: Photographs and a description of the damage. ... -
Page 19: Securing The Q-Drive System
Q-Drive Installation, Operation, and Maintenance Manual Securing the Q-Drive System The drive requires 4 anchor bolts. The mounting holes are 21.8 mm (0.866 in) in diameter. 1. Insert the 4 anchor bolts. Do not lubricate. 2. Level the system. Clearance Holes Leveling Bolts for Anchor Bolts Bottom View of Q-Drive with Location of Anchor Bolts... -
Page 20: Attaching Air, Gas, And Coolant Lines
Q-Drive Installation, Operation, and Maintenance Manual The filter needs to be @ 10 micron rating Attaching Air, Gas, and Coolant Lines Port Connection Port ID Blow By BULK 3/4" TUBE X 3/4" FEM NPT Purge BULK 1/4" TUBE X 1/4" FEM NPT QGT Vent Lines (4) BULK 3/8"... -
Page 21: Supplying The Oil For Lubrication
Q-Drive Installation, Operation, and Maintenance Manual Supplying the Oil for Lubrication The Q-Drive system ships without lubrication. To supply oil for lubrication, use the procedure in “Adding New Oil.” 15 of 59... -
Page 22: Using Q-Drive System
Q-Drive Installation, Operation, and Maintenance Manual Using Q-Drive System WARNING: Anyone in the vicinity of the system must wear the personal protection equipment (PPE): safety glasses, steel-toe shoes, protective/safety gloves, hard hat, and any equipment that is a site requirement. CAUTION: Do not start any testing, maintenance, or service procedures while the system has positive power. -
Page 23: Logging In To The Hmi
Q-Drive Installation, Operation, and Maintenance Manual Logging In to the HMI 1. Tap Please Login. The Login window displays: 2. Tap User Name. A popup keyboard displays so that you can enter the user name. 3. Tap the Password button and enter each character in the password. 4. - Page 24 Q-Drive Installation, Operation, and Maintenance Manual Supervisor Parameters screen 3. Tap one of the modes of operation. The Compressor mode is for continuous operation. 4. For all modes, set the Target Gas Outlet Pressure. Tap Target Output Pressure to display the numeric keypad.
-
Page 25: Running The Leak Test
Q-Drive Installation, Operation, and Maintenance Manual Running the Leak Test It’s highly recommended to the user to perform the leak test when operating the system, especially each time the system is turned on. 1. When the system is running, tap Settings and Operator Parameters. 2. - Page 26 Q-Drive Installation, Operation, and Maintenance Manual 9. Tap Press to Purge. The inlet valve remains open and the outlet valve changes to vent. The purging process will not begin until inlet pressure is less than 200 psi (13.8 bar). 10. Go to the open panel and open the needle valve slowly. The purging Media will enter the inlet valve, flow through the gas sections, exit out of Gas Outlet vent.
-
Page 27: Monitor The System
Q-Drive Installation, Operation, and Maintenance Manual Monitor the System It is possible to monitor the system from either the Home screen or the Operator Parameters screen. Both screens have the same information, but the Home screen is a visual representation of the current state of the system. -
Page 28: Monitoring The Gas Temperature
Q-Drive Installation, Operation, and Maintenance Manual Monitoring the Gas Temperature Comparison of Home Screen and Supervisor Parameters Screen for Gas Temperature Monitoring the Coolant Temperature If the coolant temperature increases, it means the coolant cannot dissipate the heat from the gas and is becoming insufficient to continue cooling. -
Page 29: About Alarms
Q-Drive Installation, Operation, and Maintenance Manual About Alarms In most cases, an alarm stops or pauses the pump. The alarm banner pops up on any screen.The following is an example of an alarm. Alarm example 1. To see all current alarms, tap the Alarm icon to display the Active Alarm screen. - Page 30 Q-Drive Installation, Operation, and Maintenance Manual 2. See “Troubleshooting” to remove the alarm condition. When your changes cause the value to return to an acceptable value, the pump restarts. 3. All alarms are logged when they occur and when they are acknowledged. Tap Alarm History to see all alarms.
-
Page 31: Troubleshooting
Q-Drive Installation, Operation, and Maintenance Manual Troubleshooting For actions, see “Inspection and Preventive Maintenance” and “About Service and Repair.” Problem Possible Cause Action Oil leak at shaft. A seal on the rod is worn. Replace the rod seal. A seal is extruding into the inlet Oil leak at inlets. -
Page 32: Inspection And Preventive Maintenance
Q-Drive Installation, Operation, and Maintenance Manual Inspection and Preventive Maintenance WARNING: Use a lockout procedure for power and start controls. CAUTION: Qualified electrical personnel must perform installation and maintenance. Before opening the electrical control cabinets, turn off and lock out the main isolating switch. -
Page 33: Checking Oil
Q-Drive Installation, Operation, and Maintenance Manual 2. Attach a flow meter to the Blow By port at the rear of the system. See “Attaching Air, Gas, and Coolant Lines.” 3. If the meter detects flow above 700 SCCM (cm³/min), plan to replace the piston seal set. 4. -
Page 34: Performing A Visual Inspection
Performing a Visual Inspection Inspect the Barrel for scratches and changes in the polish. Burnishing discoloration is normal. For scratches deeper than fingernail depth, plan to replace the Barrel. Consult a Haskel representative for instructions. Note: If the actuator requires service, you must return it to the factory. A replacement actuator is used while the original actuator is repaired. - Page 35 Q-Drive Installation, Operation, and Maintenance Manual 4. On edge with NO LIP, install gas compression seal with the spring facing outward. It should be flush upon final installation. 5. Turn over the Adapter Piece Insert and find the edge with a lip. Install the Wiper Seal with the steps facing outward.
- Page 36 Q-Drive Installation, Operation, and Maintenance Manual 7. Coat O-Rings in versa lube and install on adapter piece insert. Then you may install Adapter Piece Insert into Adapter plate with gas compression seal facing upward 8. Use hammer and tool to install the Adapter Piece Insert so it is flush with internal surface (shown below).
- Page 37 Q-Drive Installation, Operation, and Maintenance Manual 10. Use pliers to hold hardware (screw and lock washer) and place a small amount of Loctite on end of screw. Places screws into internal holes and install them down with Allen key. 11. Place O-ring on shaft and install adapter plate onto shaft and press toward drive section of unit. 12.
- Page 38 Q-Drive Installation, Operation, and Maintenance Manual 13. Obtain 12 bolts and lock washer and assemble as above. Place anti-seize on the end of the bolt. Install all screws into adapter plate and hand tighten. 32 of 59...
- Page 39 Q-Drive Installation, Operation, and Maintenance Manual 14. Insert screw from under panel so that end is visible on top side of panel. Turn screw into bolt until it is supporting adapter piece as shown below. NOTE: One bolt will be shorter than the other due to heat exchanger interference Reference Image (Prototype Unit) 15.
-
Page 40: Reassembling The Gas Section
Q-Drive Installation, Operation, and Maintenance Manual 17. Use versa lube to coat O-ring and install on adapter plate. Reassembling the Gas Section 1. Replace the O-ring for the End Cap. Apply a thin layer of Krytox 240AZ lubricant. 2. Push Barrel against the Adapter Piece and hold in place. 3. -
Page 41: Checklist For Inspection And Preventative Maintenance
9. Check all the flow directions on the check valves to identify the Inlet and Outlet Check Valves. 10. Check all connections to prepare to start. Checklist for Inspection and Preventative Maintenance Haskel Q Drive Safety Inspection and Preventative Maintenance Serial Number:... -
Page 42: About Service And Repair
Q-Drive Installation, Operation, and Maintenance Manual About Service and Repair Select Settings and then Service to display the parameters and values for the system. The screen shows the time since the last service. Each Pressure Transducer (PT) and Thermocouple (TC) is identified by its serial number for calibration traciblity. -
Page 43: Ordering Replacement Parts
Q-Drive Installation, Operation, and Maintenance Manual When you exceed these limits, an alarm reminds you. The alarms create a maintenance record. Maintain the system to maintain the warranty. Replace parts according to the following schedule. Replacing Part Frequency Tie Rods Every 3 years. -
Page 44: Replacement Procedures
Q-Drive Installation, Operation, and Maintenance Manual Replacement Procedures WARNING: Use a lockout procedure for power and start controls. CAUTION: Only trained and authorized personnel can service the machine. Before servicing, follow your site’s approved lock-out procedures. CAUTION: Never change or defeat the function of electrical interlocks or other machine shutdown switches. - Page 45 Q-Drive Installation, Operation, and Maintenance Manual 3. Remove the End Cap Insert, Seal Housing, and Guide Bush. Use proper Wrench to remove the Seal Housing. 4. Remove the plunger retainer plate by removing the 8/off M5x16 SHCS fasteners. 5. Re-assemble the plunger retainer and Drive Rod using 8/off M5x16 SHCS Black. Use Loctite 7471 activator and Loctite 243 thread locker on each fastener Open the inlet valve: DO NOT DROP ANYTHING (SCREWS OR FOD) IN THE ACTUATOR! Torque each M5 screw to 9.5Nm or 7ft•lbs and paint mark, and insert BS154 O-ring to the End Cap Insert using FML-2.
-
Page 46: Replacing The Piston Seals
3. Inspect the Inspect the barrel for scratches and changes in the polish. Burnishing discoloration is normal. For scratches deeper than fingernail depth, plan to replace the barrel. Consult a Haskel representative for instructions. 4. Remove the snap ring from the piston body. -
Page 47: Replacing Oil Filter And Oil
Q-Drive Installation, Operation, and Maintenance Manual 12. Go to the Service page and tap Reset Count to restart the count at zero. Replacing Oil Filter and Oil The lubricating oil capacity is 30 litres (8 gallons). Replacement lubricating oil: 20 litres (5.2 gallons), Syn-Gear EP150. - Page 48 Q-Drive Installation, Operation, and Maintenance Manual 6. Open the drain valve. 7. Wait at least 15-30 minutes for the oil to drain. 8. Remove each oil filter using a strap wrench. The filter thread is a standard right-hand thread. If you must remove the oil filters while there is still oil in the pump, turn all valves to the off position.
-
Page 49: Installing New Oil Filters
Q-Drive Installation, Operation, and Maintenance Manual Installing New Oil Filters Oil Pump Oil Pump Nozzle Oil Circulation (Reference Image from Q-Drive’s Prototype) 1. Pour some oil directly into the new filter. 2. Spread a small amount of oil on the face of the rubber seals. 3. -
Page 50: Draining Oil From Actuator
Q-Drive Installation, Operation, and Maintenance Manual Draining Oil from Actuator 1. In order to drain oil, remove ¾” BSP plug from the Oil Pump and attach a hose. 2. Place ball valves shown below in the required open or closed position 3. -
Page 51: Adding New Oil
Q-Drive Installation, Operation, and Maintenance Manual Adding New Oil 3. From empty, the actuator holds approx. 33L of oil. 4. Remove the ¾” BSP plug from the oil pump and attach a hose. 5. Run hose to container full of oil. The oil pump will be used to help fill actuator with oil. 6. -
Page 52: Re-Assembling Drive Rod Assembly
Q-Drive Installation, Operation, and Maintenance Manual 7. Loosen the Breather Plug and start hand pumping the oil. Keep observing the sight through glasses which you can view the oil level on Actuator. 8. There system will hold approx. 33L of oil. When the system is full of oil there will be an uninterrupted flow of oil. - Page 53 Q-Drive Installation, Operation, and Maintenance Manual 8. Assemble the test and transport plate to seat seal housing. Assemble using 6/off M12x1.25x35 SHCS. 9. Remove the End Cap Insert, Seal Housing, and Guide Bush. Use proper Wrench to remove the Seal Housing. 10.
-
Page 54: Replacing The Tie Rods
Q-Drive Installation, Operation, and Maintenance Manual and paint mark, and insert BS154 O-ring to the End Cap Insert using FML-2. 12. Assemble the clamps with 3/off M6x12 SHCS Black. Use Loctite 7471 and 243. Torque each M6 to 16Nm. Paint mark SHCS after tightening. Replacing the Tie Rods Tools: ... -
Page 55: Replacing Check Valves
Q-Drive Installation, Operation, and Maintenance Manual 6. After you replace the last tie rod, tighten each nut by hand. 7. Using the tightening sequence, torque each nut on the end cap side. 8. Check the torque on the drive side; 200 ft-lbs (271 Nm). Replacing Check Valves To replace a check valve, replace the entire check valve assembly. -
Page 56: Replacing Cooling Jacket
5. Remove the End Caps. Use a rubber mallet if necessary. 6. Inspect the barrel for scratches and changes in the polish. Burnishing discoloration is normal. For scratches deeper than fingernail depth, plan to replace the barrel. Consult a Haskel representative for instructions. -
Page 57: Points Of Connections
Q-Drive Installation, Operation, and Maintenance Manual Points of Connections 51 of 59... - Page 58 Q-Drive Installation, Operation, and Maintenance Manual 52 of 59...
- Page 59 Q-Drive Installation, Operation, and Maintenance Manual 53 of 59...
- Page 60 Q-Drive Installation, Operation, and Maintenance Manual 54 of 59...
- Page 61 Q-Drive Installation, Operation, and Maintenance Manual 55 of 59...
- Page 62 Q-Drive Installation, Operation, and Maintenance Manual 56 of 59...
-
Page 63: List Of Alarms
Q-Drive Installation, Operation, and Maintenance Manual List of Alarms Errors Errors AlarmCode Actuator Parking Failed - Actuator Off 50001 Actuator Parking Failed - Timeout 50002 Actuator Parking Error - Actuator off while holding 50003 Serial link PLC to ESPCM is down 50004 Actuator has reported an error state 50005... -
Page 64: Warnings
Q-Drive Installation, Operation, and Maintenance Manual Errors AlarmCode Timeout actuator still running on shutdown 50076 Actuator stopped while running unexpectedly 50077 Actuator aborted startup sequence 50081 Low Air Pressure Error 50082 High Air Pressure Error 50084 Internal error in output pressure controller 50085 Oil leak proximity sensor Cylinder 1 50086... -
Page 65: Information Message
Q-Drive Installation, Operation, and Maintenance Manual Warnings Alarm Code Force Limit Cylinder 1 Warning 50073 Force Limit Cylinder 2 Warning 50074 High Air Pressure Warning 50083 Seal change counter warning 50089 Information Message Information Alarm Code Low Pressure Speed Limits Disabled 50010 Variant change triggered 50028... - Page 66 Haskel International, LLC 100 East Graham Place Burbank CA 91502 Telephone: 818-843-4000 www.haskel.com...
Need help?
Do you have a question about the Q-Drive QGD Series and is the answer not in the manual?
Questions and answers