
Related Manuals for Spirit Johnny G


Summary of Contents for Spirit Johnny G
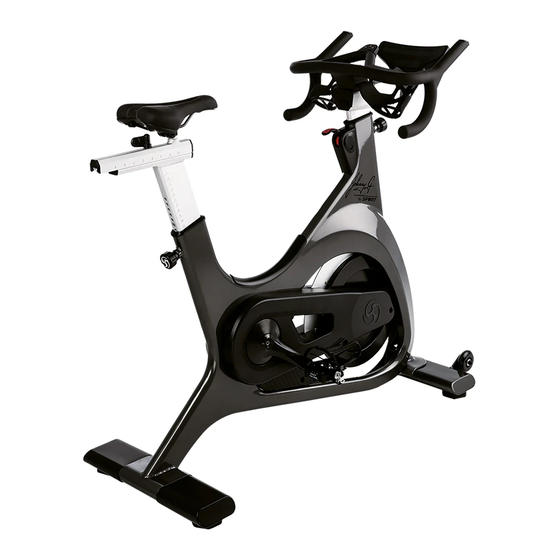
- Page 1 Owner’s Manual Model No. 16207879500 Johnny G - Assembly - Operation - Adjustments - Parts - Warranty CAUTION: Read and understand this manual before operating unit Retain For Future Reference...
-
Page 2: Table Of Contents
TABLE OF CONTENTS Product Registration ......................3 Safety Precautions ......................5 Important Safety Instructions ................... 6 Important Operation Instructions ..................7 Assembly & Setup ......................9 Instructions & Adjustments .................... 16 Training Information……………………………………………………………………………19 Programs ........................23 Maintenance Mode ......................29 Exploded Diagram ...................... -
Page 3: Product Registration
CONGRATULATIONS ON YOUR NEW BIKE AND WELCOME TO THE SPIRIT FAMILY! Thank you for your purchase of this quality stationary bike trainer from Dyaco Canada Inc. Your new bike was manufactured by one of the leading fitness manufacturers in the world and is backed by one of the most comprehensive warranties available. - Page 4 If you have any questions or problems with the parts included with your Johnny G bike, please do not return the product. Contact us FIRST! If a part is missing or defective call us toll free at 1-888-707-1880.
-
Page 5: Safety Precautions
SAFETY PRECAUTIONS IMPORTANT SAFETY INFORMATION READ ALL INSTRUCTIONS BEFORE USING THIS BIKE CAUTION: Before starting any exercise program, it is recommended that you consult your physician. Thank you for purchasing our product. Even though we go to great efforts to ensure the quality of each product we produce, occasional errors and/or omissions do occur. -
Page 6: Important Safety Instructions
The following fitness safeguards and operating precautions are directed to purchasers and users of the Johnny G Spirit Bike. Club Managers should ensure that members and fitness staff are trained to follow these same instructions. Failure to follow these safeguards may result in injury or serious health risk. -
Page 7: Important Operation Instructions
IMPORTANT OPERATION INSTRUCTIONS NEVER operate this bike without reading and completely understanding the results of any operational change you request from the computer. Understand that changes in resistance do not occur immediately. Set your desired resistance on the computer console and release the adjustment key. The computer will obey the command gradually. - Page 8 Warning Labels and Communication Stickers The following pages show examples of Johnny G Spirit Bike warning labels and communication stickers placed on the equipment as part of the manufacturing process. It is critical that owners maintain the integrity and placement of these stickers. If you find any stickers missing or damaged contact your local dealer or distributor for a replacement.
-
Page 9: Assembly & Setup
Rubber Mallet, which is recommended when assembling the pedals onto the bike. CAUTION: Damage to the bike during assembly is not covered as part of the limited Spirit Fitness warranty. Take care not to drop or lean the bike on its side. Carefully stand the bike up in the normal upright position on a stable surface so it will not tip over during assembly. - Page 10 HARDWARE FOR STEP 1 PART TYPE DESCRIPTION Short Hex Head Bolt M12×1.25×20L Long Hex Head Bolt M10×P1.5×55L Flat Washer Ø12.7 × Ø26 × 2T Flat Washer Ø10×Ø25×1.5T Pedals Set Pedals L/R STEP 1: ASSEMBLY OF STABILIZERS AND PEDALS 1. Assemble FRONT STABILIZER (2) to MAIN FRAME (1) using THREE HEX BOLTS (165) and three WASHERS (166) with19MM WRENCH (167).
- Page 11 STEP 2: HANDLEBARS 1. Run COMPUTER CABLE (90) thru opening at bottom of HANDLEBARS (4) and out of the front. 2. Slide HANDLEBAR ASSEMBLY (4) onto HANDLEBAR POST (8). While assembling, simultaneously pull COMPUTER CABLE (90) out of front to prevent wire from being jammed.
- Page 12 HARDWARE FOR STEP 3 PART TYPE DESCRIPTION Handlebar End Cap Socket Head Cap Bolt M3xP0.5x10L Handlebar Anchor 1. Install HANDLEBAR END CAP (73) onto end of HANDLEBAR POST (8) and secure with SOCKET HEAD CAP BOLT (144) using 2.5 MM ALLEN WRENCH (159). 2.
- Page 13 HARDWARE FOR STEP 3 PART TYPE DESCRIPTION Shaft Adjusting Lever Button Head Socket Bolt M6 × 10L Flat Washer Ø1/4" × 13 × 1.0T Sealing Cap STEP 3: HANDLEBARS LOCK 1. Slide handlebars assembly so that HANDLEBAR ANCHOR (51) is visible thru hole on ALUMINUM SLIDE RAIL (9).
- Page 14 HARDWARE FOR STEP 4 PART TYPE DESCRIPTION Flat Heat Countersunk Bolt M6×P1.0×10L STEP 4: CONSOLE 1. Connect MAIN WIRE (A & B) and CONTROL WIRE (C & D) to CONSOLE (33). 2. 2. Attach CONSOLE (33) to ALUMINUM SLIDE RAIL (4) secure using 2 FLAT HEAD COUNTERSUNK BOLTS (148) using 4MM ALLEN WRENCH (155).
- Page 15 esting Use this checklist to perform the bike test procedure. Recheck all the bolts and make sure they are all tightened to the proper torque specification (if indicated) and no parts are missing. Test the seat post to make sure it move freely and you are able to lock in at different positions.
-
Page 16: Instructions & Adjustments
Instructions & Adjustments Your Johnny G Spirit Bike will be an exhilarating indoor cycling experience. The bike allows the user full control over the magnetic resistance by simply pressing on the + and – Keys, located at two locations; either the Forward Control Pad or the Handlebars Shifters. - Page 17 Position the handlebar at the same height as your seat, or higher if you feel any discomfort in your back. The Johnny G Spirit Bike allows for adjustment of handlebar height. Additionally, the bike allows for fore and aft adjustment of the handlebar.
- Page 18 Resistance Control The bike allows the user full control over the magnetic resistance by simply pressing on the + and – Keys, located at two locations; either the Forward Control Pad or the Handlebars Shifters. Providing two resistance adjustment locations was purposely throughout for the rider’s convenience.
-
Page 19: Training Information
RAINING NFORMATION This section will provide very basic information regarding the structure of an indoor cycling workout. IMPORTANT: User should be aware of the features, functions and proper operation of the bike before using the bike for the first time. If unsure how to properly use the bikes RPM capabilities and resistance system adjustments, seek help from a qualified indoor cycling instructor or take a class at your local indoor cycling facility as they will teach you how to ride properly and safely. - Page 20 The Ride Of Truth The WARM UP MODE is the most basic function of the Johnny G Spirit Bike. Riders can use this mode to prepare themselves for a class or when just pedaling to warm up for other activities. This mode is the first function that occurs when the console awakens from sleep mode.
- Page 21 Heart Rate If user is wearing a heart rate strap, display will show HEART RATE DEVICE FOUND. PAIR YES will flash. Press + or – KEY to toggle between PAIR YES and PAIR NO. If PAIR YES, press PLAY KEY The number of sensors displays ...
- Page 22 Manual Mode The Manual Mode is another basic function of the Johnny G Spirit Bike. Riders can use this mode for a complete workout or to prepare themselves for other activities. The only differences between this mode and the Warm Up Mode is that the rider will have a WORKOUT SUMMARY for their effort At any time during WARM UP Mode, press PLAY KEY to enter MANUAL Mode.
-
Page 23: Programs
rograms To enter PROGRAMS Mode during a ride, RESET CONSOLE then press and hold the PLAY KEY for 3 seconds. PROGRAMS Mode offers following program functions: PAIR HR DEVICE HR ZONE POWER ZONE LAP PROGRAM EXIT ... - Page 24 Maintenance Mode – User Options Follow these instructions to enter MAINTENACE MODE and ENABLE Programs Permanently. It is not required that they be ENABLED and can be activated when entering the PROGRAMS Mode at the time of ride. Simultaneously press and hold + KEY, - KEY and PLAY KEY on Forward Control Pad for 3 seconds.
- Page 25 eart evice NOTE: HR ZONE program requires connection of a Heart Rate Strap prior to using the program. NOTE: Connecting console to a Heart Rate Strap can be accomplished prior to entering PROGRAMS Mode during an initial warm-up or after entering PROGRAMS Mode. If user puts on a HR strap after initially beginning PROGRAM Mode and needs to pair device with console.
- Page 26 HR Z rogram HR ZONE PROGRAM estimates your Maximum HR (MHR) when riders’ age is entered. The program will track the time spent within the 5 heart rate zones; less than 59% MHR to greater than 91% MHR. The console includes an LED light that will provide a visual guide to the riders’...
- Page 27 ower rogram POWER ZONE PROGRAM takes a riders Functional Threshold Power or FTP in watts and track their performance across 5 training zones; less than 55% FTP to greater than 106% FTP. The console includes an LED light that will provide a visual guide to the riders’...
- Page 28 FTP TEST NOTE: A thorough Warm-Up is important for a successful and accurate FTP test. Use consoles WARM UP MODE for a minimum 5 minutes of steady pedaling and intervals prior to starting FTP test. If user needs to establish their FTP, console can administer FTP test. During set-up process.
-
Page 29: Maintenance Mode
aintenance MAINTENANCE MODE CONTAINS SENSITIVE SETTINGS FOR YOUR BIKES CONSOLE. BECOMING FAMILIAR WITH THE MAINTENACE MODE INFORMATION LISTED IN THIS SECTION IS IMPORTANT FOR YOUR BIKES PROPER OPERATION. IT IS NECESSARY THAT THE CONSOLE BE POWERED IN ORDER TO ACCESS MAINTENANCE MODE. PEDALING ABOVE 30 RPM IS ALL THAT IS NEEDED TO ILLUMINATE CONSOLE. - Page 30 rogram LAP PROGRAM allows riders to perform repeated measures of Time and Distance efforts. The program will compare your current LAP with your previous LAP. Rider may perform as many LAPS as desired, but only the last 5 LAPS will display in the WORKOUT RESULTS.
- Page 31 NEXT LAP If PLAY KEY is pressed again, the cycle described above will repeat. THIS.LAP displays on lower section of console, replacing display of Watts and Heart Rate. The Time display will reset to 0.00. The Distance display will reset to 0.00. After 5 seconds, LAST.LAP appears, flashing 3 times.
- Page 32 SPEED Peak in MPH HR AVG HR PEAK RPM AVG RPM PEAK NOTE: If the LAP, HR ZONE or POWER ZONE features are enabled they will also be shown in the Workout Summary. See those programs for instructions on use. NOTE: LAP, HR ZONE or POWER ZONE results display after summary data listed above.
- Page 33 aintenance ettings KEY TEST Purpose of this setting is to ensure that each of the buttons are signaling properly. Press PLAY KEY to enter setting. Press PLAY KEY and follow console direction PRESS ALL KEYS. There are 5 buttons that control the bike: ...
- Page 34 BRAKE TEST BRAKE TEST CONTROLS A SENSITIVE SETTING FOR YOUR BIKES FUNCTIONALITY. PROPER TRAINING IS REQUIRED FOR THIS SETTING. Purpose of this setting is to test the magnetic resistance system. Press PLAY KEY to enter BRAKE TEST. MOTOR TEST AUTO is displayed. ...
- Page 35 UPDATE SOFTWARE NOTE: Updating Software requires a Blank USB memory stick and a computer to transfer updates from service website, to USB, to console. NO other material besides the updates should be in USB drive. Purpose of this setting is to Update Console Software with the use of a USB inserted into console.
- Page 36 USER OPTIONS Purpose of this setting is ENABLE or Turn ON programs that are defaulted to DISABLE or OFF. Programs are defaulted to DISABLED or OFF to simplify console use and allow facilities to control program use. Press PLAY KEY to enter USER OPTIONS ...
- Page 37 unctional ower hreshold Power/Watts – What is it? It has been said that from a coaching perspective the Watt is the measurement of truth: why is this? Because you either can perform at a set wattage at a given time or you can’t, the response is instant. For the coach and athlete this is very useful as it provides unequivocal feedback of what has been performed in terms of intensity, duration and total workload.
- Page 38 Power Training Levels - Basis for the System/Number of Levels The industry standard has been set at 5 levels as that was felt to be the optimum number needed to represent the range of physiological responses and to describe the different types of training required/used to meet the demands of fitness based cycling.
- Page 39 Working on this product will require basic and/or sometimes specialty tools based on the type of service that will be performed at any time. To assist, Spirit Fitness recommends having the tools listed (Fig. 1) available when performing maintenance. Tool...
- Page 40 The life of your product will be determined by how consistently you perform the daily maintenance procedures. Dry the Johnny G bike after each use to remove sweat and moisture. It is best to use a liquid non-abrasive cleaner diluted with water.
- Page 41 Monthly Maintenance The monthly maintenance check should be a comprehensive inspection of the overall frame and main assembly components of the Johnny G Spirit Bike in addition to the Weekly Maintenance. Inspection and Adjustment Inspect the frame and main assembly components for rust or corrosion. Tilt the bike to locate areas where rust and corrosion may develop.
-
Page 42: Exploded Diagram
Exploded Diagram Customer service 1-888-707-1880 Dyaco Canada Inc 2018 Email: customerservice@dyaco.ca... -
Page 43: Parts List
Parts List DESCRIPTION Q'TY 8795001 Main Frame 8795002 Front Stabilizer 8795003 Rear Stabilizer 8795004 Handlebar 8795005 Front Stabilizer Connecting Assembly 8795006 Seat Front Read Adjusting 8795007 Seat Inner Slide 8795008 Handlebar Post 8795009 Aluminum Slide Rail 8795010 Idler Wheel Assembly 8795011 Crank Axle 8795012... - Page 44 DESCRIPTION Q’TY 8795049 Flywheel Axle 8795050 Switch Beverage Holder 8795051 Handlebar Anchor 8795052 Rear Anchor 8795054 Pedal (L,R) 8795055 Ø10 × 3T_Braking Magnet 8795056 Belt 8795057 Generator/Brake Controller 8795058 Adjusting Axle 8795059 Seat Axle 8795060 Seat 8795062 Resistance Adjustment Pin Holder 8795063 Steel Cable 8795064...
- Page 45 DESCRIPTION Q'TY 8795096 600m/m_Connecting Wire 8795099 Foot Rail 87950100 Chain Cover (L) 87950101 Chain Cover (R) 87950103 6004_Bearing 87950104 6005_Bearing 87950105 M12 × P1.0 × 14L_Axle Button Head Socket Bolt 87950106 6800_Bearing 87950107 Ø6 × 25L × M5 × P0.8_Bolt 87950108 M4 ×...
- Page 46 DESCRIPTION Q'TY 87950148 M6 × P1.0 × 10L_Flat Head Countersink Bolt 87950149 M6 × 10L_Button Head Socket Bolt 87950152 Plastic discs 87950153 Ø20 × Ø30 × 0.5T_Flat Washer 87950154 M5 × 6L_Phillips Head Screw 87950155 M4_L Allen Wrench 87950157 17m/m_Single Open End Wrench 87950158 13/15m/m_Wrench 87950159...
-
Page 47: Training Guidelines
TRAINING GUIDELINES EXERCISE Exercise is one of the most important factors in the overall health of an individual. Listed among its benefits are: Increased capacity for physical work (strength endurance) Increased cardiovascular (heart and arteries/veins) and respiratory efficiency ... - Page 48 Progression As your become fitter, a higher intensity of exercise is required to create an overload and therefore provide continued improvement Overload This is where you exercise at a level above that which can be carried out comfortably. The intensity, duration and frequency of exercise should be above the training threshold and should be gradually increased as the body adapts to the increasing demands.
- Page 49 Target heart Rate 10 Second Count Beats per Minute 132 126 120 Pulse Count The pulse count (on your wrist or carotid artery in the neck, taken with two index fingers) is done for ten seconds, taken a few seconds after you stop exercising. This is for two reasons: (a) 10 seconds is long enough for accuracy, (b) the pulse count is to approximate your BPM rate at the time you are exercising.
- Page 50 ENDURANCE CIRCUIT TRAINING Cardiovascular endurance, muscle, strength, flexibility and coordination are all necessary for maximum fitness. The principle behind circuit training is to give a person all the essentials at one time by going through your exercise program moving as fast as possible between each exercise.
-
Page 51: Stretching
STRETCHING Stretching should be included in both your warm up and cool down and should be performed after 3-5 minutes of low intensity aerobic activity or callisthenic type exercise. Movements should be performed slowly and smoothly, with no bouncing or jerking. Move into the stretch until slight tension, not pain, is felt in the muscle and hold for 20-30 seconds. - Page 52 TOUCHES INNER THIGH STRETCH Slowly bend forward from your waist, Sit with the soles of your feet together letting your back and shoulders relax as with your knees pointing outward. Pull you stretch toward your toes. Reach your feet as close into your groin as down as far as you can and hold for 15 possible.
-
Page 53: Manufacturer's Limited Warranty
MANUFACTURER’S LIMITED WARRANTY Dyaco Canada Inc. warrants all its bike parts for a period of time listed below, from the date of retail sale, as determined by a sales receipt. Dyaco Canada Inc.’s responsibilities include providing new or remanufactured parts, at Dyaco Canada Inc.’s option, and technical support to our independent dealers and servicing organizations. - Page 54 Please visit us online for information about our other brands and products manufactured and distributed by Dyaco Canada Inc. www.dyaco.ca www.dyaco.ca www.dyaco.ca www.dyaco.ca www.spiritfitnesscanada.ca www.spiritfitnesscanada.ca www.dyaco.ca www.dyaco.ca www.solefitness.ca www.trainorsports.ca www.dyaco.ca www.dyaco.ca www.xterrafitness.ca www.dyaco.ca Customer service 1-888-707-1880 Dyaco Canada Inc 2018 Email: customerservice@dyaco.ca...
Need help?
Do you have a question about the Johnny G and is the answer not in the manual?
Questions and answers