Table of Contents
Advertisement
Quick Links
Advertisement
Table of Contents

Subscribe to Our Youtube Channel
Related Manuals for Spirit JOHNNY G SPIRIT BIKE


Summary of Contents for Spirit JOHNNY G SPIRIT BIKE
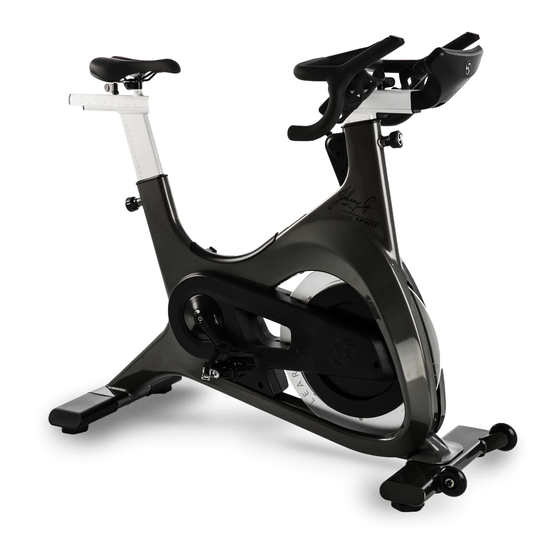
- Page 1 JOHNNY G SPIRIT BIKE OWNER’S MANUAL...
- Page 2 Johnny G by Spirit...
-
Page 3: Testing The Bike
IMPORTANT SAFETY INSTRUCTIONS WARNING LABELS AND COMMUNICATION STICKERS SAFEGUARDS REGISTER YOUR PURCHASE ASSEMBLY INSTRUCTIONS TESTING THE BIKE INSTRUCTIONS TRAINING INFORMATION CONSOLE OPERATION PROGRAMS PAIR HEART RATE DEVICE MAINTENANCE MODE GENERAL MAINTENANCE CUSTOMER SUPPORT Thank you for purchasing our product, please save these instructions. Please do not perform or attempt any customizing, adjustments, repair or maintenance that is not described in this manual. - Page 4 Congratulations on your new Johnny G Spirit Bike and welcome to the Spirit Fitness family! Thank you for your purchase of this quality Johnny G Spirit bike from Spirit Fitness. Your new bike was manufactured by one of the leading fitness manufacturers in the world and is backed by one of the most comprehensive warranties available. Through your dealer, Spirit Fitness will do all we can to make your ownership experience as pleasant as possible for many years to come.
-
Page 5: User Safety Precautions
(in the order shown): WARNING: • English, Dutch, French, German, Italian, Portuguese, Spanish, • Your Johnny G Spirit Bike is designed for aerobic exercise in a Swedish, Chinese, Japanese commercial or consumer environment. • Please check with your physician prior to beginning any exercise program. - Page 6 VOORZORGSMAATREGELEN WAARSCHUWING: Deze veiligheidsaantekeningen zijn aan u gericht als • Uw Johnny G Spirit Bike is ontworpen voor aërobische oefeningen in een commerciële of gebruiker-somgeving. eigenaar van de Johnny G Spirit Bike. Gelieve uw gebruikers en uw per- soneel voor conditietraining volledig •...
- Page 7 PRÉCAUTIONS AVERTISSEMENT: Ces consignes de sécurités s’adressent aux propriétaires du • Le Johnny G Spirit Bike est conçu pour l’exercice aérobique Johnny G Spirit Bike. Veuillez instruire tous vos utilisateurs dans un environnement commercial ou privé. et instructeurs à suivre ces consignes. À FAIRE: •...
- Page 8 Ihre. Benutzer und Ihr Fitness-Personal in der Beachtung dieser Sicherheitsvorschrifte. GEBOTE: ACHTUNG: • Legen Sie jedem Ihrer Benutzer nahe, sein Gesundheits- oder • Der Johnny G Spirit Bike ist für aerobische Übungen in einer Fitnessprogramm mit einem medi- zinischen Fachmann zu kommerziellen oder Verbraucherumgebung vorgesehen. besprechen.
-
Page 9: Da Non Fare
PRECAUZIONI AVVERTENZE: Queste note precauzionali sono dirette a voi, come • Lo Johnny G Spirit Bike è stato realizzato per esercizi di aerobica in un ambiente pubblico o privato adeguato. proprietario dello Johnny G Spirit Bike. Siete pregati di istruire i vostri uten- ti e il vostro personale all’osservanza •... - Page 10 PRECAUÇÕES ADVERTÊNCIA: Estas notas de segurança destinam-se a você, • Seu Johnny G Spirit Bike foi projetado para exercícios aeróbicos em um ambiente comercial ou próprio do proprietário do bike Johnny G Spirit Bike. Treine todos os consumidor. usuários e o pessoal da academia para que sigam estas •...
- Page 11 ADVERTENCIA: Estas notas de seguridad están dirigidas a usted como el • Su Johnny G Spirit Bike está diseñado para el ejercicio aerobic en un ambiente commercial o de consume. dueño de Johnny G Spirit Bike. Por favor instruya a todos sus usuar- ios y personal de entrenamiento para que sigan •...
- Page 12 FÖRSIKTIGHETSÅTGÄRDER VARNINGAR: Dessa säkerhetsanmärkningar är riktade till dig i • Din Johnny G Spirit Bike är avsedd för aerobisk träning i kommersiella eller konsumentinriktade miljöer. egenskap av ägare av Johnny G Spirit Bike manufactured by Spirit Fitness alla användare och all personal att följa •...
- Page 13 注意事項 注意事項 警告: 下述安全說明適用於您所擁有的 JOHNNY G • 您所擁有的Johnny G Spirit Bike室內健身車,專為商 SPIRIT BIKE室內健身車。請培訓所有使用者與健 業或消費環境中的有氧運動而設計。 身人員遵守下述安全說明。 遵守事項: • 在開始任何鍛煉計劃之前,請諮詢您的醫生。 • 鼓勵您的每個使用者在使用此健身車前,與專業的 • 請勿讓自己運動過量。 如果你感到昏厥,頭暈或疲 醫療保健專業人員討論他們的健康計劃或健身方 憊,請停止使用。 使用此健身車時要運用一般常 案。 識。 • 如果您感到頭暈或虛弱,請停止使用此健身車。 • 在使用此健身車之前,請完整閱讀使用者手冊。 • 請定期進行預防性維護。 • 不遵守上述警告可能導致人身傷害或死亡。 • 請緩慢且循序漸進使用此健身車,直至達到舒適程 度。 禁止事項: •...
- Page 14 • フライホイールの開口部やその付近に物、手、 足、指等を落としたり、入れたり、触れたりしな これらの安全に関する注意事項は、JOHNNY G いようにしてください。 SPIRIT BIKEのオーナーとしてお客様に向け示さ • カバーや覆いを取り外したり、このエクササイズ れています。これらの安全に関する指示や注意 バイクを改造しないでください。 事項に従うように、すべてのユーザーやフィッ トネススタッフをトレーニングしてください。 DO(行ってください): 警告: • 各ユーザーが各自の健康プログラムやフィットネ • このJohnny G Spirit Bike社によって製造された、業 スプログラムについて、必ず医療従事者や専門家 務使用目的または個人使用目的の有酸素運動用に と相談する事を強く奨励します。 設計されたエクササイズバイクです。 • 使用前、使用中にめまいや気分が悪いと感じた場 • エクササイズプログラムを始める前に必ず医師に 合は、直ちにバイクの使用をやめてエクササイズ ユーザー自身の健康状態を相談してください。 を中止してください。 • 自分自身のレベルを超えた過度なエクササイズは • エクササイズバイクの定期的な予防メンテナンス 避けてください。わずかでも、体調不良やめまい を行ってください。...
- Page 15 • Stay hydrated. Drink water throughout your ride as needed. Johnny G Spirit Bike. Club Managers should ensure that • Stay in control by executing all movements at a slow pace members and fitness staff are trained to follow these before attempting to increase your speed.
- Page 16 EXERCISE WARNING DECAL The following pages show examples of Johnny G Spirit Bike warning labels and communication stickers placed on the equipment as part of the manufacturing process. It is critical that owners maintain CALIFORNIA PROP 65 WARNING DECAL the integrity and placement of these (For US model only) stickers.
-
Page 17: Record Your Serial Number
WARNING This product can expose you to chemicals including Toluene and Acrylamide which are known to the State of California to cause Cancer and birth defects or other reproductive harm. For more information, go to www.P65Warnings.ca.gov RECORD YOUR SERIAL NUMBER Please record the serial number of this fitness product in the space provided below (serial number is located on the center floor tube behind the crank.) Serial Number:... -
Page 18: Pre-Assembly
NOTE: Use the large foam packaging to prop the bike frame off of the ground to allow assembly of the front, then rear stabilizers. CAUTION: Damage to the bike during assembly is not covered as part of the limited Spirit Fitness warranty. Take care not to drop or lean the bike on its side. -
Page 19: Tools Needed
NOTE: Use the large foam packaging to prop the bike frame off of the ground to allow assembly of the front, then rear stabilizers. ALWAYS have assistance when lifting main frame. An assembly video is available to show the steps for assembly of the Johnny G Spirit bike. Follow the link below: http://dyaco.com/JG_Assembly... - Page 20 JOHNNY G SPIRIT BIKE STEP ONE HARDWARE FOR STEP 1 PART TYPE DESCRIPTION SHORT HEX HEAD BOLT M12 x P1.25 x 20L LONG HEX HEAD BOLT M10 × P1.5 × 55L FLAT WASHER Ø 12.7 x Ø 26 x 2T FLAT WASHER Ø10 ×...
- Page 21 JOHNNY G SPIRIT BIKE STEP TWO 1. Run MAIN WIRE (90) through opening at bottom of HANDLEBARS (4) and out of the front. 2. Slide HANDLEBAR ASSEMBLY (4) onto aluminum slide rail. While assembling, simultaneously pull MAIN WIRE (90) out of front to prevent wire from being jammed.
- Page 22 JOHNNY G SPIRIT BIKE STEP THREE HARDWARE FOR STEP 3 PART TYPE DESCRIPTION HANDLEBAR END CAP SOCKET HEAD CAP BIOLT M3XPO.5X10L HANDLEBAR ANCHOR 1. Install HANDLEBAR END CAP (73) onto back end of ALUMINUM SLIDE RAIL (8) and secure with SOCKET HEAD CAP BOLT (144) using 2.5 MM...
- Page 23 JOHNNY G SPIRIT BIKE STEP FOUR HARDWARE FOR STEP 4 PART TYPE DESCRIPTION ADJUSTING AXLE SOCKET HEAD CAP BOLT M3×P0.5×10L FLAT WASHER Ø1/4" × 13 × 1.0T BUTTON HEAD SOCKET BOLT M6 x 10L 1. Thread ADJUSTING AXLE (58) through hole into HANDLEBAR ANCHOR (51) with TWO FLAT WASHERS (121).
- Page 24 JOHNNY G SPIRIT BIKE STEP FIVE HARDWARE FOR STEP 5 PART TYPE DESCRIPTION FLAT HEAT COUNTER- M6 x P1.0 x 10L SUNK BOT 1. Connect MAIN WIRE (A & B) and CONTROL WIRE (C & D) to CONSOLE (33). 2. Attach CONSOLE (33) to ALUMINUM...
- Page 25 Use this checklist to perform the bike test procedure. ‰ Recheck all the bolts and make sure they are all tightened to the proper torque specification (if indicated) and no parts are missing. ‰ Check the seat to make sure it is level and tight and does not rotate around or tilt. Tighten and adjust as needed. ‰...
- Page 26 Your Johnny G Spirit Bike will be an exhilarating indoor cycling experience. The bike allows the user full control over the magnetic resistance by simply pressing on the + and – Keys, located at two locations; either the Forward Control Pad or the Handlebar Shifters.
-
Page 27: Seat Height
maximum exercise efficiency and comfort, while reducing the risk of injury. Adjust the seat height so that the knee joint is slightly flexed when the extended leg is at the bottom of the pedal stroke. Once the proper height has been achieved, adjust the seat forward or back so that when the feet are in the 3 o’clock and 9 o’clock positions, the forward knee is directly over the pedal axle. -
Page 28: Handlebar Adjustments
Position the handlebar at the same height as your seat, or higher if you feel any discomfort in your back. The Johnny G Spirit Bike allows for adjustment of handlebar height. Additionally, the bike allows for fore and aft adjustment of the handlebar. -
Page 29: Resistance Control
RESISTANCE CONTROL The bike allows the user full control over the magnetic resistance by simply pressing on the + and – Keys, located at two locations; either the Forward Control Pad or the Handlebar Shifters. Providing two resistance adjustment locations was done for the riders’... - Page 30 The key is to exercise aerobically; typically, at 60% – 80% of your maximum heart rate. Slow and relaxed activity after a workout allows the muscles and cardiovascular system to gradually return to a resting level. Johnny G by Spirit...
- Page 31 • Push down on the Push Brake System handle until the pedals come to a complete stop. Your Johnny G Spirit Bike includes both an ANT+ and Bluetooth FTMS chips. Bluetooth FTMS is the new FITness Machine Service protocol to control fitness equipment, such as bike trainers, treadmills and rowing machines.
- Page 32 JOHNNY G SPIRIT BIKE CONSOLE OPERATION Johnny G by Spirit...
- Page 33 www.johnnygspiritbike.com...
- Page 34 The Warm Up Mode is the most basic function of the Johnny G Spirit Bike. Riders can use this mode to prepare themselves for a class or when just pedaling to warm up for other activities. This mode is the first function that occurs when the console awakens from sleep mode.
-
Page 35: Manual Mode
MANUAL MODE The Manual Mode is another basic function of the Johnny G Spirit Bike. The Manual Mode is also the HR Zone program. Once HR is paired during the Warm Up Mode, HR performace and zones will be tracked. Riders can use this mode for a complete workout or to prepare themselves for other activities. - Page 36 Programs Mode provides the opportunity to pair a HR strap to the console and access to the training programs contained within the Johnny G Spirit Bike. If just starting a ride and in the Warm Up Mode press and hold the Play Key for 3 seconds and the first program option will display, PAIR HR DEVICE.
- Page 37 PAIR HEART RATE DEVICE HR Zone program requires connection of a Heart Rate Strap prior to using program. Connecting console to a Heart Rate Strap is accomplished by entering Programs Mode during the Warm Up Mode. If user puts on a HR strap after leaving the Warm Up Mode and has not paired HR, console reset will be needed.
- Page 38 • WARM UP MODE flashes 3 times. • PRESS PLAY KEY, WHEN READY TO GO displays on console. • Console HR LED light illuminates on right side of console. • See page 40 for full description of HR color zones. Johnny G by Spirit...
- Page 39 If zero sensors found: • Re-scan displays. • Dampen HR contacts on strap if dry. • Press Play Key to re-scan. • If not wanting to connect a heart rate strap, press + Key until screen displays DO NOT CONNECT. •...
- Page 40 • Home screen will appear and display: Level, RPM, Time, Distance, Watts, Heart Rate. • Press + or – Key on either Forward Control Pad or handlebar ends to adjust resistance. To end workout, refer to instructions on page 41 Ending Ride or User and the workout summary. Johnny G by Spirit...
- Page 41 END WORKOUT To End Ride or User: • Press and hold Play Key for 3 seconds and all current data will pause. • Screen displays END RIDE or USER. • Press either + or – Key to toggle between END RIDE and USER. •...
- Page 42 • RED ZONE TIME, PCT • Pressing Play Key will revert to WORKOUT RESULTS. Press + Key again to advance and repeat screens. • Pressing Play Key will reset display and revert to WARM UP Mode. Johnny G by Spirit...
- Page 43 LAP PROGRAM: Summary displays time and distance for each lap. • LAP 1, LAP 2, LAP 3, LAP 4, LAP 5 Time and Distance. • If no laps were recorded this screen will not display. • Only the last 5 laps will display on separate screens, if recorded. If USER is selected: The User function adds another program to run concurrently.
- Page 44 • Press + or – Key on either Forward Control Pad or handlebar ends to adjust resistance. Console Power Zone LED color changes based on user percent of max FTP. Console Power LED is on left side of console. Power Zone LED color spectrum is as follows: Johnny G by Spirit...
- Page 45 Console Power Zone LED color changes based on user percent of max FTP. Console Power LED is on left side of console. Power Zone LED color spectrum is as follows: • <55% FTP = White • 56 – 75% FTP = Blue •...
- Page 46 WARM UP displays and 0.30 seconds counts down. • GO Displays for 3 seconds. • FTP test begins. and test time counts down. • Press + or – Key on either Forward Control Pad or handlebar ends to adjust resistance. Johnny G by Spirit...
- Page 47 NOTE: Ideal pacing is a steady and consistent effort throughout the duration, where the average power for the first half is also the same as the average power for the second half. Listen to your body. Aim for a watt target that can be sustained. Test will continue until completed or until ended by pressing the Play Key.
- Page 48 • At desired time of Recovery Mode, press Play Key. • THIS.LAP displays on lower section of console, replacing Watts and Heart Rate. • The TIME display will reset to 0.00. • The DISTANCE display will reset to 0.00. • Lap is being recorded. Johnny G by Spirit...
- Page 49 To end lap: • Press Play Key again and display temporarily goes away with END LAP displayed on lower section of console. • Display shows TIME and DISTANCE paused and THIS.LAP. • After 5 seconds, full display returns with total accumulated Time and Distance from beginning of program.
- Page 50 • Screen displays END RIDE or USER with END RIDE flashing. • Press Play Key to select. • Screen displays END WORKOUT. • NO will flash on display. • Press either + or – Key to toggle between NO and YES for desired action. Johnny G by Spirit...
-
Page 51: Maintenance Mode
MAINTENANCE MODE Maintenance Mode contains sensitive settings for your bike's console. Becoming familiar with the Maintenance Mode information used in this section important for your bike's proper operation. It is necessary that the console be powered in order to access the Maintenance Mode. Pedaling above 30RPM is all that is needed to illuminate the console. Maintenance Mode offers following bike settings: •... -
Page 52: Entering Maintenance Mode
Play Key and + Key simultaneously for 3 seconds. CONSOLE RESET displays on console. NOTE: If console displays CONSOLE RESET, instead of MAINTENANCE MODE, then ALL 3 keys on Forward Control Pad were possibly not pressed and held simultaneously or for enough time; attempt action again. Johnny G by Spirit... -
Page 53: Display Test
KEY TEST The purpose of this setting is to ensure that each of the buttons are signaling properly. • Press Play Key to enter setting. • Press Play Key and follow console direction PRESS ALL KEYS. • There are 5 buttons that control the bike: •... - Page 54 • Press Play Key to change setting. • Default setting is ENGLISH. • SPD AVG and SPD PEAK in workout results will only display MPH. • Press + Key for next screen or reset console to exit Maintenance Mode. Johnny G by Spirit...
-
Page 55: Brake Test
BRAKE TEST Brake test controls are a sensitive setting for your bike's functionality. Proper training is required for this setting. The purpose of this setting is to test the magnetic resistance system. • Press Play Key to enter Brake Test. MOTOR TEST AUTO is displayed. •... -
Page 56: Limit Sensor
• When REED switch is open, displays OFF. • RPM displays PEDAL RPM. • Press Play Key to exit to setting screen. • Press + Key for next screen or reset console to exit Maintenance Mode. Johnny G by Spirit... -
Page 57: Update Software
UPDATE SOFTWARE The purpose of this setting is to update console software with the use of a USB inserted into a port underneath the console. Updating software requires a Blank USB memory stick and a computer to transfer updates from service website or e-mail from customer service, to USB, to console. -
Page 58: Led Brightness
Set each bike to a unique number. The number must be set to 1 or above, 0 is not a valid number. • Press Play Key to accept, bike number will stop flashing momentarily then turn off indicating set. • Press + Key for next screen or reset console to exit Maintenance Mode. Johnny G by Spirit... - Page 59 AUTO PAIR HR The purpose of this setting is to turn ON or OFF the HR pairing function during the Warm Up Mode. Not all cycling classes are done using HR. Facilities have the option to simplify the user set-up and facilitate getting into the Manual Mode where HR tracking is not used. The default setting is OFF.
-
Page 60: Demo Mode
• Press + Key for next screen or reset console to exit Maintenance Mode. CALIBRATION Calibration contains factory-sensitive settings for the bike's resistance system. Do not enter and make adjustments as they will negatively affect the bike's resistance profile. Johnny G by Spirit... - Page 61 FUNCTIONAL THRESHOLD POWER Power/Watts – What is it? It has been said that from a coaching perspective the Watt is the measurement of truth: why is this? Because you either can perform at a set wattage at a given time or you can’t, the response is instant. For the coach and athlete this is very useful as it provides unequivocal feedback of what has been performed in terms of intensity, duration and total workload.
- Page 62 The reason we use zones is that it offers coaches a framework for understanding, to develop a structure for sustained improvement. A simple way to remember it in relation to time is: “the harder you do it, the less time you can do it for". Johnny G by Spirit...
- Page 63 POWER TRAINING LEVELS Basis for the System/Number of Levels The industry standard has been set at 5 levels as that was felt to be the optimum number needed to represent the range of physiological responses and to describe the different types of training required/used to meet the demands of fitness-based cycling.
- Page 64 If you have an urgent need to get deep in to the science linked to the subject then the Internet will bring up many fascinating articles when you enter any of the names mentioned above, they are the leading authorities in pro riding with power. Johnny G by Spirit...
- Page 65 Maintenance section of this document. Working on this product will require basic and/or sometimes specialty tools based on the type of service that will be performed at any time. To assist, Spirit Fitness recommends having the tools listed (Fig. 1) available when performing maintenance.
- Page 66 To level the bike: Use the four leveling adjusters (located on the underside of the front and rear legs) to compensate for uneven floor surfaces. Perform regular scheduled preventive maintenance procedures to maintain your Johnny G Spirit Bike bike in serviceable condition.
- Page 67 Weekly maintenance should focus on the overall performance of your Johnny G Spirit Bike. During these inspections, look for vibration and possible loose assemblies. Have an experienced rider ride each bike to identify and help diagnose any vibration, noises, and any "unusual" feeling from the drive belt. Either faulty flywheel alignment or a loose belt can cause vibration.
- Page 68 Depending on the use and maintenance of the product, certain items may need to be replaced upon inspection due to wear. These can be identified during scheduled inspections as described in the Preventative Maintenance section of this owner’s manual beginning on page 66. For international customers, please contact your local distributor. Johnny G by Spirit...
-
Page 69: International Offices
MANUFACTURER Dyaco Shanghai Dyaco Canada Room 210, No.350 5955 Don Murie Street Dyaco Commercial & Medical North America Hengren Road Niagara Falls, ON Yangpu District L2G 0A9 18303 Bothell Everett Hwy. Shanghai, China 200438 Canada Suite 210 TEL: 86 -21-65068300 TEL: +1 888-707-1880 Bothell, WA 98012 FAX: 86-21-65068150... - Page 70 NOTES Johnny G by Spirit...
- Page 71 NOTES www.johnnygspiritbike.com...
- Page 72 Dyaco Commercial & 866.463.2662 Medical North America www.johnnygspiritbike.com 18303 Bothell Everett Hwy. Suite 210 Bothell, WA 98012 Johnny G Spirit Bike Owners Manual © 2020 All Rights Reserved Revision: 01.28.2020...
Need help?
Do you have a question about the JOHNNY G SPIRIT BIKE and is the answer not in the manual?
Questions and answers