Advertisement
Quick Links
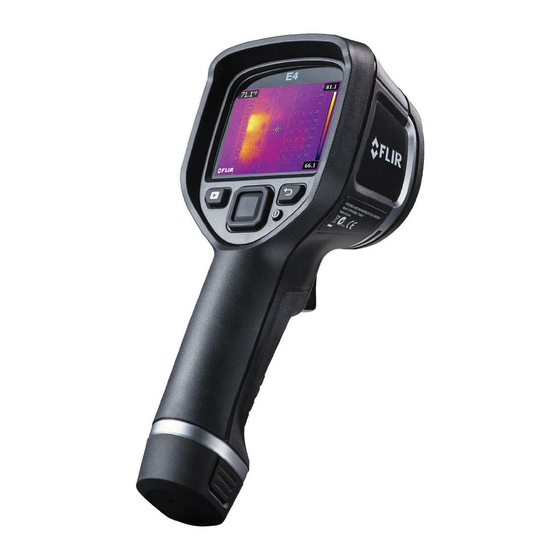
Digital Lens
IR Lens
Lens Cover Slide
Trigger
1. MEMORY:
Memory is internal (approximately 500 image capacity).
2.
POWER:
Place a fully charged battery into the bottom of the camera. The battery is charged by one of three
methods.
1. Place the battery in the provided stand alone charger.
2. Plug the Power adapter into the USB mini-B socket on top of the camera.
3. Attach a USB/USB mini-B cable from a computer USB port to the camera's USB mini-B socket on top of the
camera. (this method will take considerably longer)
3.
START:
To start the camera, press the On/Off button.
1. To place the camera in standby mode, press and hold the On/Off button for 5 second
2. To turn the camera off, press and hold the On/Off button for 10 seconds.
4.
FOCUS:
All models are focus free. (Minimum focus distance is 20 inches or .5 meter)
5.
AUTO ADJUST (Level and Span):
1. All Models: Press in on the Navigation Pad to view
the main menu toolbar.
Use the Navigation pad to highlight the Temp
Scale icon [Fig.1] then press in on the
Navigation Pad to select.
Select Auto icon [Fig. 2] then press in on
the Navigation Pad to activate full auto adjustment of level and
span.
6.
MANUAL ADJUST (Level and Span):
adjust differently than E6 and E8)
1.
E4 and E5 (ONLY)
menu toolbar.
Use the Navigation pad to highlight the Temp Scale icon [Fig.1] then
press in on the Navigation Pad to display the submenu.
Select the Lock icon [Fig. 2] this will lock the level and span
settings at their current settings.
© 2015 The Snell Group / 322 N. Main St. / Suite 8 / Barre, VT 05641 / 800.636.9820
(cover and socket)
(NOTE: Models E4 and E5
Press in on the Navigation Pad to view the main
QuickStart:
USB mini-B
Archive Button
Settings
FLIR E4, E5, E6, E8
Battery
Image mode
Color
Measurement
Temp Scale
Main Menu Toolbar Fig.1
Lock
Auto
Submenu Icons Fig.2
/
www.thesnellgroup.com
FLUKE E4, E5, E6, E8 Page 1
Cancel/Back
On/Off
Navigation Pad
(UP/Down)
(Left/Right)
(Push)
Manual
Advertisement

Subscribe to Our Youtube Channel
Related Manuals for FLIR E4


Summary of Contents for FLIR E4
- Page 1 Select the Lock icon [Fig. 2] this will lock the level and span settings at their current settings. © 2015 The Snell Group / 322 N. Main St. / Suite 8 / Barre, VT 05641 / 800.636.9820 www.thesnellgroup.com FLUKE E4, E5, E6, E8 Page 1...
- Page 2 45° x 34° 1 inch 2.6* 320 x 240 45° x 34° 1 inch 32.1 © 2015 The Snell Group / 322 N. Main St. / Suite 8 / Barre, VT 05641 / 800.636.9820 www.thesnellgroup.com FLUKE E4, E5, E6, E8 Page 2...
Need help?
Do you have a question about the E4 and is the answer not in the manual?
Questions and answers