FLIR TG165-X User Manual
Diagnostic thermal camera
Hide thumbs
Also See for TG165-X:
- User manual (42 pages) ,
- Quick start manual (74 pages) ,
- User manual (65 pages)
Advertisement
Quick Links
User Manual of Product 1:
FLIR - E5-XT with WiFi & MSX E5-XT - Handheld Infrared
Camera - with Extended Temperature Range, MSX Image
Enhancement Technology, Wi-Fi & Bluetooth for Instant Data
Sharing - (160 x 120)
User Manual of Product 2:
FLIR MR160 - Thermal Imaging Moisture Meter - with IGM
(Infrared Guided Measurement), Pin and Pinless
Advertisement

Related Manuals for FLIR TG165-X


Summary of Contents for FLIR TG165-X
- Page 1 User Manual of Product 1: FLIR - E5-XT with WiFi & MSX E5-XT - Handheld Infrared Camera - with Extended Temperature Range, MSX Image Enhancement Technology, Wi-Fi & Bluetooth for Instant Data Sharing - (160 x 120) User Manual of Product 2:...
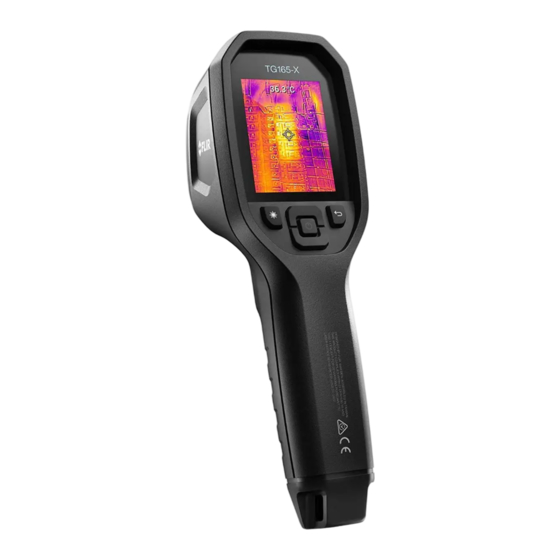
- Page 2 USER MANUAL Diagnostic Thermal Camera Models TG267, TG297, and TG165–X...
- Page 4 USER MANUAL Diagnostic Thermal Camera #NAS100014; r. AK/74592/74592; en-US...
- Page 6 Bluetooth® Communication and FLIR Tools™ ...... 22 Bluetooth® Communication Overview......22 Download the FLIR Tools™ Mobile App......22 Setting up the FLIR Tools™ Mobile App......22 Transmit Images via Bluetooth® ........22 FCC Compliance ............24 GITEKI Certified ............25 Field Firmware Updates .............
- Page 7 Table of contents Reset the Camera............. 27 Specifications..............28 10.1 Imaging and Optical Specifications ....... 28 10.2 Detector Specifications ..........28 10.3 Image Presentation Specifications........ 28 10.4 Measurement Specifications ........29 10.5 Measurement Analysis Specifications ......29 10.6 Type-K specifications (TG267 only) ......29 10.7 Configuration Specifications........
- Page 8 The documentation must not, in whole or part, be copied, photocopied, repro- duced, translated or transmitted to any electronic medium or machine-read- able form without prior consent, in writing, from FLIR Systems. Names and marks appearing on the products herein are either registered trademarks or trademarks of FLIR Systems and/or its subsidiaries.
- Page 9 The FLIR TG267 adds Type-K thermocouple contact temperature measurements. The FLIR TG297 offers a high temperature range to 1886℉ (1030℃). Visit https://support.flir.com/prodreg to register your instrument and to extend the standard one-year warranty to the 2-10 Year Warranty.
- Page 10 Safety 3.1 Safety Warnings and Cautions WARNING ⚠This symbol, adjacent to another symbol indicates the user must refer to the manual for further information. WARNING The instrument’s IP54 rating is only in affect when the top flap (covering the USB-C and Thermocouple jacks) is completely sealed.
- Page 11 Description 4.1 Product Description Figure 4.1 Imaging IR Thermometer Description (TG297 pictured) 1. Display area 2. Return button (to back up in the menu system) 3. Laser pointer button 4. Up/Down Navigation buttons and Power button (long press)/Menu button (short press) 5.
- Page 12 Description 4.2 Control Button Descriptions Long press to power ON or OFF Short press to access the menu system Return button. Back out to previous screen in menus Press to scroll upward in the menus Press to scroll downward in the menus Press to activate the Laser pointer Pull trigger to capture camera image TRIGGER...
- Page 13 Description 7. Camera image area 8. Center spot cross-hairs 9. Laser Pointer active 10. Center spot temperature measurement 11. Thermocouple measurement (TG267) #NAS100014; r. AK/74592/74592; en-US...
- Page 14 Operation 5.1 Camera Power Power is supplied by a rechargeable lithium battery. Long press the power button (center) to switch the camera ON or OFF. If the camera does not power ON, charge the battery by connecting to an AC wall charger using the sup- plied USB-C cable.
- Page 15 Operation 4. Use the Laser pointer to accurately target a spot. Press the Laser pointer button to switch ON the Laser pointer. The camera’s Laser pointer in- cludes a circular spot indicating the area that is being monitored for tem- perature, utilizing DOE (Diffractive Optical Elements) technology.
- Page 16 TG267. If the thermocouple does not include a range label, please contact FLIR technical support. WARNING To avoid electrical shock, do not use this instrument when working near voltages > 24V AC/DC.
- Page 17 Operation Figure 5.4 Thermocouple temperature readout (33.7℃, in this example) 1. If necessary, enable the thermocouple mode in the menu system (under Measurement). The thermocouple is enabled when the ‘TC’ label is shown on the display. 2. Connect a Type-K thermocouple sub-miniature plug (see Figure 5.3) to the jack in the top compartment.
- Page 18 Operation 5.5 Visible Spectrum Camera Figure 5.5 Visible Spectrum Digital Camera Image 1. Long press the power button to switch the camera ON. 2. Select a Visible Image mode in the menu system (under Image Adjust- ments/Image Mode). Note that the high resolution Visible Image mode does not support object temperature measurements.
- Page 19 Operation 6. To transmit images via Bluetooth®, see Section 7, Bluetooth® Communi- cation and FLIR Tools™. Note that the TG165–X does not include Blue- tooth® capability. #NAS100014; r. AK/74592/74592; en-US...
- Page 20 DELETE/DELETE ALL FILES menu. Select SEND to transmit the selected image to a paired mobile device (see Section 7, Bluetooth® Communica- tion and FLIR Tools™, for more information. Note that the TG165–X does not include Bluetooth® capability). • IMAGE ADJUSTMENTS: Press MENU to access IMAGE MODES (includ- ing MSX®...
- Page 21 Programming Menu System 1. Image Modes: Press MENU at IMAGE MODES to open the Image Mode menu. Use the arrow buttons to select an image mode: THERMAL PLUS VISI- BLE (MSX®), VISIBLE (QVGA 320 x 120 pixels), or HIGH RESOLUTION VISIBLE mode (2M: 1600 x 1200 pixels).
- Page 22 Programming Menu System 2. MSX® Alignment: Adjust the alignment (so that the thermal image and the visible image line up accurately) as follows: While viewing the THERMAL PLUS VISIBLE IMAGE screen in the menu, press MENU to access the MSX® adjustment screen and then use the arrow buttons to adjust the alignment.
- Page 23 Programming Menu System 3. Colors: Press MENU at the colors menu and use the arrow buttons to se- lect a color palette: Iron, Rainbow, White hot, Black hot, Arctic, or Lava. Press MENU to confirm selection. • SETTINGS: Press MENU to access the Settings sub-menu (see below): 6.3 Settings Sub-Menu •...
- Page 24 Programming Menu System 1. Center Spot: Press MENU to enable/disable the display cross-hairs. The cross-hairs should be used as a reference only to identify the spot that is being measured for temperature. Use the Laser pointer for more accurate targeting. Note that the high resolution Visible Spectrum Image Mode does not sup- port object temperature measurements and so the centre spot cannot be switched ON/OFF while in the high resolution Image Mode.
- Page 25 (TG267 only). • DEVICE SETTINGS 1. Bluetooth® (TG267 and TG297 only): Press MENU to switch Bluetooth® ON or OFF. See Section 7, Bluetooth® Communication and FLIR Tools™, for details. 2. Laser: Press MENU to enable/disable the Laser pointer. When enabled, you can use the Laser pointer button to switch ON the Laser pointer.
- Page 26 Programming Menu System 3. Screen brightness: Use the arrows to select the desired display intensity (LOW, MEDIUM, or HIGH). 4. Auto Power OFF (APO): Use the arrows to scroll and MENU to select the desired APO time (5/15/30 minutes). Set to ‘Never’ to disable APO. •...
- Page 27 Programming Menu System 2. Time & Date: Use the arrows to scroll and the MENU button to set the Time, Date, Time Format, and Date Format. 3. Language: Use the arrows to scroll and the MENU button to select a language.
- Page 28 Programming Menu System • FACTORY RESET: Follow the prompts to reset the User Settings back to Factory Default status. #NAS100014; r. AK/74592/74592; en-US...
- Page 29 FLIR Tools™ 7.1 Bluetooth® Communication Overview When paired with a mobile device running the FLIR Tools™ App (using the METERLiNK® protocol), the TG267 and TG297 continually transmit readings for live display on the mobile device. You can also send images, stored on the camera, to your mobile device.
- Page 30 Bluetooth® Communication and FLIR Tools™ Figure 7.1 Pairing the camera with a Mobile Device Figure 7.2 Sending Images to a Mobile Device #NAS100014; r. AK/74592/74592; en-US...
- Page 31 Bluetooth® Communication and FLIR Tools™ Figure 7.3 Viewing Transferred Images on a Mobile Device 7.5 FCC Compliance This device complies with part 15 of the FCC Rules. Operation is subject to the following two conditions: 1. This device may not cause harmful interference.
- Page 32 Bluetooth® Communication and FLIR Tools™ 4. Consult the dealer or an experienced radio/TV technician for help. WARNING Changes or modifications not expressly approved by the party responsible for compliance could void the user’s authority to operate the equipment. 7.6 GITEKI Certified This product is GITEKI certified.
- Page 33 System firmware by first downloading an update file from the FLIR website and then transferring the file to the camera via USB. Connect to a PC using a USB-C cable. Firmware updates are available from https://support.flir.com.
- Page 34 Clean the lenses with a high-quality lens cleaner. 9.2 Battery Considerations and Service The rechargeable lithium battery is not user-serviceable. Please contact FLIR support for service instructions: https://support.flir.com. For best results, charge the battery immediately after seeing a low battery in- dication using the supplied USB-C cable (with an AC wall charger, not sup- plied).
- Page 35 Specifications 10.1 Imaging and Optical Specifications IR resolution TG267 and TG297: 160 x 120 pixels TG165–X: 80 x 60 pixels Digital image enhancement Included Thermal Sensitivity /NETD < 70 mK Field of View (FOV) TG267 and TG297: 57° (H) x 44° (D) TG165–X: 51°...
- Page 36 Specifications Image adjustment Automatic Image modes • Thermal MSX® (Multi-Spectral Dynam- ic Imaging) • Visible Spectrum (standard and high resolution modes) 10.4 Measurement Specifications Object temperature range TG267: –13 ~ +716℉ (–25 ~ +380℃) TG297: –13 ~ +1886℉ (–25 ~ +1030℃) TG165–X: –13 ~ +572℉...
- Page 37 Please do not exceed the specified range printed on the thermocouple label. To measure higher or lower than the range of the supplied thermocouple, please use a Type-K thermocouple rated for the desired range. Contact FLIR for additional information 10.7 Configuration Specifications...
- Page 38 Specifications 10.10 Flashlight Specifications Flashlight type Bright LED 6500° K LED CCT LED CRI Beam angle ± 20° Rated power 0.5 W Light output 100 Lumens 10.11 Laser Pointer Specifications Laser type DOE (Diffractive optical elements) Laser function Indicates the size of the measurement area (circular target) Laser class Class I...
- Page 39 Specifications Charging time 4 hours to 90% and 6 hours to 100% Power management APO adjustable 5/15/30 minutes. Can be disabled. 10.14 Environmental Specifications Altitude 6562 ft. (2000 m) Pollution degree Operating temperature 14 ~ 113℉ (-10 ~ 45℃) Storage temperature -22 ~ 131℉...
- Page 40 Specifications Environmental safety REACH Regulation EC 1907/2006 RoHS 2 Directive 2011/65/EC WEEE Directive 2012/19/EC JIS C 6802:2011 laser directive IEC 60825–1 class I laser directive FDA laser directive Humidity requirements IEC 60068–2–30 for operation and storage 10.15 Physical Specifications Weight 13.9 oz.
- Page 41 Otherwise, the standard one-year warranty will be in affect from date of purchase. The 2–10 warranty covers parts and labor for the cam- era for 2 years and coverage of the detector for 10 years. Register your prod- uct at https://support.flir.com/prodreg. #NAS100014; r. AK/74592/74592; en-US...
- Page 42 Customer Support Repair, Calibration, and Technical Support: https://support.flir.com. 12.1 Corporate Headquarters FLIR Systems, Inc. 27700 SW Parkway Avenue Wilsonville, OR 97070, USA #NAS100014; r. AK/74592/74592; en-US...
- Page 43 #NAS100014; r. AK/74592/74592; en-US...
- Page 45 Customer support http://support.flir.com Copyright © 2021, FLIR Systems, Inc. All rights reserved worldwide. Disclaimer Specifications subject to change without further notice. Models and accessories subject to regional market considerations. License procedures may apply. Products described herein may be subject to US Export Regulations.
- Page 46 USER MANUAL FLIR MODEL MR160 IMAGING MOISTURE METER with IGM ™...
- Page 47 5.2.1 Moisture Measurement Overview 5.2.2 Moisture Displays Overview 5.2.3 IMAGE Modes 5.2.4 MOISTURE Modes 5.2.5 Internal Moisture Sensor Measurements (Pinless) 5.2.6 External Pin Probe Moisture Measurements 5.2.7 Reference Mode Moisture Measurements 5.3 Thermal Imager (IR) FLIR MR160 USER MANUAL Document Identifier: MR160-en-US_AG...
- Page 48 CUSTOMER SUPPORT MATERIAL GROUPS 9.1 Common Names of Timbers (BS888/589:1973) with MR160 Group Nos. 9.2 Botanical names of timbers with MR160 program group numbers 9.3 %WME Table (% Wood Moisture Equivalent) 10. WARRANTY FLIR MR160 USER MANUAL Document Identifier: MR160-en-US_AG...
- Page 49 1. Advisories 1.1 Copyright © 2023 FLIR Systems, Inc. All rights reserved worldwide. No parts of the software including source code may be reproduced, transmitted, transcribed, or translated into any language or computer language in any form or by any means, electronic, magnetic, optical, manual, or otherwise, without the prior written permission of FLIR Systems.
- Page 50 • Before operating the device, you must read, understand, and follow all instructions, dangers, warnings, cautions, and notes. • FLIR Systems reserves the right to discontinue models, parts or accessories, and other items, or to change specifications at any time without prior notice.
- Page 51 3. Introduction Thank you for selecting the FLIR MR160 Imaging Moisture Meter. The MR160 integrates high quality thermal imaging technology with the best-in-class moisture detection and measurement. The MR160 includes an integrated non-invasive pinless moisture sensor, and an external pin moisture probe (MR02).
- Page 52 9. Laser pointer lens (back) 10. Thermal imaging lens (back) 11. Internal Pinless Moisture sensor (back) 12. Micro USB Port (bottom) 13. External Probe Jack (bottom) 14. Battery Charging LED status lamp (bottom) Fig. 4-1 Meter Description FLIR MR160 USER MANUAL Document Identifier: MR160-en-US_AG...
- Page 53 OFF. Press the Select button (center) to access the Main Menu. Use this button to select items from within the menu structure. Use the four outer navigation (rim) buttons to move up-down-left- right. FLIR MR160 USER MANUAL Document Identifier: MR160-en-US_AG...
- Page 54 Icons 10 through 12 in Fig. 4-2 are available in the Image Mode Menu. Press icon 2 to view the Image Mode menu. 10. IR (View Thermal Image only) 11. IR + IGM Moisture (View Thermal Image + Moisture readings) 12. Moisture only Fig. 4-2 Menu Icons FLIR MR160 USER MANUAL Document Identifier: MR160-en-US_AG...
- Page 55 Pin Probe Moisture Measurements and in the specifications. Moisture measurements are covered in detail in the following sections. Be sure to select Pin Mode or Pinless Mode in the Moisture Menu to match the measurement type. FLIR MR160 USER MANUAL Document Identifier: MR160-en-US_AG...
- Page 56 Reference mode in Sections 5.2.3 and 5.2.6); pinless mode only. Note that in Pin mode this display area will show the selected Material/Wood Group. Access the Moisture Mode to select the Material/Wood Group. FLIR MR160 USER MANUAL Document Identifier: MR160-en-US_AG...
- Page 57 See Fig. 5-1(a). Moisture reading only In the Moisture only mode the IR Thermal Camera Image is off and the meter shows only the moisture reading in digits and in bargraph formats, see Fig. 5-1(b). FLIR MR160 USER MANUAL Document Identifier: MR160-en-US_AG...
- Page 58 Refer to example screens shown in Fig. 5-1. 4. Keep hands, surfaces, and objects away from the rear internal moisture sensor area when taking measurements. 5. For best results, lift the meter off the surface under test between measurement points; FLIR MR160 USER MANUAL Document Identifier: MR160-en-US_AG...
- Page 59 2. Connect the external pin probe to the meter’s EXT jack on the bottom of the meter (under the protective flap). Refer to the FLIR website for information on available external pin moisture probe types. 3. Select the appropriate Material Group as described in Section 5.2.4 (see Section 9 for the Material Group Appendices).
- Page 60 See the color palette example below in figure 5-5(c). For the ICE palette, the right side of the scale shows the hotter pixels in the frame, and the left side of the scale shows the coldest pixels. FLIR MR160 USER MANUAL Document Identifier: MR160-en-US_AG...
- Page 61 1. Laser icon (Press and hold Laser button to activate) 2. Crosshairs (Press and hold Laser button to activate) 3. IR Thermal Image Fig. 5-5 Thermal IR Image FLIR MR160 USER MANUAL Document Identifier: MR160-en-US_AG...
- Page 62 Images are saved in bitmap (.bmp) format. Images can be accessed on the MR160 screen using the Image Review icon available in the Main Menu. Then scroll the images using the Left and Right navigation buttons. FLIR MR160 USER MANUAL Document Identifier: MR160-en-US_AG...
- Page 63 (FLIRxxxx.bmp), indicating that the image has been saved. During this time-out period, the user can press Back to cancel the image capture or Select/Capture to save the image. Fig. 5-7(a) Laser and Crosshairs visible; Aim the Laser at the test surface FLIR MR160 USER MANUAL Document Identifier: MR160-en-US_AG...
- Page 64 Fig. 5-7(b) Saved image with Target area and Moisture reading FLIR MR160 USER MANUAL Document Identifier: MR160-en-US_AG...
- Page 65 Alarm threshold is exceeded. Refer to the example in Fig. 5-1(b). To switch the alarm OFF when the meter is alarming, press the Select button and then select SETTINGS from the Main Menu FLIR MR160 USER MANUAL Document Identifier: MR160-en-US_AG...
- Page 66 METER INFORMATION. From the SETTINGS menu, scroll to Meter Information and press the Select button to view the Model, Software Version, and Last Calibration Date information. Press the back button to return to the Settings menu. FLIR MR160 USER MANUAL Document Identifier: MR160-en-US_AG...
- Page 67 As with most electronic products, this equipment must be disposed of in an environmentally friendly way, and in accordance with existing regulations for electronic waste. Please contact your local FLIR Systems representative for more details. FLIR MR160 USER MANUAL Document Identifier: MR160-en-US_AG...
- Page 68 6.3 Updating the MR160 firmware The MR160 firmware can be updated in the field by the user. If assistance is required, contact FLIR support (see Section 8). Firmware updates provide performance enhancements and new features and functions. To update the firmware, the following is required: •...
- Page 69 Language options Meter display text can be shown in any of fourteen (14) languages 7.2 Imaging Specifications Thermal imaging camera FLIR Lepton module, microbolometer FPA (focal plane array) Image calibration Automatic (with manual lock scale option) Thermal image resolution 80 (W) x 60 (H) pixels (4800 pixels) Spectral response 8 to 14µm...
- Page 70 **Accuracy spec. applies to pin probe moisture measurements taken on wood whose temperature is 68°F (20°C). Add 0.1% to the accuracy spec. for each °C below 20°C or subtract 0.1% for each °C above 20°C. FLIR MR160 USER MANUAL Document Identifier: MR160-en-US_AG...
- Page 71 8. Customer Support Support Website https://support.flir.com Firmware Updates To check for MR160 firmware updates please visit the support website (above) for complete installation instructions. FLIR MR160 USER MANUAL Document Identifier: MR160-en-US_AG...
- Page 72 Maple, Queensland Ramin Cedar, Japanese Maple, Rock Redwood, Baltic (European) Cedar, West Indian Maple, Sugar Redwood, Californian Cedar, Western Red Matai Rosewood, Indian Cherry, European Meranti, Red (dark/light) Rubberwood Chestnut Meranti, White Santa Maria FLIR MR160 USER MANUAL Document Identifier: MR160-en-US_AG...
- Page 73 Guarea, Black Opepe Walnut, American Guarea, White Padang Walnut, European Gum, American Red Padauk, African Walnut, New Guinea Gum, Saligna Panga Panga Walnut, Queensland Gum, Southern Persimmon Wandoo Gum, Spotted Pillarwood Wawa Whitewood FLIR MR160 USER MANUAL Document Identifier: MR160-en-US_AG...
- Page 74 Juglans regia Quercus delegatensis Canarium schweinfurthii Khaya ivorensis Quercus gigantean Cardwellia sublimes Khaya senegalensis Quercus robur Carya glabra Larix decidua Quercus spp Cassipourea elliotii Larix kaempferi Ricinodendron heudelotti Cassipourea melanosana Larix leptolepis Sarcocephalus diderrichii FLIR MR160 USER MANUAL Document Identifier: MR160-en-US_AG...
- Page 75 Tsuga heterophylia Endiandra palmerstoni Paulownia tomentosa Ulmus americana Entandrophragma angolense Pericopsis elata Ulmus procera Entandrophragma cylindricum Picaenia excelsa Ulmus thomasii Entandrophragma utile Picea abies Xylia dolabriformis Erythrophleum spp Picea jezoensis (18-28%mc) Zelkova serrata FLIR MR160 USER MANUAL Document Identifier: MR160-en-US_AG...
- Page 76 27.4 20.8 20.4 25.8 20.5 24.2 27.8 21.2 19.4 22.7 26.3 ≈23 25.3 22.4 22.3 20.1 23.9 27.3 26.5 23.3 23.4 20.8 24.7 28.1 24.4 24.8 21.7 25.9 29.6 25.6 26.3 22.9 27.1 FLIR MR160 USER MANUAL Document Identifier: MR160-en-US_AG...
- Page 77 10. Warranty 10.1 FLIR Limited 10-Year Warranty This product is protected by FLIR’s Limited 10-Year Warranty. Visit www.flir.com/testwarranty read the Limited 10-Year Warranty document. FLIR MR160 USER MANUAL Document Identifier: MR160-en-US_AG...
- Page 78 Customer Support https://support.flir.com Firmware Updates To check for MR160 firmware updates please visit the technical support website (above) for complete installation instructions. Publication Identification No.: MR160 Release Version: Release Date: May 2023 Language: en-US FLIR MR160 USER MANUAL Document Identifier: MR160-en-US_AG...
Need help?
Do you have a question about the TG165-X and is the answer not in the manual?
Questions and answers