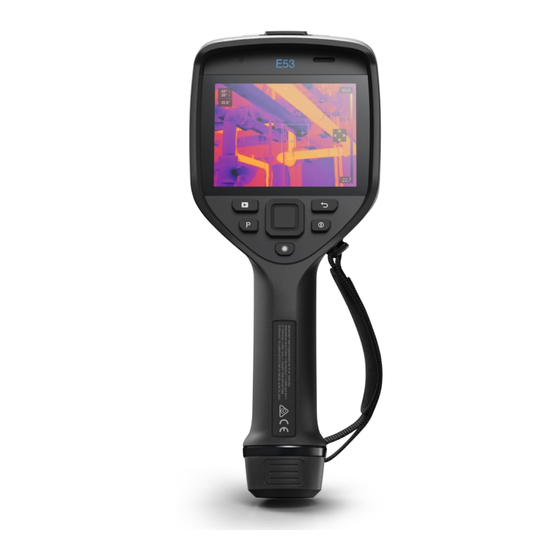
FLIR E Series User Manual
For use with flir e40bx, borrowed from ccf
Hide thumbs
Also See for E Series:
- User manual (216 pages) ,
- Getting started (130 pages) ,
- Quick start (2 pages)
Table of Contents
Advertisement
Quick Links
Advertisement
Table of Contents

Related Manuals for FLIR E Series


Summary of Contents for FLIR E Series
- Page 1 User’s manual FLIR Exx series For use with Flir E40bx, borrowed from CCF...
-
Page 2: Table Of Contents
Table of contents Page numbers different in this short version ↓ Legal disclaimer ................1 Legal disclaimer ............... 1 Usage statistics ................ 1 Changes to registry ..............1 U.S. Government Regulations............1 Copyright ................1 Quality assurance ..............1 Patents ................... 1 EULA Terms ................ - Page 3 Table of contents Figure .................. 18 Explanation ................18 Pairing Bluetooth devices..............19 10.1 General ................19 10.2 Procedure ................19 Configuring Wi-Fi ................20 11.1 General ................20 11.2 Setting up a peer-to-peer connection (most common use) ....20 11.3 Connecting the camera to a wireless local area network (less common use) .................20...
- Page 4 16.2.1 General..............35 16.2.2 Procedure ..............35 16.3 Working with condensation alarms..........36 16.3.1 General..............36 16.3.2 Procedure ..............36 Fetching data from external Extech and FLIR meters ......37 17.1 General ................37 17.2 Supported meters ..............37 17.3 Technical support..............
- Page 5 23.4.1 General..............49 23.4.2 Figure ................ 49 23.5 Draft ..................50 23.5.1 General..............50 23.5.2 Figure ................ 50 About Flir Systems ................51 24.1 More than just an infrared camera ..........52 24.2 Sharing our knowledge ............52 24.3 Supporting our customers............52 24.4...
- Page 6 Table of contents The measurement formula..............72 Emissivity tables ................76 30.1 References................76 30.2 Tables .................. 76 #T559845; r. AA/ 8324/8526; en-US...
-
Page 7: Quick Start Guide
It appears as an external drive (eg E:\) Save thermal and visible images from its DCIM\FLIR_100DCIM\FLIR_100 folder. Then please delete them from the card. Flir Tools is discontinued. If you want software to optimise images etc, see Flir Thermal Studio: https://www.flir.co.uk/products/flir-thermal-studio-suite There's a free version, but you have to create an account. -
Page 8: Camera Parts
Camera parts 6.1 View from the right 6.1.1 Figure 6.1.2 Explanation 1. Cover for the right-hand compartment: • USB-A connector. • USB mini-B connector. • Power connector. 2. Save button. 3. Tripod mount. Requires an adapter (extra accessory). 4. Focus ring. 5. -
Page 9: View From The Left
Camera parts 6.2 View from the left 6.2.1 Figure 6.2.2 Explanation 1. Laser pointer. 2. Lamp for the digital camera. 3. Digital camera. 4. Cover for the left-hand compartment: • Video out connector (composite video). • Memory card slot. #T559845; r. AA/ 8324/8526; en-US... -
Page 10: Lcd And Keypad
Camera parts 6.3 LCD and keypad 6.3.1 Figure 6.3.2 Explanation 1. Touch-screen LCD. 2. Navigation pad with center push. 3. Image archive button. 4. Button to operate the laser pointer. 5. On/off button. 6. Back button. #T559845; r. AA/ 8324/8526; en-US... -
Page 11: View From The Bottom
Camera parts 6.4 View from the bottom 6.4.1 Figure 6.4.2 Explanation 1. Latch to open the cover for the battery compartment. Push to open. #T559845; r. AA/ 8324/8526; en-US... -
Page 12: Battery Condition Led Indicator
Camera parts 6.5 Battery condition LED indicator 6.5.1 Figure Charge Socket 6.5.2 Explanation Type of signal Explanation The green LED flashes two times per second. The battery is being charged. The green LED glows continuously. The battery is fully charged. #T559845;... -
Page 13: Laser Pointer
Camera parts 6.6 Laser pointer 6.6.1 Figure Figure 6.1 This figure shows the difference in position between the laser pointer and the optical center of the infrared lens. WARNING Do not look directly into the laser beam. The laser beam can cause eye irritation. CAUTION Protect the laser pointer with the protective cap when you are not using the laser pointer. -
Page 14: Screen Elements
Screen elements 7.1 Figure 7.2 Explanation 1. Measurement tools (e.g., spotmeter). 2. Measurement result table. 3. Status icons and notifications. 4. Temperature scale. 5. Lamp toolbar button. 6. Temperature scale toolbar button. 7. Color toolbar button. 8. Measurement toolbar button. 9. -
Page 15: Navigating The Menu System
Navigating the menu system 8.1 Figure 8.2 Explanation The figure above shows the two ways to navigate the menu system in the camera: • Using the touch screen LCD to navigate the menu system (left). • Using the navigation pad to navigate the menu system (right). #T559845;... -
Page 16: Connecting External Devices And Storage Media
Connecting external devices and storage media 9.1 Figure 9.2 Explanation 1. Indicator showing that the memory card is busy. Note Do not eject the SD memory card when this LED is flashing. 2. Memory card (SD card) 3. Video cable. #T559845;... -
Page 17: Figure
Connecting external devices and storage media 9.3 Figure 9.4 Explanation 1. Power cable. 2. USB mini-B cable (to connect the camera to a PC). 3. USB-A cable (to connect the camera to an external device, e.g., a USB memory stick). #T559845;... -
Page 18: Pairing Bluetooth Devices
You can remove an added device by selecting the device and then selecting Remove. • After adding a MeterLink device, such as the FLIR MR77 or FLIR CM78, the result from the meter will be visible in the measurement result table. -
Page 19: Configuring Wi-Fi
Configuring Wi-Fi 11.1 General You can connect the camera in two different ways: • Most common use: Setting up a peer-to-peer connection (also called an ad hoc or P2P connection). This method is primarily used with other devices, e.g., an iPhone or iPad. -
Page 20: Handling The Camera
Handling the camera 12.1 Charging the battery Note You must charge the battery for 4 hours before you start using the camera for the first time. 12.1.1 Using the power supply to charge the battery 12.1.1.1 Procedure Follow this procedure: 1. -
Page 21: Adjusting The Infrared Camera Focus
Handling the camera 12.4 Adjusting the infrared camera focus 12.4.1 Figure 12.4.2 Procedure Follow this procedure: 1. Do one of the following: • For far focus, rotate the focus ring clockwise (with the touch-screen LCD facing to- ward you). • For near focus, rotate the focus ring counter-clockwise (with the touch-screen LCD facing toward you). -
Page 22: Operating The Laser Pointer
Handling the camera 12.5 Operating the laser pointer 12.5.1 Figure 12.5.2 Procedure Follow this procedure: 1. To turn on the laser pointer, push and hold the laser button. 2. To turn off the laser pointer, release the laser button. Note •... -
Page 23: Mounting An Accessory Lens
Handling the camera 3. Pull the transparent tape to lift out the battery. 12.7 Mounting an accessory lens Follow this procedure: 1. Note the two indents on the front of the lens and the corresponding tabs on the lens cap. 2. -
Page 24: Calibrating The Touchscreen
Handling the camera 5. Rotate the lens 30° clockwise. 6. Turn on the camera. 7. Specify the lens under Settings > Add-on lens. 12.8 Calibrating the touchscreen 12.8.1 Figure 12.8.2 Procedure Follow this procedure: 1. Push the navigation pad to display the menu system. 2. -
Page 25: Working With Images
Working with images 13.1 Saving an image 13.1.1 Image capacity This table gives information on the approximate number of infrared (IR) and digital cam- era (DC) images that can be saved on memory cards: IR + DC + 30 seconds IR only Card size IR + DC... -
Page 26: Example 2
Working with images 13.3.3 Example 2 This figure shows two infrared images of an isolator in a power line. In the left image, the cold sky and the power line structure are recorded at a minimum temperature of –26.0°C (–14.8°F). In the right image, the maximum and minimum tem- perature levels have been changed to temperature levels near the isolator. -
Page 27: General
Working with images 13.5.2 Procedure Follow this procedure: 1. Push the navigation pad to display the menu system. 2. Use the navigation pad to go to Color. 3. Push the navigation pad. 4. Use the navigation pad to select a different color. 5. - Page 28 Working with images 4. Select Device settings and push the navigation pad. 5. Select Reset options and push the navigation pad. 6. Select Delete all saved images and push the navigation pad. #T559845; r. AA/ 8324/8526; en-US...
-
Page 29: Working With Image Modes
Working with image modes 14.1 General You can choose between different image modes when capturing an image. 14.2 Types of image modes These are the image modes you can choose from: Thermal MSX (Multi Spectral Dynamic Imaging): Using this mode, the camera captures infrared im- ages where the edges of the objects are en- hanced. -
Page 30: Procedure
The data for all image modes are saved when saving an image. Therefore, if you open an image in, e. g., FLIR Tools or in the image archive you can still change the image mode. #T559845; r. AA/ 8324/8526; en-US... -
Page 31: Working With Measurement Tools
Working with measurement tools 15.1 Laying out measurement tools in live mode 15.1.1 General To measure a temperature, you use one or more measurement tools, e.g., a spotmeter or a box. The camera is equipped with a number of preset measurement tools. 15.1.2 Procedure Follow this procedure: 1. -
Page 32: Moving And Resizing Measurement Tools
Working with measurement tools 15.3 Moving and resizing measurement tools 15.3.1 General You can move and resize measurement tools in various ways. 15.3.2 Procedure Note This procedure assumes that you have laid out at least one measurement tool on the screen. An exist- ing spotmeter is used as an example. - Page 33 Working with measurement tools 3. On the toolbar, select one of the following and change the parameter to the desired value: • Emissivity. • Reflected temperature. • Object distance. #T559845; r. AA/ 8324/8526; en-US...
-
Page 34: Working With Alarms
Working with alarms 16.1 Working with color alarms 16.1.1 General A color alarm applies a contrasting color to all pixels with a temperature above, below, or between one or more set temperature levels. Using a color alarm is a good method to easily discover anomalies in an infrared image. 16.1.2 Procedure Follow this procedure: 1. -
Page 35: Working With Condensation Alarms
Working with alarms 4. Use the navigation pad to select Insulation alarm. This displays a dialog box. 5. Use the navigation pad to set the following parameters: • Outdoor temperature: The current outdoor temperature. • Indoor temperature: The current indoor temperature. •... -
Page 36: General
A voice annotation is an audio recording that is stored in an infrared image file. The voice annotation is recorded using a Bluetooth headset. The recording can be played back in the camera, and in image analysis and reporting software from FLIR Systems. - Page 37 Annotating images Follow this procedure: 1. Push to open the image archive. 2. Push the navigation pad up/down or left/right to select the image to which you want to add a voice annotation. 3. Push the navigation pad to open the image. 4.
-
Page 38: General
Recording video clips 19.1 General You can record non-radiometric video clips in the following image modes: • Thermal MSX. • Thermal. • Picture-in-picture. • Digital camera. The video clips can be played back in Microsoft Windows Media Player, but it will not be possible to retrieve any temperature values from them. -
Page 39: Changing Settings
Changing settings 20.1 General You can change a variety of settings in the camera. You do this in the Settings dialog box. 20.2 Procedure Follow this procedure: 1. Push the navigation pad to display the menu system. 2. Use the navigation pad to go to Settings. 3. -
Page 40: Save Options
Changing settings Relative humidity Atmospheric temperature +20°C (+69°F) 20.3.2 Save options Photo as separate JPEG: This setting defines if a digital photo will be saved as a sepa- rate file with a full field of view. If this setting is disabled, the digital photo will be saved with the same field of view as the infrared image. - Page 41 Changing settings 20.3.4.1.6 Calibrate touchscreen This setting allows calibration of the touchscreen. For more information, see section 12.8 Calibrating the touchscreen, page 25. 20.3.4.2 Wi-Fi This setting defines Wi-Fi networks. For more information, see section 11 Configuring Wi-Fi, page 20. 20.3.4.3 Bluetooth &...
-
Page 42: Technical Data
For technical data on this product, refer to the product catalog and/or technical data- sheets on the User Documentation CD-ROM that comes with the product. The product catalog and the datasheets are also available at http://support.flir.com. #T559845; r. AA/ 8324/8526; en-US... -
Page 43: Cleaning The Camera
Cleaning the camera 22.1 Camera housing, cables, and other items 22.1.1 Liquids Use one of these liquids: • Warm water • A weak detergent solution 22.1.2 Equipment A soft cloth 22.1.3 Procedure Follow this procedure: 1. Soak the cloth in the liquid. 2. -
Page 44: Application Examples
Application examples 23.1 Moisture & water damage 23.1.1 General It is often possible to detect moisture and water damage in a house by using an infrared camera. This is partly because the damaged area has a different heat conduction prop- erty and partly because it has a different thermal capacity to store heat than the sur- rounding material. -
Page 45: Oxidized Socket
Application examples 23.3 Oxidized socket 23.3.1 General Depending on the type of socket and the environment in which the socket is installed, ox- ides may occur on the socket's contact surfaces. These oxides can lead to locally in- creased resistance when the socket is loaded, which can be seen in an infrared image as local temperature increase. -
Page 46: Insulation Deficiencies
Application examples 23.4 Insulation deficiencies 23.4.1 General Insulation deficiencies may result from insulation losing volume over the course of time and thereby not entirely filling the cavity in a frame wall. An infrared camera allows you to see these insulation deficiencies because they either have a different heat conduction property than sections with correctly installed insulation, and/or show the area where air is penetrating the frame of the building. -
Page 47: Draft
Application examples 23.5 Draft 23.5.1 General Draft can be found under baseboards, around door and window casings, and above ceil- ing trim. This type of draft is often possible to see with an infrared camera, as a cooler airstream cools down the surrounding surface. Note When you are investigating draft in a house, there should be sub-atmospheric pressure in the house. -
Page 48: Glossary
Glossary absorption The amount of radiation absorbed by an object relative to the re- (absorption ceived radiation. A number between 0 and 1. factor) atmosphere The gases between the object being measured and the camera, nor- mally air. autoadjust A function making a camera perform an internal image correction. autopalette The IR image is shown with an uneven spread of colors, displaying cold objects as well as hot ones at the same time. -
Page 49: Relative Humidity
Glossary image correc- A way of compensating for sensitivity differences in various parts of tion (internal or live images and also of stabilizing the camera. external) infrared Non-visible radiation, having a wavelength from about 2–13 μm. infrared isotherm A function highlighting those parts of an image that fall above, below or between one or more temperature intervals. - Page 50 Glossary span The interval of the temperature scale, usually expressed as a signal value. spectral (radi- Amount of energy emitted from an object per unit of time, area and ant) emittance wavelength (W/m /μm) temperature A value which is the result of a subtraction between two temperature difference, or values.
- Page 51 Corporate Headquarters Flir Systems, Inc. 27700 SW Parkway Ave. Wilsonville, OR 97070 Telephone: +1-503-498-3547 Website http://www.flir.com Customer support http://support.flir.com Publ. No.: T559845 Release: Commit: 8324 Head: 8526 Language: en-US Modified: 2013-07-04 Formatted: 2013-07-23...
Need help?
Do you have a question about the E Series and is the answer not in the manual?
Questions and answers