
Subscribe to Our Youtube Channel
Related Manuals for dallmeier DOMERA DDZ4010 HS/HD Series


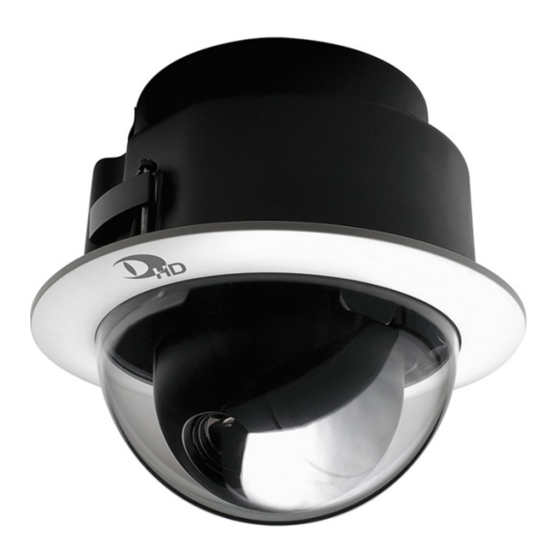
Summary of Contents for dallmeier DOMERA DDZ4010 HS/HD Series
- Page 1 Installation and Configuration English Full High-Definition High-Speed IP Network PTZ Dome Camera DDZ4010-YY/HS/HD DDZ4020-YY/HS/HD Rev. 2.0.4 / 2013-09-09...
- Page 2 Third-party trademarks are named for information purposes only. Dallmeier electronic respects the intellectual property of third parties and always attempts to ensure the complete identification of third- party trademarks and indication of the respective holder of rights. In case that protected rights are not indicated separately, this circum- stance is no reason to assume that the respective trademark is unprotected.
-
Page 3: Table Of Contents
Dome ID ......................21 Signal Transmission ..................21 Video Standard (PTZ Dome Camera) ............22 Baud Rate .....................23 Protocol ......................24 Installation and Commissioning..............25 In-ceiling Mount Variant ................25 Surface Mount Variant ..................33 Weather-proof Variant ...................37 Connection and Login ................38 System Requirements...................38 Connection ....................39 Login ......................42 www.dallmeier.com... - Page 4 SMTP Server ....................79 12.3 FTP Server ....................82 12.4 PTZ Action ....................85 12.5 Contact Out ....................87 12.6 Scheduler ......................90 12.6.1 Week Timer ....................90 12.6.2 Exceptions ....................92 12.6.3 Copy Exceptions ...................94 12.7 Copy Event Settings ..................96 12.8 Delete Event Handler ..................98 www.dallmeier.com...
- Page 5 14.3.8 Camera Setup .....................146 14.3.9 Password ....................147 14.3.10 Setup......................148 14.3.10.1 Language ....................149 14.3.10.2 Home Function....................149 14.3.10.3 View Angle ....................150 14.3.10.4 Date/Time ....................151 14.3.10.5 Data ......................156 14.3.10.6 System ......................160 14.3.10.7 Origin Offset ....................161 14.3.10.8 Dome Information ..................162 14.3.11 Run Function....................163 www.dallmeier.com...
- Page 6 RTSP Application ..................170 Maintenance ....................172 PTZ Menu Structure ..................173 Pin Assignment ..................175 19.1 Terminal Area ....................175 19.2 Weather-proof Housing ................178 Technical Specifications ................179 Technical Drawings ..................181 21.1 In-ceiling Mount Variant ................181 21.2 Surface Mount Variant ................182 21.3 Weather-proof Variant .................183 www.dallmeier.com...
-
Page 7: Introduction
This document contains detailed descriptions of the installation, connection, commission- ing and configuration of the above-mentioned devices. In addition, safety instructions, general notes and basic technical specifications are pro- vided. The target audience is trained and authorized professionals (installers). www.dallmeier.com... -
Page 8: Typographical Conventions
Expressions in bold/italics generally indicate a control element on the device (switches or labels) or on its user interface (buttons, menu entries). Paragraphs in italics provide information on basic principles, special features and efficient procedure as well as general recommendations. www.dallmeier.com... -
Page 9: Safety Instructions
System Components Only use internal components that have been tested and approved by Dallmeier. Inappropriate internal components may cause malfunctions, damages and data loss and may result in the loss of warranty. - Page 10 The housings of the units may only be opened by qualified personnel for commissioning, inspection, maintenance and repair. Disposal Do not dispose waste electrical and electronic equipment into the household trash. Disconnect the units from the power supply. Remove all connected devices. Return the units to your respective sales partner. www.dallmeier.com...
-
Page 11: General Notes
Certain functions and features may require the purchase of an additional license. Transportation and Packaging Store the original packaging for transportation at a later date. Dallmeier is not responsible for damage resulting from unprofessional/improper transpor- tation. The goods should only be shipped in their original packaging. -
Page 12: Performance Features
DDZ40(10)(20)-YY/HS/HD Performance Features • 1/3" Full HD CMOS image sensor with Dallmeier technology • Pure Digital Signal Processing • High-speed PTZ dome • 10× optical zoom (DDZ4010-YY/HS/HD) • 20× optical zoom (DDZ4020-YY/HS/HD) • 12× digital zoom • ICR function for Day/Night switching •... -
Page 13: Warranty
The following approvals/certifications were valid for all devices described in this document at the time of this document’s compilation: • CE • FCC • UL • ACA • UVV-Kassen (DGUV Test) • CB • DIN 50130-4 compliant Visit www.dallmeier.com for possible updates. www.dallmeier.com... -
Page 14: Requirements
• The accuracy of the automatic white balance (AWB) algorithm depends on the light- ing used. Mixed light (consisting of artificial light and daylight) may cause colour distortions (inaccurate colour reproduction). • Poor lighting can lead to a faulty white balance. www.dallmeier.com... -
Page 15: Views And Connection Assignment
M4 screw eye bolt Housing (BackBox) with IP I/O interface Cable entry Slot for locking tab Ventilation slots (trim ring) Slot for locking tab (trim ring) Ceiling clamp Trim ring with bubble Locking tab Fig. 5-2 www.dallmeier.com... - Page 16 PTZ dome camera USB / SDHC port Plug-in module for PTZ dome camera Connector for PTZ dome camera M4 locking screw Thread for (ceiling clamp) securing screw (PTZ dome camera) Fig. 5-4 Housing top view (with built-in plug-in module) www.dallmeier.com...
-
Page 17: Surface Mount Variant
(IP I/O interface) Locking clip for Locking clip for PTZ dome camera PTZ dome camera Thread for housing ring Ventilation slots Thread for Connector for securing screw plug-in module (PTZ dome camera) Fig. 5-6 Housing base (without plug-in module) www.dallmeier.com... - Page 18 Locking clip for PTZ dome camera PTZ dome camera Plug-in module for PTZ dome camera USB / SDHC port Connector for Thread for securing screw PTZ dome camera (PTZ dome camera) Fig. 5-8 Housing base top view (with built-in plug-in module) www.dallmeier.com...
-
Page 19: Terminal Area (Ip I/O Interface)
LAN / PoE Audio Audio GP In/Out 24 V AC RS485 Fig. 5-9 For pinout information, see chapter “Pin Assignment” on page 175. PTZ Dome 5.4.1 For Surface Mount Housing (SM) Lens M3 securing screw Slot for locking clip Fig. 5-10 www.dallmeier.com... -
Page 20: For In-Ceiling Mount Housing (Im) And Weather-Proof Housing (Wm)
For In-ceiling Mount Housing (IM) and Weather-proof Housing (WM) Lens M3 securing screw Locking clip Fig. 5-11 5.4.3 Rotary/DIP Switches Male connector Rotary switch: Dome ID (camera address 1 – 999) DIP switch: Signal transmission, Video standard, Baud rate, Protocol Fig. 5-12 PTZ dome bottom view www.dallmeier.com... -
Page 21: Basic Settings (Ptz Dome Camera)
To ensure a correct signal transmission, the PTZ dome camera has to be configured for IP based applications. If required, set the correct type of signal transmission with the DIP switch S4 (see Fig. 5-12). Signal transmission Analogue Reserved IP based Table 6-2 Signal transmission www.dallmeier.com... -
Page 22: Video Standard (Ptz Dome Camera)
IP I/O interface (via WebConfig). If required, set the video standard (as stated in the order) with the DIP switch S5 (see Fig. 5-12). Video standard NTSC Baud rate Table 6-3 Video standard (PTZ dome camera) www.dallmeier.com... -
Page 23: Baud Rate
If required, set the baud rate with the DIP switch S5 (see Fig. 5-12). Baud rate 2400 Bd 4800 Bd 9600 Bd 19200 Bd 38400 Bd 57600 Bd 115200 Bd 230400 Bd Table 6-4 Baud rate Default setting (recommended) www.dallmeier.com... -
Page 24: Protocol
IP I/O interface, the protocol type Auto (No-Parity) has to be set. If required, set the protocol type with the DIP switch S6 (see Fig. 5-12). Protocol AuTo (No-Parity) AUTO (Even-Parity) DCCP RESET Table 6-5 Protocol Dallmeier Camera Communication Protocol www.dallmeier.com... -
Page 25: Installation And Commissioning
Source (LPS) Class 2 power supply unit when operating the devices with a separate power supply unit. In-ceiling Mount Variant Tools required for installation include: • Drywall utility saw or jigsaw • Ceiling hook • Safety wire • Carabiner • Phillips screwdriver (M4) www.dallmeier.com... - Page 26 Carefully unplug the plug-in module (without using force). Trim ring Plug-in module Securing screw Securing screw Fig. 7-1 Before installing the PTZ dome camera, remove the adhesive tape and the lens protec- tion cap. Lens protection cap Adhesive tape Fig. 7-2 www.dallmeier.com...
- Page 27 Turn the cover plate counter-clockwise as far as it will go. M4 screw eye bolt Cover plate Fig. 7-3 Remove the cover plate. Terminal area (IP I/O interface) Thread for M4 screw eye bolt Keyhole shaped slot for locking bolt Cable entry Fig. 7-4 www.dallmeier.com...
- Page 28 (see Fig. 7-4). Turn the cover plate clockwise as far as it will go. Tighten the M4 screw eye bolt on the cover plate. Ensure that the cover plate is securely fixed. www.dallmeier.com...
- Page 29 Screw a ceiling hook on the supporting structure. Insert the housing into the circular recess. Attach the safety wire to the M4 screw eye bolt (use a carabiner) and the ceiling hook. Supporting structure Ceiling hook Safety wire Carabiner Fig. 7-7 www.dallmeier.com...
- Page 30 Tighten the M4 locking screw of both ceiling clamps with a Phillips screwdriver until the housing is fixed. M4 locking screw M4 locking screw (ceiling clamp) (ceiling clamp) Fig. 7-8 Ceiling clamp Ceiling clamp Suspended ceiling Phillips screwdriver Fig. 7-9 Locked ceiling clamp Locked ceiling clamp Fig. 7-10 www.dallmeier.com...
- Page 31 Step 7 Carefully insert the PTZ dome camera into the housing until it clicks into place (ensure the correct alignment of the connectors). Tighten both securing screws of the PTZ dome camera. Securing screw Securing screw Fig. 7-12 www.dallmeier.com...
- Page 32 Trim ring Slot Locking tab Trim ring Fig. 7-13 Step 9 Connect the PoE switch or the separate power supply unit to the mains socket. The device starts booting and is ready for operation after a short self-test. www.dallmeier.com...
-
Page 33: Surface Mount Variant
Loosen both securing screws of the plug-in module. Carefully unplug the plug-in module (without using force). Housing ring Securing screw (housing ring): Hexagon socket set screw with cone point DIN 914 M2.5×4 Plug-in module Securing screw Securing screw Fig. 7-14 www.dallmeier.com... - Page 34 Connect the required cables to the connectors of the terminal area (see chapter “Pin Assignment” on page 175). Mount the housing base with 3 screws to the ceiling. Ceiling Drill hole (Ø 6 mm) Cable entry Anchor Mounting screw (4×60 mm) Fig. 7-16 www.dallmeier.com...
- Page 35 Carefully insert the PTZ dome camera into the housing base until it clicks into place (ensure the correct alignment of the connectors). Tighten both securing screws of the PTZ dome camera. Securing screw Securing screw Fig. 7-18 www.dallmeier.com...
- Page 36 Tighten the securing screw of the housing ring. Fig. 7-19 Step 6 Connect the PoE switch or the separate power supply unit to the mains socket. The device starts booting and is ready for operation after a short self-test. www.dallmeier.com...
-
Page 37: Weather-Proof Variant
To ensure personnel safety and to avoid damage to the device by electri- cal surge, it is absolutely required to ground the weather-proof housing. Grounding cable Cable harness Grounding cable Grounding connection Fig. 7-20 For pinout information, see chapter “Pin Assignment” on page 175. www.dallmeier.com... -
Page 38: Connection And Login
• a more powerful PC is required if several devices are configured with live video display (and/or live audio output) simultaneously. • a DirectX compatible graphics card and the ActiveX-based Dallmeier control are not required for the configuration without live video display or live audio output. -
Page 39: Connection
D Hide/show panel bar (hide or show all panels in the left workspace area) E IP address of device F Log out of configuration mode G Panel camera control (Zoom +/−, Pan/Tilt) H Panel Preset position (call stored Presets 1 – 8) Panel Miscellaneous (Connection method UDP/TCP) www.dallmeier.com... - Page 40 If your computer mouse is equipped with a mouse wheel, you can zoom in or out of the scene by simply scrolling the wheel. For this, first move the mouse pointer over the live video and then scroll the mouse wheel. www.dallmeier.com...
- Page 41 If no preset is yet stored with the selected list item, “Empty Data” is displayed in the live video and no PTZ operation is carried out. For more information about presets, refer to chapter “PTZ Configuration” on page 104 or section “Position Preset” on page 109. www.dallmeier.com...
-
Page 42: Login
Notice Risk of misuse by unauthorized users! Change the factory default admin password as soon as possible. Click coNFiG in the user interface of the live mode. The login dialogue is displayed. Fig. 8-4 Dallmeier Video Protocol www.dallmeier.com... - Page 43 J Configuration dialogues Note that • the live video display and live audio output in the configuration mode can be disabled if only a low bandwidth is available. • a new login is required after 5 minutes without user action. www.dallmeier.com...
-
Page 44: Basic Settings
However, the time zone must be set in both cases. Open the time settings dialogue via common Settings > time .. Select the time zone tab. Fig. 9-2 Set the time zone. Confirm with oK. www.dallmeier.com... -
Page 45: Manual Configuration
If using the host name instead of the IP address, ensure that the Domain Name System (DNS) settings are correctly configured (see section “Domain Name System (DNS)” on page 55). Contact your network administrator for more information and assistance. www.dallmeier.com... -
Page 46: Camera Name
Group login Group password User login User name + user password Group password LDAP login LDAP user name + LDAP user password The authentication with the group password is also possible in “User login” mode. Dallmeier Video Management Software www.dallmeier.com... -
Page 47: Group Login
• a login of the local user groups Group 2: user and Group 3: guest is only possible after a password has been defined. Open the User groups dialogue via common settings > User management > User groups ..Fig. 9-7 www.dallmeier.com... -
Page 48: User Login
Select the tab of the relevant group. Click New. The New user dialogue is displayed. Fig. 9-9 Enter a new User name. Enter a New password. Repeat the new password in the Confirm password field. Finally, confirm with oK. www.dallmeier.com... -
Page 49: Ldap Login
The group prefix is a user-definable expression (for example, myhostname), however, it is required. This allows administrators to assign different user groups and, thus, variable user rights to multiple simultaneously installed LDAP clients of the same system design (e.g. Dallmeier cameras described here). The available group suffixes are fixed expressions:... - Page 50 Base DN (Distinguished Name, search base on the LDAP server); Object location in the LDAP directory hierarchy Example: ou=department,dc=example,dc=com LDAP filter: Default entry: (sAMAccountName=%UNam%) Default entry: memberOf LDAP attributes: Enter the relevant data to access the LDAP server. www.dallmeier.com...
- Page 51 (member of group 1). Click Start test. After a successful test, confirm with oK in order to save the settings. From this point in time, only authorized LDAP users are able to log into the device (now the LDAP client). www.dallmeier.com...
-
Page 52: Rights
• certain permission levels can not be set for all rights. • certain rights are partially or fully relevant for external applications only (e.g. for the DaVid Protocol). Open the Rights configuration dialogue via common settings > User management > Rights ..Fig. 9-12 www.dallmeier.com... - Page 53 Find the relevant right (row). Change the permission level with a click on the symbol in the column of the relevant group. Proceed as described above for all rights and groups. Finally, confirm with oK. www.dallmeier.com...
-
Page 54: Network
Incorrect settings may result in the device being no longer available via the network. Contact your network administrator for more information and assistance. For troubleshooting purposes, write down the MAc address and all new settings before changing the configuration. www.dallmeier.com... - Page 55 (myhostname). Search domains (max. 5 allowed, separated by spaces) are useful if a defined alarm host or UTC time server is not located in your specified domain name. www.dallmeier.com...
-
Page 56: Manual Configuration
The newly assigned network settings can be determined by the MAC address of the de- vice using the IP-Finder or on the DHCP server. The IP-Finder must be executed in the same LAN in which the device is located. 10) IP-Finder: Dallmeier software for the determination and configuration of network-compatible Dallmeier devices www.dallmeier.com... -
Page 57: Streaming
The (static) video server exclusively transports the IP packets via uDP (User Datagram Protocol). Note that • UDP allows for a smooth and fast data transmission with relatively low delays. • packet losses (lack of images) can occur during the transmission. www.dallmeier.com... -
Page 58: Transfer Method
The data packets are provided with the specified destination IP address and port number and transferred to exactly one receiver (client) in the network via a point-to-point connec- tion. The receiver will only receive the data packets if the appropriate application service is available at the specified port number. www.dallmeier.com... -
Page 59: Ttl
Dynamic Servers A dynamic server is created whenever a UDP or TCP data transmission is actively re- quested, for example, via the ActiveX-based Dallmeier control, the DaVid Protocol, the Real Time Streaming Protocol (RTSP) or via SMAVIA Viewing Client. The Dynamic servers tab provides information about the currently created dynamic serv- ers. -
Page 60: Audio Client
PC) to the audio client in the camera using the DaVid Protocol. The camera decodes the incoming audio data and outputs the generated analogue audio signals via the analogue Audio OUT interface of the camera (e.g. via a connected speak- er). www.dallmeier.com... -
Page 61: Rtsp
RTP/RTSP/TCP packets from the internet to the local area network. • With RTSP the transmission of RTP streams can be embedded in the existing RTSP/ TCP connection; a separate UDP transmission or an additional port for the RTP data stream is not necessary. www.dallmeier.com... - Page 62 (amount of images saved). A large RTSP buffer is only recommended in case of short-term network overloads. In case of a permanent network overload a smaller buffer as well as lower bit rates are recommended for the individual encoder settings. www.dallmeier.com...
-
Page 63: Video
(via WebConfig). Open the Video standard dialogue via Video > Video standard ..Fig. 11-1 Note that this dialogue may be locked by external devices/applications. Select a Standard. Confirm with oK. www.dallmeier.com... -
Page 64: Sensor
Open the Sensor settings dialogue via Video > Sensor ..Fig. 11-2 Note the explanations below. Set the relevant options. Finally, confirm with oK. You can restore the factory sensor settings at any time by clicking “Default”. www.dallmeier.com... -
Page 65: Global
−3 to 18 dB Defines the maximum amount of electrical gain with which the amplitude of the incoming signal is increased. Useful in low light situations. The higher the gain the more image noise may occur. Only adjustable with manual exposure control. www.dallmeier.com... - Page 66 Recommended in low-light conditions and with low contrast subjects or with subjects not located in the central measurement area. • AF (one Push) Automatic focusing is not carried out until a new trigger command is sent by the user (e.g. pan, tilt, zoom, execute one push focus button). www.dallmeier.com...
-
Page 67: Image Optimization
Reproduces images more lively and with more depth. • cinema type 2 In addition to the features of “Cinema Type 1”, this setting is especially suitable for scenes with a high dynamic range, which provides a reproduction of a deeper black. www.dallmeier.com... - Page 68 Flat gamma curve > smoother distribution of brightness values, lower contrast • S-curve Mid Gamma curve with moderate gradient > medium contrast • S-curve High Steeply rising gamma curve > stronger image characteristics, high contrast Effect • None • Negative • Black-and-white www.dallmeier.com...
-
Page 69: White Balance
(Apply white balance button), assuming that a white or neutral grey subject (as reference value), in correct lighting conditions, is located in more than a half of the entire image. The “One Push” white balance value is lost if the device is turned off. www.dallmeier.com... - Page 70 Manual White Balance (MWB) for manual adjustment of red and blue gain (see below). Red Gain Manual adjustment of red gain with white balance mode Manual, 256 steps (0 – 255). Blue Gain Manual adjustment of blue gain with white balance mode Manual, 256 steps (0 – 255). www.dallmeier.com...
-
Page 71: Day/Night
Possible values: 0 – 28 (Default: 12) Higher level: The camera switches earlier to night mode (ICR ON) and later to day mode (ICR OFF). Lower level: The camera switches later to night mode (ICR ON) and earlier to day mode (ICR OFF). www.dallmeier.com... -
Page 72: Encoder Settings
Select the frame rate from the drop-down list Frames/Second. Select the Resolution (width × height in pixels). Select the Bitrate. Select the Bitrate mode. Select the GoP-size (only with H.264). Confirm with oK. www.dallmeier.com... - Page 73 Variable bit rates allow for a higher image quality while simultaneously enabling a better use of both available hard disk storage space and transmission capacities. A constant bit rate on the other hand allows for a more precise calculation of required storage capacity. www.dallmeier.com...
- Page 74 “Deinterlacing”. However, the playback thus may be jumpy. In this case disabling this function may, in certain circumstances, result in a smoother playback. www.dallmeier.com...
-
Page 75: Encoder 2
The higher the audio bit rate, the better the audio quality. However, a higher bit rate always requires a higher bandwidth usage (transmission capacity) and more hard disk storage space than a lower bit rate. www.dallmeier.com... -
Page 76: Event Management
Select the action type which is supposed to be executed when a defined event occurs (is triggered) from the drop-down list Action. Set the required settings for the selected action type (see below). Activate the active checkbox to enable the event handling. Finally, confirm with oK. www.dallmeier.com... -
Page 77: David Alarm Host
Fig. 12-2 Enter the iP address of the alarm host to which the event-triggered DaVid messages are supposed to be sent to. 11) Dallmeier evaluation and management software for event messages www.dallmeier.com... - Page 78 Select the trigger tab. Fig. 12-3 contact status: Status change of Contact IN 1, 2 or 3 Select all relevant triggers which are supposed to be sent out as event messages by activating the related checkboxes. Finally, confirm with oK. www.dallmeier.com...
-
Page 79: Smtp Server
If necessary, enter the User name and the Password for the SMTP authentication. Enter the Sender. Enter the e-mail addresses of the Recipients (separated by semicolons) to which the SMTP server is supposed to forward the event-triggered e-mails. Enter the Subject and the Message of the e-mail. www.dallmeier.com... - Page 80 MJPEG encoding (see section “Encoder Settings” on page 72). Click test to check your configuration by sending a test e-mail. The test was successful if a new e-mail from the device is in your specified e-mail ac- count. www.dallmeier.com...
- Page 81 Contact IN 3 (NC, Normally Closed) has been opened contact status: Status change of Contact IN 1, 2 or 3 Select all relevant triggers which are supposed to be sent out as event messages by activating the related checkboxes. Finally, confirm with oK. www.dallmeier.com...
-
Page 82: Ftp Server
The oldest image in the directory will be overwritten after a certain number of upload- ed images (Ringbuffer size). • Filename + number + .jpg Existing images in the directory will not be overwritten. • Filename + date + .jpg Existing images in the directory will not be overwritten. www.dallmeier.com... - Page 83 The used encoder must be enabled (“Encoder 2” is disabled by default) and configured for MJPEG encoding (see section “Encoder Settings” on page 72). Click test to check your configuration. The test was successful if a new JPEG image is uploaded to the FTP directory you specified. www.dallmeier.com...
- Page 84 The less the duration between two FTP image uploads is set, the more the network utili- zation rate (traffic level, bandwidth consumption) may increase. Select all relevant triggers which are supposed to initiate an FTP image upload by activating the related checkboxes. Finally, confirm with oK. www.dallmeier.com...
-
Page 85: Ptz Action
Action” on page 131 for additional information. To previously test a stored PTZ alarm action, activate the related checkbox and click the test button. However, note that only one PTZ alarm action is permitted to be active for a correct test. www.dallmeier.com... - Page 86 Contact IN 3 (NO, Normally Open) has been closed contact 3 opened: Contact IN 3 (NC, Normally Closed) has been opened Note the chapter “Pin Assignment” on page 175. Select all relevant triggers by activating the related checkboxes. Finally, confirm with oK. www.dallmeier.com...
-
Page 87: Contact Out
Note the section “Contact OUT” on page 100 and the chapter “Pin Assignment” on page 175. Fig. 12-10 Select the relevant Contact OUT interface which status is supposed to be changed if an event occurs from the drop-down list contact. www.dallmeier.com... - Page 88 Select the trigger tab. Fig. 12-11 Remote control: Remote status change of Contact OUT (via DaVid Protocol, e.g. SMAVIA Viewing Client, see below) Select all relevant triggers by activating the related checkboxes. Finally, confirm with oK. www.dallmeier.com...
- Page 89 Recorder > Relay > Relay 1 (or equivalent name). The status of the Contact OUT interface of the device is changed. To change the status of the Contact OUT interface of the device again, repeat the last step. www.dallmeier.com...
-
Page 90: Scheduler
Click inactive. In the week timer, click and hold the left mouse button and draw a rectangle over a relevant period. Release the mouse button. Repeat the last two steps until all relevant inactive periods are selected. www.dallmeier.com... - Page 91 Repeat the last two steps until all relevant inactive periods are deleted. It is also possible to delete sections (at least 15 minutes) between inactive periods. Confirm with oK if you do not want to make any additional settings. www.dallmeier.com...
-
Page 92: Exceptions
Note that exceptions will overwrite the settings of the entire relevant day in the week timer. Select the exceptions tab. Fig. 12-14 Click New ..The calendar is displayed. Fig. 12-15 Select a date. Confirm with oK. The selected date is added to the exceptions list. www.dallmeier.com... - Page 93 In the example shown (Fig. 12-17) the period from 02:00 to 06:00 am is active. During this period messages are sent out and alarm actions are executed. Confirm with oK if you do not want to make any additional settings. www.dallmeier.com...
-
Page 94: Copy Exceptions
Click copy ..The calendar is displayed. Fig. 12-18 Select the new date to which you want to copy the exception settings. Confirm with oK. The new date with the copied exception settings is added to the exceptions list. www.dallmeier.com... - Page 95 DDZ40(10)(20)-YY/HS/HD Fig. 12-19 To delete exceptions, select the relevant date in the exceptions list and click “Delete”. Confirm with oK if you do not want to make any additional settings. www.dallmeier.com...
-
Page 96: Copy Event Settings
The copy function allows you to copy saved event settings to other event handlers. Click event management in the configuration menu. Click on a saved event handler item in the configuration menu. The related dialogue is displayed. Fig. 12-20 Click copy ..www.dallmeier.com... - Page 97 The configuration menu is expanded with the name of the copied event handler with the addition (1) (represents copy 1) and the related dialogue of the copy is displayed. Fig. 12-21 Customize the relevant settings. Finally, confirm with oK. www.dallmeier.com...
-
Page 98: Delete Event Handler
Click event management in the configuration menu. In the configuration menu, click on an event handler you want to delete. The related dialogue is displayed. Fig. 12-22 Click Delete. The event handler is deleted and its menu item removed from the configuration menu. www.dallmeier.com... -
Page 99: Interfaces
Fig. 13-1 Select crosslink from the drop-down list Function to enable the control signal loop- through connection. Select the following settings: Mode: RS485 Baud: 9600 (recommended) Bits: Parity: none Stop Bits: Protocol: none Finally, confirm with oK. www.dallmeier.com... -
Page 100: Contact Out
Contact OUT interface is set to its basic state (see below) again. Basic state Select the basic state voltage level of the Contact OUT interface from the drop-down list Basic state. Finally, confirm with oK. www.dallmeier.com... -
Page 101: Data Display
Select the Duration. Confirm with oK. The externally transferred data is embedded in the current image (frame) that is captured exactly at the moment when the data is received and stays embedded for the selected Duration (frames). www.dallmeier.com... -
Page 102: Position
> Data display > Position ..Fig. 13-4 The right-hand side of the dialogue (blue rectangle with Dallmeier logo) represents a exemplary screen for displaying live videos with full “PAL” or “NTSC” resolution. Note that the aspect ratio and size (resolution) of the actual screen depend on the used client. - Page 103 The display area can be resized by dragging its yellow corner (in the bottom right). Fig. 13-6 An exact positioning and resizing is possible by using the corresponding input fields. Adjust all relevant settings and confirm with oK. www.dallmeier.com...
-
Page 104: Ptz Configuration
To be able to control and configure the PTZ dome camera via the IP I/O interface, the Dome ID = 1 has to be set (see section “Dome ID” on page 21). Click PTZ Configuration ... in the configuration menu to open the PtZ control dia- logue. Fig. 14-1 www.dallmeier.com... - Page 105 E Select preset number (1 – 8) F Reset PTZ configuration to factory settings G Save current position (incl. zoom, iris and focus settings) with selected preset number H Exit submenu without saving, close main menu Restore saved preset www.dallmeier.com...
-
Page 106: Boot Sequence
DDZ40(10)(20)-YY/HS/HD 14.1 Boot Sequence The boot sequence displays information about the PTZ dome camera for service or trou- ble shooting purposes. Dallmeier HD-PTZ Ver. :V1.0 Ver. :V1.38 FPGA Ver. :V1.8 :0001 Baud rate :9600 bps Protocol :DCCP Tilt :Origin set OK... -
Page 107: Normal Display (Osd)
Click Zoom − (WIDE) to zoom out. Click iris + (IRIS OPEN) to open the iris. Click Iris − (IRIS CLOSE) to close the iris. Click Focus + (FAR) for far focusing. Click Focus − (NEAR) for near focusing. www.dallmeier.com... -
Page 108: Dome Menu (Main Menu)
Click iris + (IRIS OPEN) to open a submenu, to execute a command or to save set- tings. Click Iris − (IRIS CLOSE) to exit a (sub)menu (without saving). Click Back (ESC) to exit a (sub)menu without saving or to close the main menu. www.dallmeier.com... -
Page 109: Position Preset
“D/N Trigger Control” on page 112). Execute Save and Exit to save the settings and exit the submenu. To call a stored position preset directly from the dome menu, go to Run Function in the main DOME MENU. www.dallmeier.com... -
Page 110: Edit Title
Click iris + or Zoom + / Zoom − to set the selected character. The cursor in the title line moves to the next digit position automatically. To delete all characters, select and execute Delete All. Execute Save and Exit. www.dallmeier.com... -
Page 111: Edit Position
Angles of PAN,TILT ---.-,---.- Zoom factor --.-X Edit the position ( ~ € | }), the zoom factor (Zoom + / Zoom −) and the focus (Focus + / Focus −). Click iRiS + to save the settings. www.dallmeier.com... -
Page 112: D/N Trigger Control
Only effective with Trigger mode Auto. Higher level: The camera switches earlier to night mode (ICR ON) and later to day mode (ICR OFF) Lower level: The camera switches later to night mode (ICR ON) and earlier to day mode (ICR OFF). www.dallmeier.com... -
Page 113: Camera Preset
Adjust the focus control parameter settings (see section “Focus Control” on page 119). Select a gamma setting (see section “Gamma” on page 120). If necessary, select the digital noise reduction level (Noise Filter, DDZ4020-YY/HS/HD only) Finally, execute Save and Exit. www.dallmeier.com... -
Page 114: Ae Control
Fixed Shutter speed (59.94/NTSC: 1/60 sec, 50/PAL: 1/50 sec) MANUAL: Variable Shutter speed, Iris and Gain SHUTTER: Variable Shutter speed, Auto Iris and Gain IRIS: Variable Iris, Auto Gain and Shutter speed Iris: F1.8 – Close (DDZ4010-YY/HS/HD) Iris: F1.6 – Close (DDZ4020-YY/HS/HD) www.dallmeier.com... - Page 115 1/1 sec. applies only for the DDZ4020-YY/HS/HD. Slow shutter speeds are useful in low-light conditions, but may result in motion blur with fast moving objects. When slow shutter speeds are used, auto-focus and white balance may not function fully (this only applies for the DDZ4010-YY/HS/HD). www.dallmeier.com...
- Page 116 Defines the brightness level. See descriptions of BRIGHT mode. Selectable in BRIGHT mode only. Sharpness 0 – 15 Influences the perceived sharpness by edge enhancement. The higher the value, the more the edges in the image will be enhanced. www.dallmeier.com...
-
Page 117: Wb Control
(Execute ONE PUSH), assuming that a white or neutral grey subject (as reference value), in correct lighting conditions, is located in more than a half of the entire image. The “One Push” white balance value is lost if the device is turned off. www.dallmeier.com... - Page 118 (high-pressure gas discharge lamps). MANUAL: Manual adjustment of (R)ed and (B)lue Gain, 256 steps each. R GAIN Red Gain (0 – 255) Adjustable in MANUAL mode only. B GAIN Blue Gain (0 – 255) Adjustable in MANUAL mode only. www.dallmeier.com...
-
Page 119: Focus Control
AF Sensitivity (DDZ4020-YY/HS/HD only) Normal: Default setting, recommended for scenes with frequently moving objects. Usually, this is the most appropriate mode. Low: Improves the focus stability in low-light conditions. Auto-focus is not carried out even when the brightness level changes. www.dallmeier.com... -
Page 120: Gamma
Linear gamma curve (gamma value is 1) > no gamma correction S-Curve Low: Flat gamma curve > smoother distribution of brightness values, lower contrast S-Curve Mid: Gamma curve with moderate gradient > medium contrast S-Curve High: Steeply rising gamma curve > stronger image characteristics, high contrast www.dallmeier.com... -
Page 121: Scan
Set the scan direction. Set the swap option. Set the dwell time. Execute Save and Exit. To run a stored scan directly from the dome menu, go to Run Function in the main DOME MENU. www.dallmeier.com... -
Page 122: Tour
Select the predefined function number (NO). Select the speed (SP) and the dwell time (DW). Execute Save and Exit. To run a stored tour directly from the dome menu, go to Run Function in the main DOME MENU. www.dallmeier.com... - Page 123 (Tour 04 in Tour 02 will be skipped in Tour 01) Tour 02 executes as follows: Preset 05 -> Preset 06 -> Preset 08 -> Preset 05 -> Pattern 01 -> Preset 05 … (Tour 04 is still valid if called directly from Tour 02) www.dallmeier.com...
-
Page 124: Pattern
Click iris +, to open the PATTERN AREA SETUP menu. The recording starts. PATTERN AREA SETUP CONTROL :XXX SEC Total:XXX SEC Press IRIS-OPEN to Save ---.- ---.- --.-X Scan the relevant area. Click iris + to save the recording. www.dallmeier.com... - Page 125 If the total recording time reaches 480 seconds, the recording is stopped automatically. When you start to record again, the previous data will be overwritten. Execute Save and Exit. To run a stored pattern directly from the dome menu, go to Run Function in the main DOME MENU. www.dallmeier.com...
-
Page 126: Actions
Clear Alarm List Exit Current cursor position Schedule Action Click the selectors ~ € (Joystick up/down) to select a menu item. Click the selectors | } (Joystick left/right) or click iris + (IRIS OPEN) to open a sub- menu. www.dallmeier.com... -
Page 127: Schedule Action
Select the action day(s) during which the selected function is supposed to be executed automatically (see section “Edit Day” on page 129). Set the start time the selected function is supposed to be executed automatically. Execute Add Action To List. www.dallmeier.com... - Page 128 So do not forget to program a second action for the Day/Night and the Alarm Out options. The function types D/N:COLOR, D/N:BW and D/N:AUTO change the camera setup con- figuration and do not affect a position preset. So we recommend to set another position preset for the night. www.dallmeier.com...
- Page 129 The action will not occur on that day of the week. OFF: Sets all days to ON for your convenience. All On All Off Sets all days to OFF for your convenience. Select the relevant day. Select the relevant option. Execute Save and Exit. www.dallmeier.com...
-
Page 130: Schedule Action List
Exit LIST ACTION ALL, PRESET, SCAN, PATTERN, TOUR, AUTO PAN, ALARM OUT, ALARM IN, D/N:BW, D/N:COLOR, D/N:AUTO Select the LIST ACTION type to sort the action list. Select Previous or Next to list previous or next actions. www.dallmeier.com... -
Page 131: Alarm Action
2, 5, 10, 20, 30, 40, 50, 60, 120 seconds, UNL(imited) 3 levels of priority are available. 1 is the highest priority Every priority level should be set only once. The function of lower priority alarms won’t be serviced until the function of higher priority alarms is completed. www.dallmeier.com... -
Page 132: Alarm List
A001: Alarm input 01, A002: Alarm input 02 A003: Alarm input 03 Select Previous or Next to list previous or next alarms. This ALARM LIST is not cleared by the Factory Default function (see section “Data” on page 156). www.dallmeier.com... -
Page 133: Clear Alarm List
DDZ40(10)(20)-YY/HS/HD 14.3.6.5 Clear Alarm List Clear Alarm List Are you sure ? > Select YES to clear the alarm list. www.dallmeier.com... -
Page 134: Screen Menu
Edit Dome Title Exit Current cursor position Area Title Click the selectors ~ € (Joystick up/down) to select a menu item. Click the selectors | } (Joystick left/right) or click iris + (IRIS OPEN) to open a sub- menu. www.dallmeier.com... -
Page 135: Area Title
If the PTZ dome camera is positioned over 90° vertically, first move the PTZ dome cam- era to 90° vertically. Otherwise, the PTZ dome camera moves to 90° vertically automati- cally when you edit the start and end position. www.dallmeier.com... -
Page 136: Privacy Zone
Pay attention to the available methods for each Privacy Zone item, as described above. Select the number (NO) of the Privacy Zone item. Depending on the selected method (POLYGON, or other method), there are two different procedures for defining the Privacy Zone (see below). www.dallmeier.com... - Page 137 Press IRIS-OPEN to SetPoint 1 ---.-,---.- --.-X Move the first corner point of the polygonal Privacy Zone to the required position using the selectors ~ € | }. PRIVACY AREA SETUP CONTROL Press IRIS-OPEN to SetPoint 1 ---.-,---.- --.-X www.dallmeier.com...
- Page 138 PRIVACY AREA SETUP CONTROL Press IRIS-OPEN to SetPoint 2 ---.-,---.- --.-X Click iRiS + to save the settings. The third corner point of the polygonal Privacy Zone is displayed. PRIVACY AREA SETUP CONTROL Press IRIS-OPEN to SetPoint 3 ---.-,---.- --.-X www.dallmeier.com...
- Page 139 Move the fourth corner point of the polygonal Privacy Zone to the required position us- ing the selectors ~ € | }. PRIVACY AREA SETUP CONTROL Press IRIS-OPEN to SetPoint 4 ---.-,---.- --.-X Click iRiS + to save the settings. www.dallmeier.com...
- Page 140 01 Privacy Zone 1 POLYGON BLU None None None None None None None Save and Exit Set the required colour and zoom trigger settings for the new polygonal Privacy Zone (see section “Colour and Zoom Trigger” on page 143). www.dallmeier.com...
- Page 141 The default position and size of the Privacy Zone is displayed. PRIVACY AREA SETUP CONTROL MOVE MASK AND IRIS-OPEN ---.-,---.- --.-X Move the Privacy Zone to the required position using the selectors ~ € | } . PRIVACY AREA SETUP CONTROL MOVE MASK AND IRIS-OPEN ---.-,---.- --.-X www.dallmeier.com...
- Page 142 POLYGON BLU None None None 05 Privacy Zone 2 BLOCK None None None Save and Exit Set the required colour and zoom trigger settings for the new polygonal Privacy Zone (see section “Colour and Zoom Trigger” on page 143). www.dallmeier.com...
- Page 143 Finally, execute Save and Exit. Note that the masking of the Privacy Zone is not displayed in the OSD configuration mode. To test the masking of the Privacy Zone and the zoom trigger function, you have to exit the OSD configuration menu. www.dallmeier.com...
-
Page 144: Display
Every 90° of clockwise rotation will change the title to: →E (East), →S (South), →W (West) If using the ON/OFF option frequently, it is recommended to set “North” as a preset. Recall the “North” preset before enabling the directional title. www.dallmeier.com... -
Page 145: Edit Dome Title
You can assign up to 8 characters (see section “Edit Title” on page 110). EDIT TITLE DOME ID- 1234567890 Space ABCDEFGHIJ Backspace KLMNOPQRST Insert UVWXYZ()-/ Delete abcdefghij Delete All klmnopqrst Exit uvwxyz*,.: Save and Exit Blinking cursor (-) Digit position Yellow cursor (D) Current cursor position www.dallmeier.com... -
Page 146: Camera Setup
This option allows you to reset the configuration of the camera module to the factory default settings. Load Camera Defaults Are you sure ? > Select YES and click iRiS + if you want to load the camera default settings. www.dallmeier.com... -
Page 147: Password
If the passwords don’t match, the message “Passwords do not match” is displayed. If so, try it again. If Enable Password is set to ON, the INPUT PASSWORD screen is always displayed when trying to enter the main DOME MENU. INPUT PASSWORD:0 UP/DOWN to Change TELE/OPEN to Enter RIGHT to Move www.dallmeier.com... -
Page 148: Setup
Dome Information Exit Current cursor position Language Click the selectors ~ € (Joystick up/down) to select a menu item. Click the selectors | } (Joystick left/right) or click iris + (IRIS OPEN) to open a sub- menu. www.dallmeier.com... -
Page 149: Language
The number is only displayed if the function was predefined before. 010 – 240 seconds (in 10 sec steps) Waiting Time Enable / Disable home function Enable To run the “home” function directly from the dome menu, go to Run Function in the main DOME MENU. www.dallmeier.com... -
Page 150: View Angle
Set the pan limit first before setting positions presets, scans and patterns. When you enter the pan limit mode, the PTZ dome camera moves to 90° vertically auto- matically if the PTZ dome camera is positioned over 90° vertically. www.dallmeier.com... -
Page 151: Date/Time
Only when you change the time and date, the clock starts to operate. The date and time can be displayed in the video image if the Date/Time option is set to ON in the display menu (see section “Display” on page 144). www.dallmeier.com... - Page 152 FIXED: The daylight saving time occurs on the same date each year. DAYLIGHT SAVING Type :FIXED START Month:MAR Week :---- ---- Time :01:00 AM 02:00 AM Save and Exit Configure the required settings and execute Save and Exit. www.dallmeier.com...
- Page 153 Number :NEW Type :RELATIVE Month :NOV Week :4th :THU Add Holiday Delete Holiday Exit FIXED: The holiday occurs on the same date each year. EDIT HOLIDAY Number :NEW Type :FIXED Month :JAN Week :---- Add Holiday Delete Holiday Exit www.dallmeier.com...
- Page 154 Are you sure ? > Select Yes and click iris + if you want to delete the holiday. The next number is displayed at the Number field. If no number exists, NEW is displayed at the Number field. www.dallmeier.com...
- Page 155 LIST HOLIDAYS:ALL > FIXED :01/01/2009 RELATIVE :11/20/2008 Previous Next Exit ALL, each month (JAN – DEC) List Holiday Select the LIST HOLIDAYS type to sort the holiday list. Select Previous or Next to list previous or next holidays. www.dallmeier.com...
-
Page 156: Data
• Time and date • Installation (see section “System” on page 160) • Alarm list Factory Default Are you sure ? > Select Yes and click iris + if you want to reset the stored data to the factory default settings. www.dallmeier.com... - Page 157 Data will not be affected. Execute Erase. ERASE PROGRAMMED DATA Are you sure ? > Select YES and click iRiS + if you want to erase the selected data from the EEPROM of the PTZ dome camera. www.dallmeier.com...
- Page 158 If the connector board has no backup memory, the message No Memory Option! is displayed. Restore Data Version :Vx.x Camera :xxxx Are you sure ? > Select YES and click iRiS + if you want to restore the saved PTZ dome camera set- tings from the backup memory. www.dallmeier.com...
- Page 159 If the connector board has no backup memory, the message No Memory Option! is displayed. Clear Backup Data Version :Vx.x Camera :xxxx Are you sure ? > Select YES and click iRiS + if you want to clear all data of the backup memory. www.dallmeier.com...
-
Page 160: System
Save and Exit 0 – 3 Xxxx Dome ID set by the rotary switches S1 – S3 xxx: (see section“Dome ID” on page 21) Changing Dome ID will reboot the Dome. New Dome ID is Xxxx Are you sure ? > www.dallmeier.com... -
Page 161: Origin Offset
Press IRIS-OPEN to Save ---.-,---.- --.-X Move the PTZ dome camera to the required position. Click iris + to save the position as new origin position. In order to enable the ORIGIN OFFSET set the Enable option to Enable. www.dallmeier.com... -
Page 162: Dome Information
H/W Ver. Software version S/W Ver. Version of FPGA (Field Programmable Gate Array) FPGA Ver. Type of camera module Camera Type of connection board Con. Type ID of PTZ dome camera Set baud rate Baud rate Set protocol type Protocol www.dallmeier.com... -
Page 163: Run Function
In order to be able to execute a function, the function must be defined first. When the Function type HEATER is run, the TTL (transistor-transistor logic) output of the connector is set to the highest level for 5 minutes. www.dallmeier.com... -
Page 164: Service And Info
15.1 Downloads This dialogue allows you to download the following files directly from the device: • Dallmeier Live Video ActiveX • MIB file of the device for SNMP applications The Simple Network Management Protocol (SNMP) is an application-layer protocol used to manage and monitor network elements (cameras, recorders, routers, switches, print- ers, etc.) with a Network Management System (NMS). -
Page 165: Licenses
Licenses The License dialogue allows you to activate possible extra features. For information about available extra features contact the Dallmeier Support. For purchasing license codes, contact the Dallmeier Sales Department. Open the License dialogue via Service > License .. -
Page 166: Configuration File
Select all relevant settings which are to be exported to the configuration file by activat- ing the related checkbox. Confirm with oK. Follow the instructions of the download dialogue and save the configuration file to a data storage device. The configuration file name contains the IP address of the related device. www.dallmeier.com... -
Page 167: Upload
Service > Configuration file > Upload ..Fig. 15-6 Click Browse…. Select the relevant configuration file on your data storage device. Confirm with oK. At the end of the transfer a list of the transferred (or skipped) configuration settings is displayed. www.dallmeier.com... -
Page 168: Configuration Transfer To Several Devices
Enter the First iP address and the Last iP address of the relevant device group. Enter the Username. Enter the Password. Confirm with oK. At the end of the transfer a list of the transferred (or skipped) configuration settings is displayed. www.dallmeier.com... -
Page 169: Info
• Software version • Version number of the encoder • ONVIF version • Version number of the Linux Kernel • Serial number of the device • Uptime Information about the network connections is displayed in the Network connections tab. www.dallmeier.com... -
Page 170: Image Transmission
For more information, refer to section “RTSP” on page 61. Communication protocol RTSP Transmission protocol Transport protocol UDP/TCP Port Note that • the used encoder must be enabled. • the RTSP server in the camera must be enabled. • the RtSP live access right/permission must be enabled. www.dallmeier.com... - Page 171 “Dual Streaming” functionality (two streams with different quality). The required bandwidth proportionally increases to the number of applications request- ing for the data of an encoder. In this case, a multicast configuration should be preferred, because it only requires bandwidth for one stream. www.dallmeier.com...
-
Page 172: Maintenance
Do not rub acrylic glass with a dry cloth. Do not use common glass cleaners. Avoid excessive rubbing. Dry gently with a clean dry cloth to avoid scratching the surface. www.dallmeier.com... -
Page 173: Ptz Menu Structure
---- --- -- -- ---------------- ---- --- -- -- ---------------- ---- --- -- -- ---------------- ---- --- -- -- ---------------- Previous Next Save and Exit PATTERN SETUP TITLE PATTERN1 PATTERN2 PATTERN3 PATTERN4 PATTERN5 PATTERN6 PATTERN7 PATTERN8 TOTAL Save and Exit www.dallmeier.com... - Page 174 Enable Password :OFF Password Edit Password Setup Confirm Password : Run Function Save and Exit Exit SETUP MENU Language Home Function View Angle Date/Time Data System Origin Offset Dome Information Exit RUN FUNCTION Function :--------- Number :--- Action :--- Exit www.dallmeier.com...
-
Page 175: Pin Assignment
Weidmüller male connector SL 3.50/02/90G (mating connector Weidmüller BL 3.50/02/180 SN) Fig. 19-2 In order to comply with UL’s requirements, always use a UL-certified, Limited Power Source (LPS) Class 2 power supply unit when operating the devices with a separate power supply unit. www.dallmeier.com... - Page 176 RJ45 jack (front view) Fig. 19-3 10BASE-T-/100BASE-TX-PoE PoE+ (PoE conformity IEEE 802.3at) Audio ouT / IN 3.5 mm phone jack Fig. 19-4 Green (Line-out, stereo) Pink (Line-In, stereo) Left channel Left channel Right channel Right channel GND Ground GND Ground www.dallmeier.com...
- Page 177 5 V DC, max. 10 mA to GND I/O RS485 full duplex: Use Tx+/Tx− for data transmission from the camera to the controller. Use Rx+/Rx− for signal transmission from the controller to the camera. RS485 half duplex: Connect Tx+/Rx+ and Tx−/Rx− www.dallmeier.com...
-
Page 178: Weather-Proof Housing
Grey: GND I/O Black: GP In 2 Brown: GND I/O Pink: GP In 1 Blue: GND I/O Red: GP OUT Blue: Power Fan/Heater Brown: (24V AC, max. 3A) Black: Power Camera Black/White: (24/28V AC) Fig. 19-6 I/O cable pinout www.dallmeier.com... -
Page 179: Technical Specifications
20 Technical Specifications The following basic technical data was valid at the time of this document’s compilation. Detailed specifications and possible updates can be found in the corresponding current product data sheet on www.dallmeier.com. Interfaces Audio IN (stereo) 1× 3.5 mm phone jack (Line IN) Audio OUT (stereo) 1×... - Page 180 −10°C to +40°C (14°F to 104°F) Weather-proof variant (outdoor): −30°C to +50°C (−22°F to 122°F) Relative humidity 0% – 90% RH, non-condensing IP rating IP67 (weather-proof variant) Approvals/Certifications Type CE, FCC, UL, ACA, UVV “Kassen” (DGUV Test), CB, DIN EN 50130-4 compliant www.dallmeier.com...
-
Page 181: Technical Drawings
DDZ40(10)(20)-YY/HS/HD 21 Technical Drawings The following technical drawings were valid at the time of this document’s compilation. Visit www.dallmeier.com for possible updates. 21.1 In-ceiling Mount Variant Unit: mm Fig. 21-1 Unit: mm Fig. 21-2 www.dallmeier.com... -
Page 182: Surface Mount Variant
DDZ40(10)(20)-YY/HS/HD 21.2 Surface Mount Variant Unit: mm Fig. 21-3 28,3 56,50 Unit: mm Fig. 21-4 www.dallmeier.com... -
Page 183: Weather-Proof Variant
DDZ40(10)(20)-YY/HS/HD 21.3 Weather-proof Variant 258,50 Unit: mm Fig. 21-5 www.dallmeier.com... - Page 184 European Parliament and of the Council of 8 June 2011 on the restriction of certain haz- ardous substances in electrical and electronic equipment. The following company is responsible for this declaration: Dallmeier electronic GmbH & Co.KG Cranachweg 1 93051 Regensburg Germany The measurements were carried out in accredited laboratories.
Need help?
Do you have a question about the DOMERA DDZ4010 HS/HD Series and is the answer not in the manual?
Questions and answers