Table of Contents
Advertisement
Quick Links
Advertisement
Table of Contents

Related Manuals for dallmeier DDF4920HDV-DN-IM


Summary of Contents for dallmeier DDF4920HDV-DN-IM
- Page 1 DDF4920HDV-DN Commissioning English 004688 / 2.0.2 / 2016-06-07...
- Page 2 SD and SDHC of SD-3C, LLC headquartered in North Hollywood, California, USA. Third-party trademarks are named for information purposes only. Dallmeier electronic respects the intellectual property of third parties and always attempts to ensure the com- plete identification of third-party trademarks and indication of the respective holder of rights.
-
Page 3: Table Of Contents
Commissioning DDF4920HDV-DN-IM Table of Contents 1 Validity 2 Documents Data Sheet Commissioning Configuration 3 Typographical Conventions 4 Safety Instructions 5 General Notes Scope of Delivery Transportation and Packaging Warranty Approvals/Certifications Appropriate Use 6 Requirements General Operation 7 Maintenance 8 Installation and Commissioning... -
Page 4: Validity
DDF4920HDV-DN-IM Commissioning 1 Validity This document applies to the following device: • DDF4920HDV-DN-IM (in-ceiling mount variant) Figures in this document may differ from the actual product. 2 Documents Data Sheet The document “Data sheet” contains detailed technical specifications and features of the device. -
Page 5: Typographical Conventions
Commissioning DDF4920HDV-DN-IM 3 Typographical Conventions This document may contain various warning words and symbols that indicate potential sources of danger: DANGER DANGER indicates a hazardous situation which, if not avoided, will result in death or serious injury. WARNING WARNING indicates a hazardous situation which, if not avoided, could result in death or serious injury. - Page 6 DDF4920HDV-DN-IM Commissioning For reasons of clarity and readability, various text formatting elements and types of emphasis are used in this documentation: Instructions are indicated by arrows ( ➡ ): ➡ Carry out instructions one after the other in the sequence described.
-
Page 7: Safety Instructions
• System Components Only use internal components that have been tested and approved by Dallmeier. Inappropriate internal components may cause malfunctions, damages and data loss and may result in the loss of warranty. - Page 8 DDF4920HDV-DN-IM Commissioning • Documentation Read the documents included in the delivery carefully and thoroughly. Always observe the contained instructions, notes and warnings. The product documentation contains several documents which are included in the delivery in printed form and/or on a digital medium.
- Page 9 Commissioning DDF4920HDV-DN-IM • Operating Conditions Unfavourable operating conditions may shorten the life of the device and may cause malfunctions, damages and data loss and may result in the loss of war- ranty. Observe the specifications given in the technical data, the operating condition requirements and the maintenance instructions.
-
Page 10: General Notes
Certain functions and features may require the purchase of an additional license. Transportation and Packaging Store the original packaging for later transportation. Dallmeier is not responsible for any damage resulting from unprofessional/im- proper transportation. The device should only be shipped in the original packaging. -
Page 11: Warranty
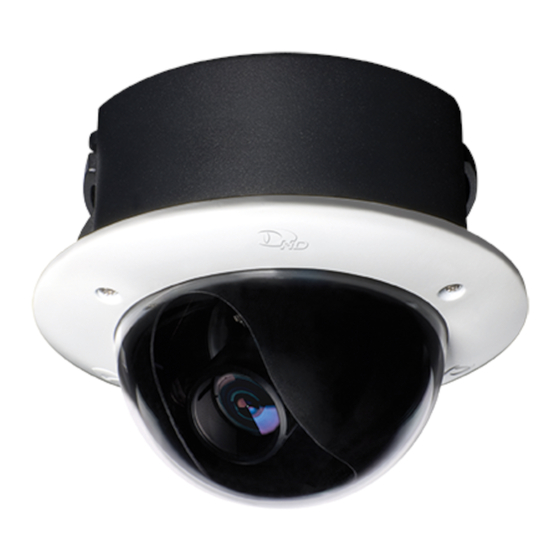
• CE, FCC, ACA, UVV “Kassen” (DGUV Test), UL, DIN 50130-4 compliant Visit www.dallmeier.com for possible updates. Appropriate Use The DDF4920HDV-DN-IM (in-ceiling mount variant) is a 5-megapixel HD network camera built into a vandal-resistant (IK10) dome enclosure. It is exclusively designed for indoor installations in suspended ceilings or drywall (plasterboard) systems and can be powered via PoE (Power over Ethernet, Class 0, IEEE 802.3af) or supplied with 12 V DC (separate power supply unit required). -
Page 12: Requirements
DDF4920HDV-DN-IM Commissioning 6 Requirements General Unfavourable local conditions may shorten the life of the product and may cause malfunctions or damages. Do not install/operate the device in places • with a large amount of dust and dirt, • with steam or oil vapours (e.g. kitchen), •... - Page 13 Commissioning DDF4920HDV-DN-IM • Always disconnect the separate 12 V DC power supply unit from the mains socket (pull out the power plug) before connecting or disconnecting the device. • In order to comply with UL’s requirements, always use a UL-certified, Limited Power Source (LPS) Class 2 power supply unit when operating the device with a separate 12 V DC power supply unit.
-
Page 14: Maintenance
DDF4920HDV-DN-IM Commissioning 7 Maintenance The device may only be opened by qualified personnel for commissioning, inspec- tion, maintenance and repair. Cleaning If it is necessary to clean the device, observe the following notes: NOTICE Damage to the surface of the device ➡... -
Page 15: Installation And Commissioning
Commissioning DDF4920HDV-DN-IM 8 Installation and Commissioning The installation and commissioning of the device may only be carried out by quali- fied personnel. WARNING Falling device/objects or collapsing ceiling Danger of death or serious injury to the head ➡ Observe the manufacturer’s instructions about... - Page 16 DDF4920HDV-DN-IM Commissioning NOTICE Damage to the device resulting from improper power supply The device can be powered via Power over Ethernet (PoE, Class 0, IEEE 802.3af) or supplied with a separate 12 V DC power supply unit. However, always beware not to use both power sources simultaneously.
- Page 17 Commissioning DDF4920HDV-DN-IM ❶ ⓐ Torx screwdriver (T20 H) ⓐ www.dallmeier.com...
- Page 18 DDF4920HDV-DN-IM Commissioning ⓐ 3× Tamper-resistant torx screw (Torx-TR 20) ⓐ ➡ Loosen the three tamper-resistant torx screws (Torx-TR 20) of the cover ring with a torx screwdriver (T20 H). www.dallmeier.com...
- Page 19 Commissioning DDF4920HDV-DN-IM ❷ ➡ Remove the cover ring/bubble. www.dallmeier.com...
- Page 20 DDF4920HDV-DN-IM Commissioning ❸ ⓐ M6 eye bolt ⓑ ⓐ Ceiling clamp (2×) ⓑ ➡ Screw the M6 eye bolt onto the bottom side of the housing. www.dallmeier.com...
- Page 21 Commissioning DDF4920HDV-DN-IM ❹ ⓐ Ø 143 mm ⓑ Ceiling hook ⓑ ⓐ ➡ Cut a circular hole (Ø 143 mm) into the suspended ceiling or ceiling panel. ➡ Screw a ceiling hook into the supporting structure. www.dallmeier.com...
- Page 22 DDF4920HDV-DN-IM Commissioning ❺ ⓐ ⓐ Basic position of ceiling clamp ➡ Insert the housing into the circular cut-out. www.dallmeier.com...
- Page 23 Commissioning DDF4920HDV-DN-IM ❻ ⓑ ⓐ Carabiner ⓐ ⓑ Safety wire ➡ Attach a safety wire to the M6 eye bolt (use a carabiner) and the ceiling hook. www.dallmeier.com...
- Page 24 DDF4920HDV-DN-IM Commissioning ❼ ⓐ ⓐ M4 locking screw (ceiling clamp) ⓑ Phillips screwdriver ⓑ www.dallmeier.com...
- Page 25 Commissioning DDF4920HDV-DN-IM Locked ceiling clamp (2×) ➡ Tighten the M4 locking screw of both ceiling clamps with a Phillips screw- driver until the housing is securely fixed. www.dallmeier.com...
- Page 26 DDF4920HDV-DN-IM Commissioning ❽ ⓐ PG16 cable gland ⓐ ➡ Run the required cables through a PG16 cable gland and screw the PG16 cable gland in the appropriate thread on the bottom side of the housing. www.dallmeier.com...
- Page 27 Commissioning DDF4920HDV-DN-IM www.dallmeier.com...
- Page 28 DDF4920HDV-DN-IM Commissioning ❾ ⓐ ⓗ ⓖ ⓕ ⓔ ⓑ ⓓ ⓒ ➡ Connect the required cables to the connectors of the camera module. www.dallmeier.com...
- Page 29 Commissioning DDF4920HDV-DN-IM ⓐ Analog video output (BNC, CVBS) ⓑ DC auto iris interface ⓒ LAN LED ⓓ Audio OUT / Microphone IN (3.5 mm phone jack) ⓔ LAN / PoE (RJ45 jack, PoE conformity IEEE 802.3af) ⓕ Power LED ⓖ 12 V DC Power IN (Weidmüller male connector SL 3.50/02/90G) ⓗ...
- Page 30 DDF4920HDV-DN-IM Commissioning ❿ ⓐ ⓐ /SDHC card • Min. 1 GB recommended • Max. 32 GB supported www.dallmeier.com...
- Page 31 Commissioning DDF4920HDV-DN-IM ⓫ ⓐ Knurled locking screw “Rotation” (2×) Tilt ±90° Pan ±90° Rotation ±180° ⓐ www.dallmeier.com...
- Page 32 DDF4920HDV-DN-IM Commissioning ⓬ ⓑ ⓐ ⓐ Ambient light sensor attached to adjustable foam ring ⓑ Locking screw (focal length) www.dallmeier.com...
- Page 33 Commissioning DDF4920HDV-DN-IM ⓐ Locking screw (focus) ⓐ Remote Back Focus Control The camera is equipped with the “Remote Back Focus Control” function. After the manual focus setting on the lens, a convenient and precise fine ad- justment of the focus can be made over the network in the “WebConfig” user interface of the camera (more information and important notes can be found in the documentation on camera configuration).
- Page 34 DDF4920HDV-DN-IM Commissioning ⓭ ⓐ Black inner dome cover ⓐ ➡ Attach the cover ring to the housing while ensuring that the ambient light sensor is not covered by the black inner dome cover. www.dallmeier.com...
- Page 35 Commissioning DDF4920HDV-DN-IM ➡ Tighten the three tamper-resistant torx screws (Torx-TR 20) of the cover ring with a torx screwdriver (T20 H). www.dallmeier.com...
-
Page 36: Pin Assignment
DDF4920HDV-DN-IM Commissioning 9 Pin Assignment Ring Sleeve Audio OUT / Microphone IN (3.5 mm phone jack, for stereo plug) Audio OUT (mono) Microphone IN (mono) Not used Signal Not used Ring Signal Sleeve Ground Ground NOTICE For a clean (interference-free) audio signal transmis- sion, the Audio IN/OUT Y-Cable Connector FGA-30 is required (optionally available). - Page 37 Commissioning DDF4920HDV-DN-IM 12 V DC (+) 12 V DC (−) 12 V DC Power IN (Weidmüller male connector SL 3.50/02/90G) DC auto iris interface Pin No. Function − Control Control Drive Drive − www.dallmeier.com...
-
Page 38: Connection And Login
DDF4920HDV-DN-IM Commissioning 10 Connection and Login The configuration of the device is carried out with a PC/web browser via the local area network (LAN). Alternatively, the PC can be directly connected to the device via an Ethernet crossover cable. Minimum System Requirements... - Page 39 • a more powerful PC is required if several devices are configured with live video display (and/or live audio output) simultaneously. • a DirectX compatible graphics card and the Dallmeier Live Video ActiveX are not required for the configuration without live video display or live audio output.
-
Page 40: Connection
DDF4920HDV-DN-IM Commissioning Connection The factory default IP address of the device is 192.168.2.28. ➡ Ensure that the PC/web browser can establish a connection to the device via Ethernet. ➡ Start the web browser. ➡ Enter the IP address of the device into the address bar of the web browser. -
Page 41: Login
Commissioning DDF4920HDV-DN-IM Login The graphical user interface of the configuration mode is displayed for authorized users only. The factory default admin password is “3”. NOTICE Risk of misuse by unauthorized users ➡ Change the factory default admin password as soon as possible. -
Page 42: Technical Specifications
DDF4920HDV-DN-IM Commissioning 11 Technical Specifications Specifications Sensor 1/2.5" 5-megapixel CMOS image sensor Video preview output 1× BNC (CVBS) – for local installation only, e.g. for adjusting the focal length and the image section Audio OUT / Microphone IN 1× 3.5 mm phone jack (mono signal, for stereo plug) Mic IN: max. - Page 43 Commissioning DDF4920HDV-DN-IM Specifications IK protection IK10 protection against external mechanical impacts (up to 20 joules) Dimensions Approx. Ø 170 × H 135 mm (Ø 6.7" × H 5.3") Weight Approx. 1200 g (2.6 lb) Operating temperature −20 °C to +40 °C (−4 °F to 104 °F), Indoor Relative humidity 0 % –...
- Page 44 Dallmeier electronic GmbH & Co.KG Cranachweg 1 · 93051 Regensburg · Germany Phone +49 (0) 941 87 00-0 · Fax +49 (0) 941 87 00-180 www.dallmeier.com · info@dallmeier.com...