Table of Contents
Advertisement
Quick Links
Advertisement
Table of Contents

Subscribe to Our Youtube Channel
Related Manuals for dallmeier DDF51 0HDV-DN Series


Summary of Contents for dallmeier DDF51 0HDV-DN Series
- Page 1 DDF51(X)0HDV-DN Commissioning English 006830 / 1.0.2 / 2018-12-19...
- Page 2 Phillips of Phillips Screw Company headquartered in Burlington, Massachusetts, USA. Third-party trademarks are named for information purposes only. Dallmeier electronic respects the intellectual property of third parties and always attempts to ensure the complete identification of third-party trademarks and indication of the respective holder of rights.
-
Page 3: Table Of Contents
Warranty Appropriate Use Operation Approvals/Certifications 6 Requirements Ambient Conditions Power Supply 7 Maintenance 8 Installation and Commissioning 9 Interfaces 10 Inserting a Memory Card 11 Pin Assignment – Interface Board Series 5100 12 Connection and Login Connection Login 13 Technical Specifications 14 Dimensions © 2018 Dallmeier | www.dallmeier.com... -
Page 4: Validity
Keep all documents in legible condition and in a suitable location for future refer- ence. Regularly check the website www.dallmeier.com for the latest product documen- tation updates. © 2018 Dallmeier | www.dallmeier.com... -
Page 5: This Document
The target audience of the document is trained system integrators (video security/ surveillance systems installation contractors). Configuration The document entitled “Configuration” contains detailed information concerning the configuration of the device. The target audience of the document is trained system integrators (video security/ surveillance systems installation contractors). © 2018 Dallmeier | www.dallmeier.com... -
Page 6: Typographical Conventions
CAUTION indicates a hazardous situation which, if not avoided, could result in minor or moderate injury. NOTICE NOTICE addresses practices not related to physical injury, such as device and/or property damage due to faulty operations or incor- rect configurations. © 2018 Dallmeier | www.dallmeier.com... - Page 7 (housing parts, mounting elements, connections/interfaces, etc.) or to control elements of the device’s web-based graphical user interface (menu items, buttons, etc.). Paragraphs in italics provide information on basic principles, special features and efficient procedure as well as general recommendations. © 2018 Dallmeier | www.dallmeier.com...
-
Page 8: Safety Instructions
• System Components Only use internal components that have been tested and approved by Dallmeier. Inappropriate internal components may cause malfunctions, damages and data loss and may result in the loss of warranty. - Page 9 Keep all documents in legible condition and in a suitable location for future reference. Regularly check the website www.dallmeier.com for the latest product docu- mentation updates. • Condensation Water If the device is brought from a cold to a warm environment, resulting condensa- tion water may cause malfunctions and damages.
- Page 10 If objects or liquids get into the device, immediately disconnect it from the power supply (pull out the power plug or disconnect the device from the PoE enabled PSE port). Contact the sales partner responsible for your area. © 2018 Dallmeier | www.dallmeier.com...
- Page 11 • Disposal Do not dispose waste electrical and electronic equipment into the household trash. Disconnect the device from the power supply. Remove all connected devices. Return the device to the sales partner responsible for your area. © 2018 Dallmeier | www.dallmeier.com...
-
Page 12: General Notes
Transportation and Packaging Store the original packaging for later transportation. Dallmeier is not responsible for any damage resulting from unprofessional or improper transportation. The device should only be shipped in the original packaging. If the original packaging is no longer available, ensure that the used packaging suf- ficiently protects the device against damage, moisture, heat and cold. -
Page 13: Warranty
Damage to the device due to an unsuitable mounting location The device is exclusively designed for indoor use. An outdoor installation is prohibited and may result in malfunction, damage, data loss and loss of warranty. ➡ Do not install/operate the device in outdoor environments. © 2018 Dallmeier | www.dallmeier.com... -
Page 14: Operation
• The accuracy of the Automatic White Balance (AWB) algorithm depends on the used lighting. Mixed light (consisting of artificial light and daylight) may cause color distortions (inaccurate color reproduction). • Poor lighting can lead to an incorrect white balance. © 2018 Dallmeier | www.dallmeier.com... -
Page 15: Approvals/Certifications
The following approvals/certifications were valid for the device at the time of this document’s compilation: • CE, FCC, RCM, UL, DIN 50130-4 compliant Visit www.dallmeier.com for possible updates. Note (USA) This equipment has been tested and found to comply with the limits for a Class A digital device, pursuant to Part 15 of the FCC Rules. -
Page 16: Requirements
• with strong heat emissions (e.g. radiator), • with improper ambient temperatures, • near sources with strong radiation (e.g. radio transmitters, magnetic fields), • with corrosive surroundings (e.g. gases, salt water), • with insufficient air ventilation (e.g. closed cabinet). © 2018 Dallmeier | www.dallmeier.com... -
Page 17: Power Supply
➡ Carry out all protective measures for a standard-compliant grounding/earthing of the device in accordance with the cur- rently applicable DIN, VDE and ISO standards in order to ensure the safety of persons (protection against dangerous contact voltages). © 2018 Dallmeier | www.dallmeier.com... - Page 18 DIN, VDE and ISO standards in order to ensure the safety of the device (pro- tection against over-voltages) and its immunity to electromag- netic interferences (EMI). © 2018 Dallmeier | www.dallmeier.com...
- Page 19 ➡ Always disable PoE on the relevant port of your PoE switch (or PoE midspan device) or disconnect the used single-port PoE injector from the power supply before un-mating the jack-plug connection in order to prevent damage to the contacts of the RJ45 connectors by contact erosion. © 2018 Dallmeier | www.dallmeier.com...
-
Page 20: Maintenance
• Do not use common glass cleaners. • Avoid excessive rubbing. • To dry the plastic bubble, dab it carefully and gently with a clean, soft, dry and antistatic cloth to avoid scratching the surface. © 2018 Dallmeier | www.dallmeier.com... -
Page 22: Installation And Commissioning
➡ For fixing the ceiling hook, use an anchor that is suitable for the ceiling type and construction material: • Plastic screw anchor for use in solid masonry materials (concrete/brick) • Gravity or spring toggle anchor for use in drywall ceilings (plasterboard) © 2018 Dallmeier | www.dallmeier.com... - Page 23 Commissioning DDF51(X)0HDV-DN-IM ❶ ⓐ Torx screwdriver with hollow point (T20 H) ⓐ © 2018 Dallmeier | www.dallmeier.com...
- Page 24 DDF51(X)0HDV-DN-IM Commissioning ⓐ 3× Tamper-resistant torx screw (Torx-TR 20) ⓐ ➡ Loosen the three tamper-resistant torx screws (Torx-TR 20) of the cover ring using a torx screwdriver with hollow point (T20 H). © 2018 Dallmeier | www.dallmeier.com...
- Page 25 Commissioning DDF51(X)0HDV-DN-IM ❷ ➡ Remove the dome cover (cover ring with bubble) from the housing. © 2018 Dallmeier | www.dallmeier.com...
- Page 26 DDF51(X)0HDV-DN-IM Commissioning ❸ ⓐ M6 eye bolt ⓑ Cat.5e RJ45 adapter cable ⓒ ⓐ Ceiling clamp (2×) ⓑ ⓒ ➡ Screw an M6 eye bolt onto the bottom side of the housing. © 2018 Dallmeier | www.dallmeier.com...
- Page 27 Commissioning DDF51(X)0HDV-DN-IM ❹ ⓐ Ø 143 mm ⓑ Ceiling hook ⓑ ⓐ ➡ Cut a circular hole (Ø 143 mm) into the suspended ceiling or ceiling panel. ➡ Screw a ceiling hook into the supporting structure. © 2018 Dallmeier | www.dallmeier.com...
- Page 28 1. Cabling the “Interface Board Series 5100” (see page 40) 2. Inserting a memory card (see page 42) ➡ Disconnect the pre-assembled Cat.5e RJ45 adapter cable. ➡ Unscrew the three fixing screws of the camera module. © 2018 Dallmeier | www.dallmeier.com...
- Page 29 Phillips PH1 (3×) Lock washer (3×) ➡ Remove the three fixing screws and the three toothed lock washers from the camera module. © 2018 Dallmeier | www.dallmeier.com...
- Page 30 DDF51(X)0HDV-DN-IM Commissioning PG16 cable gland Rubber cable grommet © 2018 Dallmeier | www.dallmeier.com...
- Page 31 ➡ Carry out the cabling. Scenario 2: Inserting a memory card ➡ Insert a suitable memory card into the memory card slot (see chapter “Inserting a Memory Card” on page 42). © 2018 Dallmeier | www.dallmeier.com...
- Page 32 3-axis camera gimbal as shown on page 36. ⓐ ⓐ Basic position of ceiling clamps ➡ Insert the housing into the circular cut-out. © 2018 Dallmeier | www.dallmeier.com...
- Page 33 ⓑ Steel safety cable ➡ Attach a suitable safety cable (steel wire rope with two loops) to the M6 eye bolt (use carabiner) and the ceiling hook to properly secure the camera from falling down. © 2018 Dallmeier | www.dallmeier.com...
- Page 34 DDF51(X)0HDV-DN-IM Commissioning ❽ ⓐ ⓐ ⓐ M4 locking screw (ceiling clamp) ⓑ Phillips screwdriver ⓑ © 2018 Dallmeier | www.dallmeier.com...
- Page 35 Commissioning DDF51(X)0HDV-DN-IM Locked ceiling clamps ➡ Tighten the M4 locking screw of both ceiling clamps with a Phillips screw- driver until the housing is securely fixed. © 2018 Dallmeier | www.dallmeier.com...
- Page 36 DDF51(X)0HDV-DN-IM Commissioning ❾ ⓐ Knurled thumb screw (roll axis) Pan: Max. ±90° 45° ⓐ Roll: Max. ±180° Tilt: Max. ±45° ⓐ Maximum permissible pan, tilt and roll range © 2018 Dallmeier | www.dallmeier.com...
- Page 37 ➡ Adjust the focal length (zoom) and the focus position in the “Lens control” camera dialog. ➡ Repeat the last two steps until the captured scene meets your require- ments. © 2018 Dallmeier | www.dallmeier.com...
- Page 38 ⓑ ➡ Attach the dome cover (cover ring with bubble) back to the housing. NOTICE: Make sure that the ambient light sensor is not covered by the black inner liner (rotate the bubble as required). © 2018 Dallmeier | www.dallmeier.com...
- Page 39 Commissioning DDF51(X)0HDV-DN-IM ➡ Tighten the three tamper-resistant torx screws (Torx-TR 20) of the cover ring using a torx screwdriver with hollow point (T20 H). © 2018 Dallmeier | www.dallmeier.com...
-
Page 40: Interfaces
DDF51(X)0HDV-DN-IM Commissioning 9 Interfaces ⓐ ⓑ ⓒ ⓖ ⓓ ⓔ ⓕ © 2018 Dallmeier | www.dallmeier.com... - Page 41 ⓖ Power IN (Weidmüller male connector SL 3.50/02/90G) ➡ Connect the required cables to the respective interfaces of the camera module (if necessary, see chapter “Pin Assignment – Interface Board Series 5100” on page 44). © 2018 Dallmeier | www.dallmeier.com...
-
Page 42: Inserting A Memory Card
DDF51(X)0HDV-DN-IM Commissioning 10 Inserting a Memory Card ⓐ ⓐ microSDXC card (optional) © 2018 Dallmeier | www.dallmeier.com... - Page 43 ➡ Only use memory cards that have been tested and approved by Dallmeier (failure to do so may result in the loss of warranty). Damage to the device or memory card due to incorrect card...
-
Page 44: Pin Assignment - Interface Board Series 5100
2.0 mm) or a similar tool into the rectangular opening below each conductor and pull out the conductor. Note, however, that disconnecting the conductors is only possible after the camera module has been removed (see optional step ❺ on page 28). © 2018 Dallmeier | www.dallmeier.com... - Page 45 Contact IN 2 GND (isolated) Contact IN 1 Contact OUT 1A Contact OUT 1B Contact OUT 2A Contact OUT 2B Contact IN 1 – 2: For use with potential-free switching contacts Contact OUT 1 – 2: Open-drain output (max. 5 V DC, 500 mA, potential-free, low-impedance connection) © 2018 Dallmeier | www.dallmeier.com...
- Page 46 RS485_A: RX+ (Non-inverting Receiver Input) RS485_B: RX− (Inverting Receiver Input) RS485_Y: TX+ (Non-inverting Driver Output) RS485_Z: TX− (Inverting Driver Output) RS485 – Half duplex RS485_Y: TX+/RX+ (Non-inverting Driver Output and Non-inverting Receiver Input) RS485_Z: TX−/RX− (Inverting Driver Output and Inverting Receiver Input) © 2018 Dallmeier | www.dallmeier.com...
- Page 47 Line IN (stereo) Line OUT (stereo) Left channel Left channel Ring Right channel Right channel Sleeve Ground Ground Audio Line IN (stereo) Input level: max. 2.83 V Input impedance: 29 kΩ Audio Line OUT (stereo) Output level at 10 kΩ load: max. 3.11 V Output impedance: 320 Ω © 2018 Dallmeier | www.dallmeier.com...
- Page 48 (mating connector: Weidmüller BL 3.50/02/180 SN) In order to comply with UL’s requirements, only use a UL certified “Limited Power Source (LPS)” power supply unit when powering the device by an exter- nal DC power supply unit. © 2018 Dallmeier | www.dallmeier.com...
-
Page 49: Connection And Login
Microsoft Internet Explorer 11 (Windows 7) Microsoft Edge (Windows 10) Google Chrome Mozilla Firefox (latest available version of each browser) Browser settings JavaScript enabled Ethernet 100 Mbps Sound Sound card or on-board sound chip (min. 16 bit) © 2018 Dallmeier | www.dallmeier.com... -
Page 50: Connection
➡ Enter the IP address of the device into the address bar of the web browser. ➡ Confirm the input. The connection to the device is then established. After the successful connection to the device, the login dialog is displayed. © 2018 Dallmeier | www.dallmeier.com... -
Page 51: Login
After the successful login, the graphical user interface of the configuration mode is displayed. ➡ Configure all required settings (e.g. zoom and focus position). ➡ Finally, click “LOGOUT” to properly log out of the device. © 2018 Dallmeier | www.dallmeier.com... -
Page 52: Technical Specifications
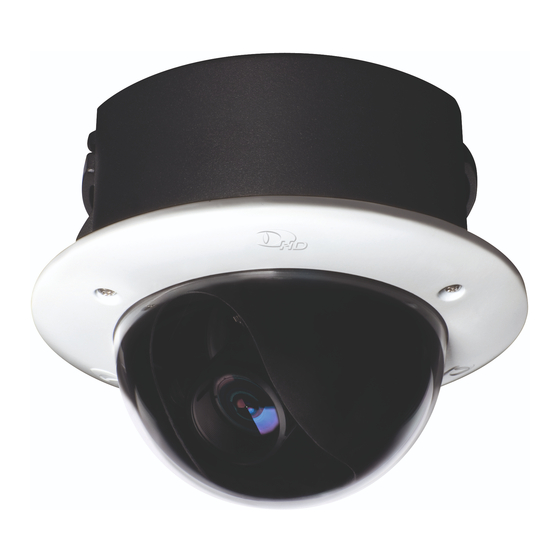
Input level: max. 2.83 V Input impedance: 29 kΩ Audio Line OUT (stereo) 1× 3.5 mm phone jack (for stereo TRS plug): Output level at 10 kΩ load: max. 3.11 V Output impedance: 320 Ω Power IN 1× Weidmüller male connector SL 3.50/02/90G © 2018 Dallmeier | www.dallmeier.com... - Page 53 3-axis gimbal for manual adjustment (pan/tilt/roll) Bubble Clear (with black inner liner) Vandal-resistant IK protection IK10 protection against external mechanical impacts (up to 20 joules) Color Housing: black Cover ring: white Dimensions Approx. Ø 170 × H 135 mm (Ø 6.7" × H 5.3") Weight Approx. 1200 g (2.6 lb) © 2018 Dallmeier | www.dallmeier.com...
- Page 54 0 % – 90 % RH, non-condensing Approvals/Certifications Type • CE • FCC • RCM • UL • DIN 50130-4 compliant For detailed technical specifications and possible updates, see the currently valid product data sheet that is available on www.dallmeier.com. © 2018 Dallmeier | www.dallmeier.com...
-
Page 55: Dimensions
Commissioning DDF51(X)0HDV-DN-IM 14 Dimensions 170 mm (6.69") 62 mm (2.44") 60 mm (2.36") 142 mm (5.59") 114.60 mm (4.51") 28.80 mm (1.13") 14 mm (0.55") Housing © 2018 Dallmeier | www.dallmeier.com... - Page 56 DDF51(X)0HDV-DN-IM Commissioning 150 mm (5.91") Cat.5e RJ45 adapter cable with rubber grommet © 2018 Dallmeier | www.dallmeier.com...
- Page 60 Dallmeier electronic GmbH & Co.KG Bahnhofstr. 16 · 93047 Regensburg · Germany Phone +49 941 8700-0 · Fax +49 941 8700-180 www.dallmeier.com · info@dallmeier.com...
Need help?
Do you have a question about the DDF51 0HDV-DN Series and is the answer not in the manual?
Questions and answers