
Related Manuals for Hans Grohe Joleena 04776 0 Series


Summary of Contents for Hans Grohe Joleena 04776 0 Series
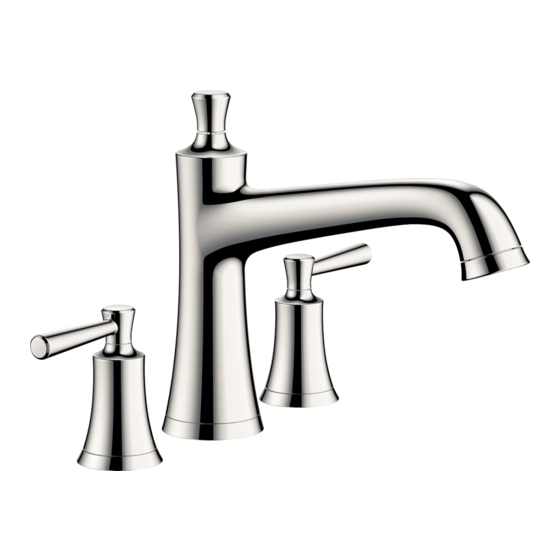
- Page 1 EN Installation / User Instructions / Warranty FR Instructions de montage / Mode d'emploi / Garantie ES Instrucciones de montaje / Manejo / Garantía Joleena 04776XX0 Joleena 04777XX0...
-
Page 2: Technical Information
English Technical Information Water pressure Recommended 15 - 75 PSI (0.1 - 0.5 MPa) Maximum 145 PSI (1 MPa) Hot water temp. Recommended 120°-140° F (48° - 60° C)* Maximum 158°F (70° C)* Flow rate - handshower 1.75 GPM (6.6 L/min) * Please know and follow all applicable local plumb- ing codes when setting the temperature on the water heater. -
Page 3: Données Techniques
Français Données techniques Pression d’eau recommandée 15 - 75 PSI (0.1 - 0.5 MPa) maximum 145 PSI (1 MPa) Température d'eau chaude recommandée 120°-140° F (48° - 60° C)* maximum 158°F (70° C)* Capacité nominale douchette 1.75 GPM (6.6 L/min) * Vous devez connaître et respecter tous les codes de plomberie locaux applicables pour le réglage de la température du chauffe-eau. -
Page 4: Datos Tecnicos
Español Datos tecnicos Presión en servicio recomendada 15 - 75 PSI (0.1 - 0.5 MPa) max. 145 PSI (1 MPa) Temperatura del agua caliente recomendada 120°-140° F (48° - 60° C)* max. 158°F (70° C)* Caudal máximo teleducha 1.75 GPM (6.6 L/min) * Debe conocer y cumplir todos los códigos locales aplicables para ajustar la temperatura del calenta- dor de agua. - Page 5 Joleena Joleena 04776XX0 04777XX0 8⅞" (225 mm) 8⅞" (225 mm) 8⅛" (206 mm) 8⅛" (206 mm) 6¼" (158 mm) 3⅛" 3⅛" (80 mm) (80 mm) 2" 2½" 2" 2" 2½" 2" Ø2⅛" (52 mm) (65 mm) (52 mm) (52 mm) (65 mm) (55 mm) (52 mm)
-
Page 6: Installation / Installation / Instalación
Installation / Installation / Instalación 04776XX0 English Français Español Turn the water off at the main Avant de commencer, fermez Cierre el paso del agua en la before beginning. l'eau à la valve principale. entrada del suministro antes de comenzar. Remove the plaster shields. - Page 7 27 mm English Français Español Position the handle over the Placez la cloche sur la tige. Posicione la manija sobre el valve stem. vástago. Vissez la cloche sur la valve. Rotate the “bell” to secure it to Gire la manija sobre la válvula. the valve.
- Page 8 English Français Español Lightly lubricate the o-rings on Lubrifiez les joints toriques sur la Lubrique los retenes anulares the sealing ring using white bague d’étanchéité à l’aide de en el anillo de sellado con grease (not included). graisse de plomberie blanche grasa blanca para plomería (no (non comprise).
- Page 9 3 mm English Français Español Tighten the set screw using a Serrez la vis de pression à l’aide Apriete el tornillo de fijación con 3 mm Allen wrench. d’une clé hexagonale de 3 mm. una llave Allen de 3 mm. Install the screw cover.
- Page 10 Installation / Installation / Instalación 04777XX0 English Français Español Turn the water off at the main Avant de commencer, fermez Cierre el paso del agua en la before beginning. l'eau à la valve principale. entrada del suministro antes de comenzar. Remove the plaster shields.
- Page 11 English Français Español Position the handle over the Placez la cloche sur la tige. Posicione la manija sobre el valve stem. vástago. Vissez la cloche sur la valve. Rotate the “bell” to secure it to Gire la manija sobre la válvula. the valve.
- Page 12 English Français Español Lubricate the diverter o-rings us- Lubrifiez les joints toriques Lubrique los retenes anulares del ing white plumbers grease. du dispositif de dérivation à distribuidor con grasa blanca l’aide de graisse de plomberie para plomería (no incluida). Press the diverter assembly firmly blanche.
- Page 13 3 mm English Français Español Tighten the screw using a 3 mm Serrez la vis de pression à l’aide Apriete el tornillo de fijación con Allen wrench. d’une clé hexagonale de 3 mm. una llave Allen de 3 mm. Install the screw cover. Installez le cache-vis.
- Page 14 English Français Español Remove the plaster shield from Retirez le protecteur du support Retire el protector de yeso del the handshower holder. de douchette. soporte de la ducha de mano. Pull out on the handshower hose. Tirez sur l’extrémité du tuyau Tire el extremo de la manguera pour l’éloigner du support.
- Page 15 English Français Español Place a black rubber hose Installez le tamis dans le coude. Instale la arandela de filtro en washer in the elbow. el codo. Installez la douchette. Screw the handshower into the Instale la ducha de mano. elbow. Guidez la douchette dans le support.
- Page 16 Replacement Parts / Pièces détachées / Repuestos Joleena 04776XX0 93545XX0 93543XX1 93544XX0 88512000 93542XX0 xx = Colors / Couleurs / Acabados 00 = Chrome 67 = Matte Black 82 = Brushed Nickel 83 = Polished Nickel...
- Page 17 Replacement Parts / Pièces détachées / Repuestos Joleena 04777XX0 93549XX0 93548XX0 04782XX0 93543XX1 93544XX0 98058000 28071XX0 94074000 93547XX0 93542XX0 xx = Colors / Couleurs / Acabados 93549XX0 00 = Chrome 67 = Matte Black 82 = Brushed Nickel 83 = Polished Nickel...
- Page 18 User Instructions / Instructions de service / Manejo ouvert fermé abierto cerrar cold froid chaud frío caliente...
- Page 19 Cleaning / Nettoyage / Limpieza scale remover détartrant S c al e desincrustante R e m o v e r ¾" > 1 min.
- Page 20 Cleaning Recommendation for Hansgrohe Products Modern bathroom faucets, kitchen faucets and shower products are made from different materials to comply with the needs of the market with regard to design and functionality. To avoid damage to the product, it is necessary to take proper care of it.
- Page 21 Important • Les residus de produits pour le corps comme les savons liquides, shampooings, gels de douche, teintures pour cheveux, parfums, apres-rasage et vernis a ongles peuvent causer des deteriorations. Rincez le produit avec de l’eau propre après chaque utilisation. •...
-
Page 24: Limited Consumer Warranty
Limited Consumer Warranty This warranty is limited to products manufactured by Hansgrohe, conditions in the home such as excessive water pressure Inc. (“Hansgrohe”) that are purchased by a consumer in the United or corrosion. States or Canada after March 1, 1996, and installed in either the Labor and other expenses for disconnection, deinstallation, United States or in Canada.
Need help?
Do you have a question about the Joleena 04776 0 Series and is the answer not in the manual?
Questions and answers