Table of Contents
Advertisement
Advertisement
Table of Contents

Related Manuals for DIEBOLD NIXDORF BEETLE A1150


Summary of Contents for DIEBOLD NIXDORF BEETLE A1150
- Page 1 BEETLE A1150 User Manual 01750342843A...
-
Page 2: Table Of Contents
Important Notes........................1-5 Safety Notes........................1-6 2 Supplier’s Declaration of Conformity ..................2-1 3 Introduction ..........................3-1 About this manual ......................3-1 Care of the BEETLE A1150 ....................3-1 Recycling the BEETLE A1150 ...................3-1 Warranty..........................3-2 Lithium Battery ........................3-2 Unpacking and Checking the Delivery Unit................3-3 4 Basic settings.......................... - Page 3 14 Starting Up the System ......................14-1 15 Error Reporting .......................... 15-1 16 POST Code ..........................16-1 17 Technical Data..........................17-1 17.1 AC Power Adapter ......................17-3 17.2 NFC Module ........................17-4 17.3 I/O Hub ..........................17-5 Copyright © 2020, Diebold Nixdorf 01750342843A...
- Page 4 Table of Contents 17.3.1 Block Diagram..................... 17-7 17.4 Total Available Power ......................17-8 18 Appendix............................. 18-1 18.1 Approved Printers List ......................18-1 Copyright © 2020, Diebold Nixdorf 01750342843A...
-
Page 5: Manufacturer´s Certification
RoHS directive 2011/65/EU. Therefore, you will find the CE mark on the device or packaging. In addition, the BEETLE A1150 has received the cTUVus symbol. FCC-Class A Declaration This equipment has been tested and found to comply with the limits for a Class A digital device, pursuant to part 15 of the FCC Rules. -
Page 6: Wireless Declaration Of Conformity
Manufacturer´s Certification Wireless Declaration of Conformity Hereby, Diebold Nixdorf declares that this device is in compliance with the essential requirements and other relevant provisions of Directive 2014/53/EC. Csěky [Czech]: Diebold Nixdorf tímto prohlašuje, že tento zařízení je ve shodě se zák- ladními požadavky a dalšími příslušnými ustanoveními směrnice... - Page 7 övriga relevanta bestämmelser som framgår av direktiv 2014/53/EG. Íslenska [Icelandic]: Hér með lýsir Diebold Nixdorf yfir því að tæki er í samræmi við grunnkrö- fur og aðrar kröfur, sem gerðar eru í tilskipun 2014/53/EC. Norsk [Norwegian]: Diebold Nixdorf erklærer herved at utstyret enhet er i samsvar med de...
-
Page 8: Fcc Rf Exposure Warning
Ce périphérique a également étéévalué et démontré conforme aux limites d'exposition aux RF d'IC dans des conditions d'exposition à des appareils mobiles(antennes sont supérieures à 20 cm à partir du corps d'une personne). Copyright © 2020, Diebold Nixdorf 01750342843A... -
Page 9: Important Notes
Diebold Nixdorf is not responsible for any radio and television malfunctions which emerge from unautho- rized changes in the device. Make sure that only cables and devices may be connected which are admit- ted by Diebold Nixdorf. The user is responsible for any malfunctions that emerge from the actions men- tioned before. -
Page 10: Safety Notes
Service of Diebold Nixdorf or your dealer must be notified. • Your BEETLE A1150 system is the result of modern technical innovation. So please see for accord- ing structural and technical surroundings to guarantee a faultless and efficient work of your BEETLE A1150. -
Page 11: Supplier's Declaration Of Conformity
2 Supplier’s Declaration of Conformity Product Description: POS Terminal Model: BEETLE A1150 Party issuing Supplier’s Declaration of Conformity Diebold Nixdorf Singapore PTE. LTD. 30A Kallang Place #04-01 Singapore 339213 Phone: +65 6747 3828 Responsible Party – U.S. Contact Information Diebold Nixdorf 5995 Mayfair Road N. -
Page 12: Introduction
USB Type C. About this manual This documentation is intended to help you to work with the BEETLE A1150 system and to serve as a reference work. The detailed table of contents will help you find the desired information quickly and eas- ily. -
Page 13: Warranty
All parts of the product which are subject to wear and tear are not included in the warranty engagement. For detailed warranty arrangements please consult your contract documents. Please order spare parts at the Diebold Nixdorf customer service. Lithium Battery WARNING... -
Page 14: Unpacking And Checking The Delivery Unit
Diebold Nixdorf sales outlet. Transport the device only in its original packaging (to protect it against impact and shock). -
Page 15: Basic Settings
The BEETLE A1150 is configured to your order. Add-on peripheral devices, for example the magnetic swipe card reader (MSR), are delivered together with the system as an assembled unit. Components The BEETLE A1150 comes with a 15W of the following processor options with configurable memory and SSD options: 4.1.1 4.1.1... -
Page 16: Setting Up The Device
(desktop version), or on the wall (wall mount version). Set up the BEETLE A1150 system where it will not be exposed to extreme environmental conditions. Protect the device from vibrations, dust, moisture, heat and strong magnetic fields. -
Page 17: Overview
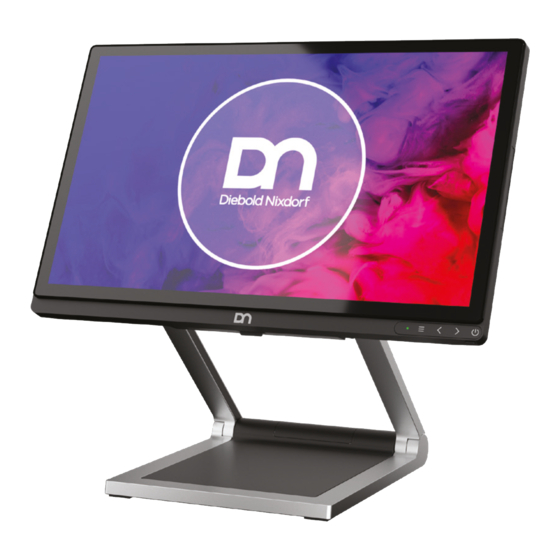
6 Overview Front View with Stand Figure 6-1: BEETLE A1150 (front view) BEETLE A1150 Desktop Stand Touch buttons and Activities Indicator Power status indicator Copyright © 2020, Diebold Nixdorf 01750342843A... -
Page 18: Back View With Stand
Overview Back View with Stand Figure 6-2: BEETLE A1150 (back view) VESA mount cover Hinge Side-attach peripheral connection cover Copyright © 2020, Diebold Nixdorf 01750342843A... -
Page 19: Ac Power Adapter
Overview AC Power Adapter Figure 6-3: BEETLE A1150 AC power adapter AC Power Cord DC Power Out Power Indicator The external power supply is applicable for common line voltage. It automatically adjusts itself to the particular voltage. Copyright © 2020, Diebold Nixdorf... -
Page 20: Front Panel
Overview Front Panel Figure 6-4: BEETLE A1150 front panel - Activity Indicator - Brightness buttons • LED Off : No activity • LED White Off : Off/AC applied • LED Green Blinking: Activity as config- • LED White On : Upon 1st touch and sub-... -
Page 21: Projected Capacitive Touch Screen
Use a soft, fine-meshed cloth to clean the surface. Dampen the cloth slightly and then clean the screen. NOTE A wrong maintenance may cause damages to the screen, which are not covered by warranty. Copyright © 2020, Diebold Nixdorf 01750342843A... -
Page 22: Planning The Installation
Please refer to the drawings below for dimensions of the desktop and wall mount versions. All dimen- sions are specified in millimetres. The views of the systems are not drawn to scale. Desktop version 8.2.1 8.2.1 Desktop Stand Standard Copyright © 2020, Diebold Nixdorf 01750342843A... -
Page 23: Wall Mount Version
Planning the Installation 8.2.2 8.2.2 Wall mount version Required operation space WARNING Maintain at least 50 mm from the side of the system to ensure proper ventilation during the operation of the system. Copyright © 2020, Diebold Nixdorf 01750342843A... -
Page 24: Installation Site Requirements
The mounting method must be able to support the combined weight of the system and the sus- pended weight of all cables attached to the system. • The system must be mounted to a solid concrete or brick wall with flat smooth surface. Copyright © 2020, Diebold Nixdorf 01750342843A... -
Page 25: Installation To A Stand
*Observe the safety precaution mentioned on the next page when you remove the back cover of stand. WARNING To avoid damage to the back cover of the stand, be careful of how you would remove it. Copyright © 2020, Diebold Nixdorf 01750342843A... -
Page 26: Preparing The System
Installing system to the stand Fit the system on the stand while holding it in place. Tighten the 4 M4x6 countersunk screws (1) (that came with the stand) to secure the sys- tem to the stand. Copyright © 2020, Diebold Nixdorf 01750342843A... - Page 27 Tilt the system back to access the connector panel at the bottom of the system display. Remove the cable cover (1). Plug the USB-C cable into the port indicated (1). Replace the cable cover. Copyright © 2020, Diebold Nixdorf 01750342843A...
-
Page 28: Installing System To The Stand (With I/O Hub)
When uninstalling the stand, always make sure that all cables are disconnected. Installing system to the stand (with I/O hub) 9.2.1 9.2.1 Preparing the stand Remove the I/O Hub cover by pulling it up from the back. Copyright © 2020, Diebold Nixdorf 01750342843A... - Page 29 *Observe the safety precaution mentioned on the next page when you remove the back cover of stand. WARNING To avoid damage to the back cover of the stand, be careful of how you would remove it. Copyright © 2020, Diebold Nixdorf 01750342843A...
-
Page 30: Preparing The System
When installing the system to a stand with I/O Hub, install the I/O Hub before installing the system to ensure stability of the structure. Fit the I/O Hub (1) into the base of the stand as illustrated. Copyright © 2020, Diebold Nixdorf 01750342843A... - Page 31 Secure the I/O Hub with the 2 M3x4 screws provided at the positions indicated (1). Connect the USB-C cable to the port indi- cated (1). Then, fit the system on the stand while hold- ing it in place. Copyright © 2020, Diebold Nixdorf 01750342843A...
- Page 32 (that came with the stand) to secure the sys- tem to the stand. Tilt the system back to access the connector panel at the bottom of the system display. Remove the cable cover (1). Copyright © 2020, Diebold Nixdorf 01750342843A...
- Page 33 11. Replace the VESA cover (1) by pushing it upwards. 12. Replace the cover of the I/O Hub (1) previ- ously removed. NOTE When uninstalling the stand, always make sure that all cables are disconnected. Copyright © 2020, Diebold Nixdorf 01750342843A...
-
Page 34: Installing System To The Stand (With Cable Covers)
*Observe the safety precaution mentioned on the next page when you remove the back cover of stand. WARNING To avoid damage to the back cover of the stand, be careful of how you would remove it. Copyright © 2020, Diebold Nixdorf 9-10 01750342843A... -
Page 35: Preparing The System
Installing system to the stand Fit the system on the stand while holding it in place. Tighten the 4 M4x6 countersunk screws (1) (that came with the stand) to secure the sys- tem to the stand. Copyright © 2020, Diebold Nixdorf 9-11 01750342843A... - Page 36 Remove the cable cover (1) at the bottom of the system display. Plug the USB-C cable into the port indicated (1). Route the cables from the connector panel in the path as illustrated (arrows). Replace the cable cover previously removed. Copyright © 2020, Diebold Nixdorf 9-12 01750342843A...
- Page 37 Tilt the system back to its operating position Tug the cables neatly into their respective cable channels as illustrated (arrows). NOTE The arrow paths are for illustration pur- pose only and are not meant to be ex- haustive. Copyright © 2020, Diebold Nixdorf 9-13 01750342843A...
- Page 38 10. Replace the VESA cover by sliding it up- wards. 11. Align the back cable cover (1) with the front cable cover (2). 12. Replace back cable cover (1) by sliding it up- wards. Copyright © 2020, Diebold Nixdorf 9-14 01750342843A...
- Page 39 USB 3.0 (Type C with DP and PD 5/12/24V) Power source/sink function CASH RJ12 (Cash drawer) WARNING Make sure that all additional devices have a CE certificate. NOTE Maximum 70W load is allowed for any combination of the interface connectors. Copyright © 2020, Diebold Nixdorf 10-1 01750342843A...
-
Page 40: Connector Panel
Connector Panel 10.1 10.1 Connecting cables All devices belonging to the module BEETLE A1150 that have a separate power cable must be con- nected to the same electric circuit. Tilt the display to the back, and remove the cable connection cover (1) to uncover the connector panel. -
Page 41: Disconnecting Cables
Unplug all data communication cables from the sockets of the data networks. • Unplug all cables from the devices. With MINI-DIN plugs ( Diebold Nixdorf key- boards), the plug remains inserted until re- leased. Pull the plastic covering from the connecting socket with your thumb. - Page 42 Connector Panel Manually loosen the knurled screw of the USB-C connector. Figure 10-5: USB-C connector To release a RJ45/RJ50 plug push down the latch (see arrow). Figure 10-6: RJ45-RJ50 plug Copyright © 2020, Diebold Nixdorf 10-4 01750342843A...
-
Page 43: Storage Media
11 Storage Media Mass storage in the BEETLE A1150 is a double-slot Socket 3 (M-Key) for Type 2280 M.2 SSD card. • Solid State Disk (SSD) A solid state disk is a data storage drive that uses memory elements in place of a rotating disk to store data. - Page 44 (arrow). 10. Put back and tighten the SSD screws (1) and (2) previously removed. 11. The back cover can now be assembled back onto the system. Figure 11-5: Inserting a new SSD Copyright © 2020, Diebold Nixdorf 11-2 01750342843A...
-
Page 45: Replacement Of The Ram
The RAM is now unhooked and can be re- moved and replaced. When fitting in the new RAM, push it down- wards until it latches on and a “click” sound is heard. Figure 11-6: Replacing the RAM Copyright © 2020, Diebold Nixdorf 11-3 01750342843A... -
Page 46: Installing System To A Wall
Recommended Screw for wall is Pan head Wood Screw TGS-C3- 4.8 x 38L Drill Diameter: 6 mm Min Hole Depth: 40 mm Load per anchor for concrete: 40 kg Load per anchor for Solid brick: 30 kg Copyright © 2020, Diebold Nixdorf 12-1 01750342843A... -
Page 47: Mounting Height
12.3 12.3 Mounting location Once you have determine the mounting height, with the help of the wall mount back plate, mark the loca- tion of the four holes on the wall. Copyright © 2020, Diebold Nixdorf 12-2 01750342843A... -
Page 48: Installation
The wall mount plate must be installed by a professional and qualified installer who is fa- miliar with the building construction methods and the electrical code that are govern by the local laws on the public access areas. Use only Diebold Nixdorf wall mount plate. 12.4.1 12.4.1 Fix wall mount back plate to the wall •... - Page 49 Installing System to a Wall Copyright © 2020, Diebold Nixdorf 12-4 01750342843A...
-
Page 50: Fix Wall Mount Front Plate To The System
Hook the system with its wall mount front plate installed, onto the wall mount back plate that has been mounted on the wall. Ensure that the hooks at both sides of the wall mount back plate are se- curely locked on the slots of the wall mount front plate. Copyright © 2020, Diebold Nixdorf 12-5 01750342843A... - Page 51 Tighten the thumb screw on the top of the wall mount front plate to secure the hooks of the wall mount plates. • Dress the cables routing according to the store set up or the overall installation site plan. Copyright © 2020, Diebold Nixdorf 12-6 01750342843A...
-
Page 52: Peripherals (Optional)
For guide on software application programming, please refer to BA9x MSR/Waiter Lock Programming Manual. 13.1.1 13.1.1 Installation The Waiter Lock kit as seen. Containing the Waiter Lock module and two M3x4 screws. Figure 13-1: Waiter Lock kit Copyright © 2020, Diebold Nixdorf 13-1 01750342843A... - Page 53 Gently remove the Waiter Lock side cover by prying the 2 ends outwards (see arrows) with a small screwdriver. Figure 13-2: Removing Waiter Lock side cover Then, slide the side cover out (see arrow). Figure 13-3: Sliding out the side cover Copyright © 2020, Diebold Nixdorf 13-2 01750342843A...
- Page 54 Peripherals (optional) Remove either side-attach peripheral con- nection cover of the BEETLE A1150 . Figure 13-4: Removing the side-attach peripheral connection cover The side-attach peripheral connection cover now removed as seen. Figure 13-5: Side-attach peripheral connection cover re- moved Copyright © 2020, Diebold Nixdorf...
- Page 55 Fit each knob on the Waiter Lock module into its respective groove on the system as indicated. Figure 13-6: Fitting the Waiter Lock into the BEETLE A1150 Then put on and tighten two M3x4 screws at (1) and (2). Figure 13-7: Tightening the Waiter Lock screws Re-attach the side-attach peripheral connec- tion cover.
- Page 56 Peripherals (optional) 12. The front view of the BEETLE A1150 with the Waiter Lock as seen. Figure 13-9: Front view with Waiter Lock Copyright © 2020, Diebold Nixdorf 13-5 01750342843A...
-
Page 57: Magnetic Swipe Card Reader (Msr)
13.2.2 Cleaning instructions In order to guarantee good reading results, the swipe card reader should be cleaned from time to time. This is carried out by using a special cleaning card that can be purchased from Diebold Nixdorf. 13.2.3 13.2.3 Installation The MSR kit as seen. - Page 58 Peripherals (optional) Remove either side-attach peripheral con- nection cover (1) of the BEETLE A1150. Figure 13-12: Removing the side-attached peripheral connec- tion cover Insert the MSR module into the now exposed USB port of the BEETLE A1150 . Fit each knob on the MSR module into its re- spective groove on the system as indicated.
- Page 59 The MSR is now installed. Back view of the BEETLE A1150, with the MSR as seen. Figure 13-15: MSR module installed 10. The front view of the BEETLE A1150, with the MSR as seen. Figure 13-16: Front view with MSR module Copyright © 2020, Diebold Nixdorf...
-
Page 60: Nfc Module
For guide on software application programming, please refer to BA9x MSR/Waiter Lock Programming Manual. 13.3.1 13.3.1 Installation The NFC Module kit as seen. Containing the NFC module and two M3x4 screws. Figure 13-17: NFC module kit Copyright © 2020, Diebold Nixdorf 13-9 01750342843A... - Page 61 Gently remove the NFC Module side cover by prying the 2 ends outwards (arrows) with a small screwdriver. Figure 13-18: Removing the NFC module side cover Then, slide the side cover out (see arrow). Figure 13-19: Sliding out the side cover Copyright © 2020, Diebold Nixdorf 13-10 01750342843A...
- Page 62 Peripherals (optional) Remove either side-attach peripheral con- nection cover of the BEETLE A1150 . Figure 13-20: Removing the side-attach peripheral connec- tion cover The side-attach peripheral connection cover now removed as seen. Figure 13-21: Side-attach peripheral connection cover re- moved Copyright © 2020, Diebold Nixdorf...
- Page 63 Peripherals (optional) Insert the NFC module into the now exposed USB port of the BEETLE A1150. Fit each knob on the NFC Module into its re- spective groove on the system as indicated. Figure 13-22: Fitting the NFC module into the...
- Page 64 10. Re-attach the NFC Module side cover. 11. The NFC Module is now installed. Figure 13-24: NFC module installed The front view of the BEETLE A1150 with the NFC Module as seen. Figure 13-25: Front view with NFC module Copyright © 2020, Diebold Nixdorf...
-
Page 65: Starting Up The System
14 Starting Up the System After installing the BEETLE A1150, switch on the system by using the Power button on the front panel. The system first performs an automatic self-test to test its basic functions. For example, you may see the following message (irrespective of processor type) on the monitor: DN „ID xx/xx Date“... -
Page 66: Error Reporting
USB1 PD chip execution error To recover do a cold reboot USB1 PD chip not detected To recover do a cold reboot 24V DC-IN voltage in indeterminate region To recover do a cold reboot Copyright © 2020, Diebold Nixdorf 15-1 01750342843A... -
Page 67: Post Code
S3 Resume Boot Script Error 0xEB S3 OS Wake Error 0xF8 Recovery PPI is not available 0xF9 Recovery capsule is not found 0xFA Invalid recovery capsule DXE Phase 0xD0 CPU initialization error 0xD1 North Bridge initialization error Copyright © 2020, Diebold Nixdorf 16-1 01750342843A... - Page 68 0xD9 Error loading Boot Option (LoadImage returned error) 0xDA Boot Option is failed (StartImage returned error) 0xDB Flash update is failed 0xDC Reset protocol is not available 0xDD DXE phase BMC self-test failure Copyright © 2020, Diebold Nixdorf 16-2 01750342843A...
-
Page 69: Technical Data
1x USB Type-C, PD 2.0, DP 1.2, DFP (5V/12V) Expansion Internal 2x M.2 2280 socket (for SSD) 1x M.2 2230 socket (for WiFi) Options External MSR, Waiter Lock, NFC reader Other Features Capacitive touch front panel Copyright © 2020, Diebold Nixdorf 17-1 01750342843A... - Page 70 Technical Data Ambient Light Sensor Proximity Sensor Hardware TPM 2.0 (optional) Integrated antenna for Wifi / Bluetooth (optional) Power Rating 24V DC / 4A I/O Expansion Option Multi-I/O Hub (see technical data Section 17.3) Copyright © 2020, Diebold Nixdorf 17-2 01750342843A...
-
Page 71: Ac Power Adapter
Technical Data 17.1 17.1 AC Power Adapter Only use power supply units (PSU) released or approved by Diebold Nixdorf. The PSU has to comply with the following minimal requirements and common standards: Rated input voltage 100-240VAC Rated input current 2.0A... -
Page 72: Nfc Module
Rated Voltage Rated Current 300mA on transmitter path RF Output Power 1W (max.) Operating Temperature 5 ºC to 40 ºC Device Firmware Upgrade Middleware support Operating Systems Windows & Linux Certification EN 50364 Copyright © 2020, Diebold Nixdorf 17-4 01750342843A... -
Page 73: I/O Hub
Technical Data 17.3 17.3 I/O Hub The I/O Hub (illustration on next page) is an accessory for the BEETLE A1150, to extend the number of I/O ports. Power input DC24V IN 24V DC, 4A User interface USB-C (Right) USB Type C, PD 3.0, DP 1.2, UFP... - Page 74 Technical Data Figure 17-1: I/O Hub – front view Figure 17-2: I/O Hub – back view Copyright © 2020, Diebold Nixdorf 17-6 01750342843A...
-
Page 75: Block Diagram
Technical Data 17.3.1 17.3.1 Block Diagram Figure 17-3: Block diagram of I/O Hub Copyright © 2020, Diebold Nixdorf 17-7 01750342843A... -
Page 76: Total Available Power
17.4 17.4 Total Available Power The total power available for the external IO ports depends on the rating of AC power adapter used. Be- low is the Diebold Nixdorf’s approved AC power adapter for BEETLE A1150. Part Number Model Name... -
Page 77: Appendix
18 Appendix 18.1 18.1 Approved Printers List The following are the approved printers that are allowed to be connected to the BEETLE A1150 +24Vdc Powered USB port: Model Manufacturer TH200i series Diebold Nixdorf TH210 series Diebold Nixdorf TH230 series Diebold Nixdorf... - Page 78 Light Emitting Diode LVDS Low Voltage Differential Signal Magnetic Stripe card Reader Optical Disk Drive On Screen Display Point Of Sales Solid State Drive SVGA Super Video Graphics Array Thin Film Transistor Technology (LCD Tech- nology) Copyright © 2020, Diebold Nixdorf 01750342843A...
- Page 79 DIEBOLD NIXDORF 5995 Mayfair Road | North Canton, OH 44720 | United States © 2020 Diebold Nixdorf, Incorporated. All Rights Reserved.
Need help?
Do you have a question about the BEETLE A1150 and is the answer not in the manual?
Questions and answers